Happy Monday: We've Got A Great Week For YOU!

Happy Monday: We've Got A Great Week For YOU!

This week we are continuing in our Sew Yourself Some Love Series.  Here's a little look at what is coming so that you don't miss out!

Read More

Sew Yourself Some Love with the 'Build Yourself a Better Wardrobe' Giveaway

Sew Yourself Some Love with the 'Build Yourself a Better Wardrobe' Giveaway

It is here - the month long sewing extravaganza that is 'Sew Yourself Some Love'.  This month we are encouraging women to take a moment of time to care for themselves so that they can better care for their families, friends, and other loved ones in their lives.  We hope you all feel encouraged, uplifted, and cared for in this month long journey - and beyond. (And also - WIN PRIZES!)

Read More

Canaan's Incredible Blazer Tour: With Max California

Canaan's Incredible Blazer Tour: With Max California

Today we make our first stop over with the amazingly talented Ari of Max California.  Head over to her blog to check out her full post and amazing pictures!   And don't forget to enter below to win your own copy of the My Little Plumcake Canaan's Incredible Blazer Pattern!!!

Read More

The Night Before Christmas: Introducing a Pajama Series

The Night Before Christmas: Introducing a Pajama Series

 The holidays all too often get muddled in the stress of 'must do's, have to's, and want too's'.  Between shopping for gifts, creating the perfect holiday card, and decorating a pristine house (HA!); the stress mounts and we can sometimes lose sight of our family, the whole reason we put ourselves through all this stress.

So for one week, we here at Pattern Revolution, are bringing you a little glimpse into our lives, our traditions, and our love for adorable Pajamas!  A reminder that simple things can mean the most when they are filled with love.

Read More

Weekly Recap: Giveaways and Discounts OH MY!

This has been a jam packed week of fun over here at Pattern Revolution - we want to make sure that you didn't miss out on the fun... so here is a quick recap of all the things still going on! 


Giveaways: 

-You have One day left to enter the Mean Princess Master Collection Giveaway - that's right, every single one of her patterns is being given away in a Master Collection Bundle to one Lucky winner - make sure it is you by entering HERE! 

master.bundle.jpg

 -Three of our readers can win a copy of the Norah Dress PDF Pattern by Mouse House Creations - and if you already bought the pattern, you can win an reimbursement!!!!  Make sure to enter HERE.

norah dress-1005a.jpg

 -There are a few Hours Left to enter to win a copy of the Mara Dress PDF by Compagnie M.  Enter HERE.

10314067666_5e6804b806_z.jpg


Discount Codes: 

-Our Affiliate Peek A Boo Pattern Shop has ALL of their Pajamas on sale for 25% off!!!  This discount can also be combined with her multiple pattern discount for some AWESOME deals!!! 

*We're going to be doing some really fun things with Pajamas in the near future, so grab a pattern and get ready to participate in the fun!!! 

Lil__Long_Johns.jpg


 - Our Affiliate Go To Patterns is having an awesome sale (ends 10/26 at midnight EST):

Use code KCW10 to get 10% off your entire order.

Use code KCW20 to get 20% off your order of $30 or more


We also Did Reviews of   the Norah Dress, the Mara Blouse&Dress,  The Color Block Dress, and the Cordelia Peplum Top (don't miss out on the sew along for this one HERE).


WOW - what a full week, and right now Robin is in Huston at Quilt Market having a blast - I'm sure she'll have lots of stories to share next week when she gets back!!! 


Covered Buttons: A Tutorial and Giveaway!

Thank you to our friends at  I Like Big Buttons  and Amelie and Henri for Sponsoring this post!

578718_528127233936783_847209792_n.jpg
iusb_760x100.12435551_p2sy.jpg
Today we are going to talk about something that can change the way you add buttons to a garment FOREVER!  Two words: Covered Buttons.  Do they sound daunting?... they aren't, sound expensive?... not at all, sound time consuming?... first; they are quick to make, but second think of the time you waste driving to the store, searching for the 'perfect button' when nothing is quite right, standing in line to buy the buttons, and then driving back home again - yeah, you could have made a second garment complete with covered buttons in that amount of time!
I found myself desperate for covered buttons recently when I tested the Elenora Ruffle Coat by Amelie &Henri - the pattern has 6 buttons (two on each sleeve and two on the front) and I KNEW I wanted them to match the sash & lining to pull the whole garment together.  I love the way it turned out!


Here is a collection of the great things I have been able to make with the covered button kit from I Like Big Buttons in the past few weeks.  These are the 5/8 size wire back buttons.


Ok... the Anatomy of a covered button:
You have a 'Male' part and a 'Female' part. - these are shank buttons so it isn't that hard to figure out which is which.  Got it?  Good!  Now you also have two parts of the button press (these are also male and female) - the clear part - Female, and the pink part- Male, (do you like my uber technical names here?!!?)


Most button kits then come with a round donut circle - this is your tracing template.  Use a fabric marking tool and trace as many circles onto your fabric as you need for your buttons, and cut them out. *when you are cutting your fabric circle, make sure you plan the part of any patterned prints that will be at the center of the circle.*


Now you are going to take one of your fabric circles and place a female button piece in the center (convex side down).  Place it over your clear section of the button press, and push down.


Once your fabric and button are inside, you are going to press the extra fabric in towrds the center

Place the Male side on top (shank facing up).

Use the pink part of your press, and press the male side firmly into the female side - you need to press pretty hard, and you will feel the male side 'pop' into place.

Pop out your button and VOILA!!!!  Gorgeous Buttons to match any garment.


So what do you want to button up???

Our great friends over at ILikeButtons are providing you with the opportunity to win all the supplies you need to start making awesome covered buttons.  And we're pairing it with the adorable Elenora Ruffle Coat by Amelie and Henri to give you the perfect pattern to try out your new button making skills.

For this Prize Pack you will win:

Button and Findings Starter Kit:

15x Size 24 Cover Buttons Wire Back (for use with coat)
1x Size 24 Tool and Size 36 Tool
1x Size 24 Plastic Template and Size 36 Plastic Template
15x Size 24 Cover Buttons Flat Back (for use with bobby pins)
15x Size 36 Cover Buttons Flat Back (for use with Snap Barrettes)
12x Snap Barrettes in Vibrant Girl Colors
12x Bobby Pins in Vibrant Girl Colors

AND

The Elenora Ruffle Coat PDF Pattern By Amelie &Henri

Making your Own Labels with Spoonflower and a GIveaway!

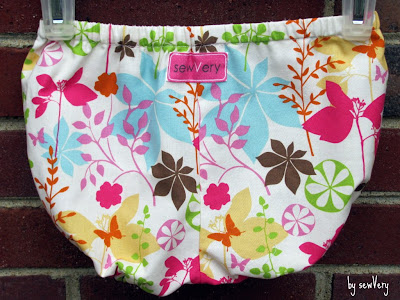
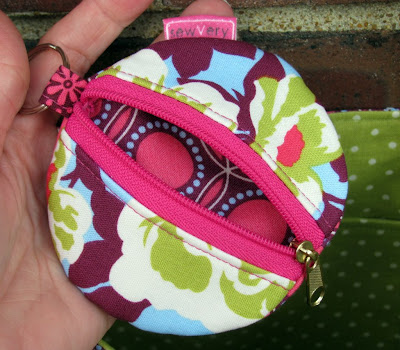
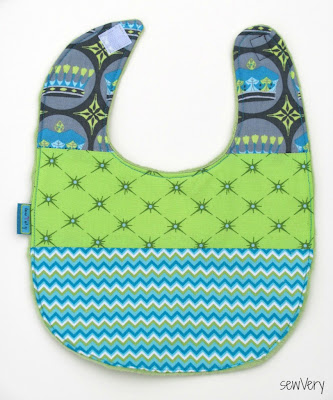
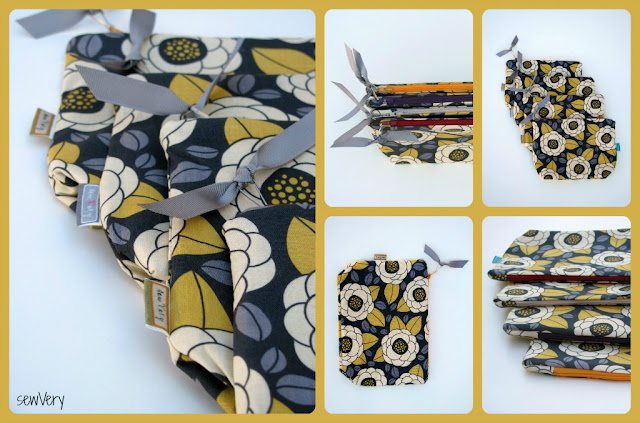
Today we have the lovely Veronica from Sew Very here to share an amazing tutorial for creating your own custom labels through Spoonflower.   Whether you just want something for the garments you make for your children or labels for the custom clothing you sell in your boutique, this is such an amazing option to creating custom labels!  We also have an amazing prize below:  Sew Very has donated a $20 gift card to Spoonflower, and Laura of Vintage Laundry has donated her gorgeous Washing/Care Template.  What an awesome prize that can get you started towards finishing your garments with professional looking labels. 

Now Here's Veronica to tell you how! 

------------------------------------------------------ 

Hi, Everyone!  I'm Veronica, the happy seamstress behind the blog sewVery!  Each week, I manage to sew together a new outfit or two (sometimes three) for my four-year-old daughter, and occasionally, I test my sewing skills by making a bag or piece of clothing for myself!


On pretty much every item I make, I attach a colorful sewVery clothing label, and today, I'm going to share with you how easy it is to make your own clothing labels!


But first, here's the entire story and how-to behind my colorful mix of sewVery labels!

Several months ago when I started sewing a lot, I decided I wanted to brand my clothes like so many other bloggers were doing.  I searched Etsy, but the price for even a small quantity of custom labels with color seemed expensive.  After more research, I came across a post from Kate at See Kate Sew, where she shared some basic information on how she made her own labels by printing them out as custom fabric at Spoonflower.  I used her post as a guide to get me started.

My first step was to create a graphic for sewVery.  For me, I wanted something pretty plain that could be used on either boy or girl items.  Now, since everyone uses different photo editing software, I'll just give you the steps on how I spaced my labels and the dimensions I used.  Anyone can create a simple logo using Word (that's what I used), Photoshop, Picasa, PicMonkey, or any photo editing or drafting program. I'll also give you tips or advice based on my experience.

My configuration is based on an 8 1/2" x 11" area that is filled with four columns of labels and uses a minimum pixel size of 150 pixels.  In my example, I have two sizes of labels; however, you can just design one or even more.  The thing to keep in mind is that the spacing between the columns and rows must stay the same in order to make cutting out the labels with a rotary cutter easy to do.

My large sewVery labels are 2 1/4" wide x 1" tall, and my smaller labels that can be sewn into the seam on a piece of clothing are 1" x 1".  See the examples below.  Keep in mind that you'll need at least 1/4" blank space around all sides of your labels in order to cut them out and turn the fabric under for pressing. That ends up being 1/2" between labels on your layout and a 1/4" margin on the top/bottom/sides of the overall page.  For my labels, I figured I could get two columns of large labels and two columns of smaller labels per page.

When you upload your file to Spoonflower (read below for further instructions on how to do this), you'll repeat the 8 1/2" x 11" page over and over on a yard of fabric to get approximately 500 custom labels all for roughly $20!


For my labels, I used the Basic Combed Cotton offered at Spoonflower, and I've been very pleased with the overall look and performance (wash after wash) of the labels.  For the Basic Combed Cotton and the Kona Cotton, Spoonflower inserts the image on a piece of fabric that will have the 42" wide measurement as the width and the 36" wide measurement as the height.  If you are wanting to order a certain number of labels, you can use my example below to calculate the number of labels you'll be able to fit onto a yard of fabric.

Here's the math for 1 yard of fabric:
1 yard of fabric area = 42" x 36" = 1,512 square inches
sheet of paper area = 8.5" x 11" = 93.5 square inches

1,512 / 93.5 = 16.17 sheets of paper per yard of fabric

* Keep in mind that with the 8 1/2" x 11" sheet of paper configuration I used, you'll actually only get 15 full sheets of labels plus the top two rows of of 5 more sheets.  

Since I can fit 16 large labels and 16 small labels per sheet of paper, this means I can get
32 labels per sheet of paper x 16.17 sheets of paper per yard of fabric  = 517 labels per yard of fabric!

I was very indecisive about what colors I wanted to use for my labels, so I just put together lots of color combinations that I liked and ran with it.  The result was that I can color coordinate my label to the item that I make!  I often get compliments on my labels because of this!

I suggest consulting the color chart from Spoonflower prior to designing and placing your order.  It includes the RGB color and code. Here's what it looks like.


Spoonflower has a very useful Help page that includes a lot of valuable information about color selection. For instance, don't use two dark colors because the colors will blend together too much when printed on fabric.  Contrasting colors work best together.  I wish I had considered this before I placed my first order because a couple of my color combinations didn't work well.  Also, the script font in white on the smaller labels didn't show up as I had hoped.  As you can see in my examples above, the yellow, white, pink, and teal blue options all turned out really well.

Once you've created your logo and saved it as an image file, you'll be ready to create your labels. First, upload your file to Spoonflower HERE.  Once the image is loaded, make sure the Fabric tab is selected then choose Basic Repeat, the Design Size (no smaller than 150 dpi), the fabric you'd like to print your labels on, and the quantity of fabric you want printed.  You'll see a preview image of your labels laid out on the quantity of fabric you are ordering.  At this point, either save your design and/or add it to your cart. Pay for your order and your label yardage will arrive in the mail in just a few days!

When the fabric arrives, be sure to wash and dry it.  If you measure the labels after washing and drying it, you will notice some minimal shrinkage.  Iron the fabric and then take your cutting mat, ruler, and rotary cutter and start cutting out your labels making sure you leave an approximate 1/4" border all the way around the label.


I keep my labels sorted by color and size in some clear plastic sheet protectors.  When I need a label, I then fold the raw edges to the back and iron them.  To keep these edges from unfolding, I then add a small amount of fabric glue to those seams.  After it dries for a minute or two, I then press the entire label again from the front side.


For the smaller inseam labels, I fold the side edges in, press, and tack down with a little glue (if necessary).  Then fold the label in half so that the raw edges meet and press.


When I'm ready to sew one of the larger labels onto an item, I simply pin it in place and stitch around the edge following the border I created on the image.  For the smaller labels, position the label in between two pieces of fabric with right sides together making sure that the white portion of the label will be sewn into the seam allowance.


That's it!  Now you can make your very own clothing labels in a wide variety of colors for just pennies!  I hope I've answered all your questions on how you can make your own clothing labels. As always, I welcome your comments and would love to hear from you.  Hope you'll come visit me at my blog, sewVery, and check out my other sewing projects and tutorials!

Have fun sewing!

 --------------------------------------

Thanks Again Veronica - I can't wait to make some labels of my own!!! 

Now enter below for the chance to WIN! 

Saturday Sales and Super Prizes

Did you miss out on any of our awesome deals this week??? Well, here is a round up of the special sales and giveaways that we have offered this week.    Make sure you join us on Facebook so that you don't miss out on all the goodies!


Sales: 

Our Featured Designer, Susan of Kikoi Patterns is offering all of our readers and amazing BOGO sale through the month of August.  She just released a brand new Pattern: The Full Circle Dress in sizes 1-8.  It features a double layer circle skirt and the most adorable bow in the back.  Get your BOGO code HERE.

Current Giveaways:

Carlie & Kymy Dolman Tops PDF Bundle (8/19)

Little Lizard Kind Retro Glam Skirt Pattern (8/20)

Footloose and Fancy Free 3 Pattern Bundle   (ex 8/22)

Bumblebee Dress PDF Pattern Giveaway (ex 8/23)


Have you found any amazing deals this week?? We'd love to hear about it!