Bundle UP Resources for Seamstresses

Bundle UP Resources for Seamstresses

The only way to learn a new technique or to sharpen your skills is to jump right in! Zippers are nothing to be scared of, especially with all the great free resources available. We'll share a few of our favorites and encourage you to take your sewing up a notch! We're also including links to find some awesome supplies to make your Bundle Up patterns (and some discount codes too!).

Read More

How to change your own serger blades

How To Change Your Own Serger Blades

There I was, happily serging along, trying to get one more outfit done before leaving for vacation, when all of a sudden I heard that dreaded sound, "crunch!" Ugh, I ran over a pin, AGAIN. It doesn't happen often, but when it does, it isn't pretty...you probably know exactly what I mean. This time it was especially ugly, because instead of using my awesome ultra thing quilters pins, I had a few cheapies mixed in there, and they don't snap right in half like the good ones do, in fact, my machine came to a grinding halt and my handwheel was jammed. BAD.  After a few cuss words and a sprained thumb, I was able to work it free and remove the carcass that was jamming my machine, but it just wasn't cutting the same anymore. GREAT! I nicked my blade. 

At first I wasn't quite sure what to do. I called my local dealer, $100 for service and new blades. Ugh, there goes my  vacation money! After taking a closer look at my machine, I decided to use Google to find a part number because I can remove 3 screws on my own and I knew the parts had to be available somewhere. I stumbled upon Ken's Sewing Center and after asking around in some of my online sewing groups, I found that they had a great reputation, so I decided to give them a try. Their website was easy to navigate and I easily found just what I needed to fix my problem. Within a week,  I got my parts in the mail and set to work. I took less than 10 min to change my blades, saved me a lot of money doing it myself, and my machine is as good as new!

Want to learn how?

The first thing you need to know is when to change your blades. Each manufacturer has their own recommendations for each model, but to be perfectly honest, I was LONG overdue according to my User Manual and my machine was working just fine. So, how do you know when it's really time? Well, the same way you know when a pencil needs sharpening, or your scissors are dull, it's just not the same! If you can't cut through multiple layers with ease, if your machine keeps jamming, or your scrap keeps getting caught up in your threads, it's time to change blades.

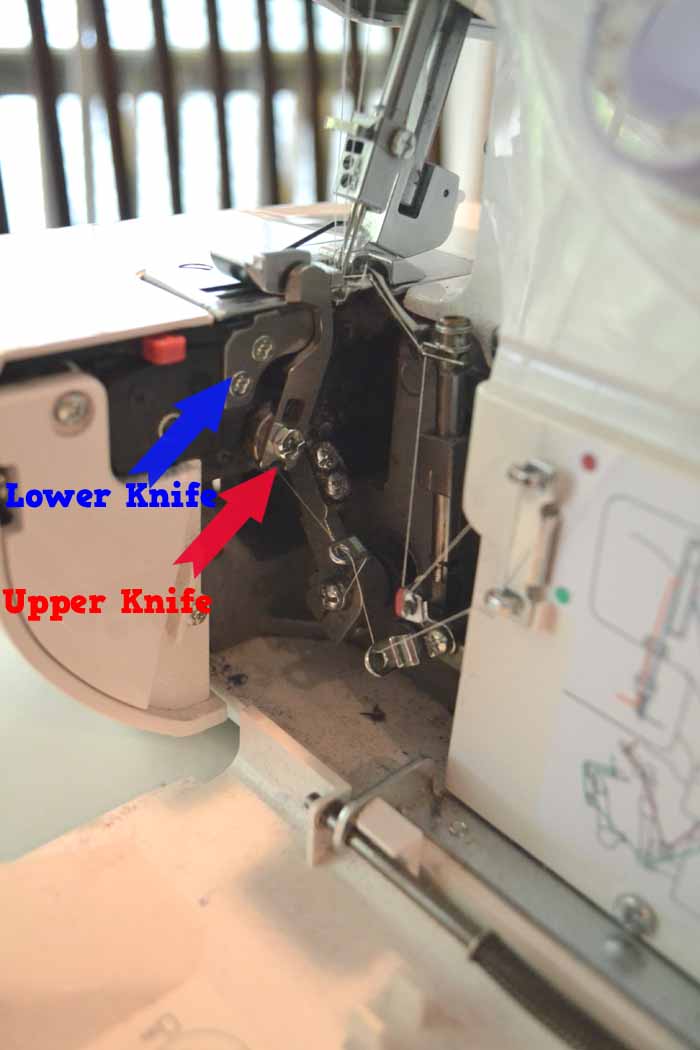
Next you need to get friendly with your machine. I have a Janome 3434D. Take a look at your blades, they may look different than mine. 


002sergertute.jpg

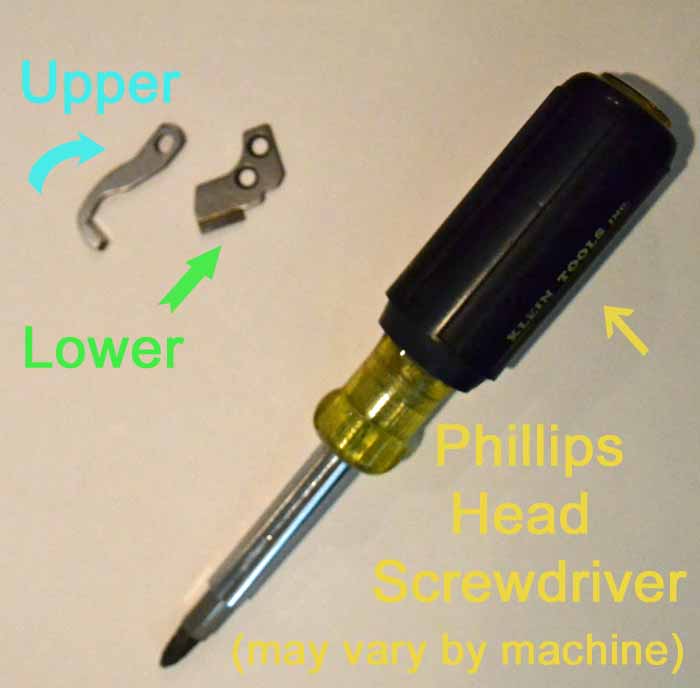
Next, get your tools and spare parts ready.  

008sergertute.jpg

Make sure your machine is off and unplugged.  Disengage your upper knife and find the screws for the lower knife.

013sergertute.jpg
021sergertute.jpg
022sergertute.jpg
012sergertute.jpg
023sergertute.jpg
024sergertute.jpg

Yes, it really is that easy! I swear, it took less time to change the blades than it takes to thread the darn thing! Before you turn it on and start serging, turn the handwheel slowly several revolutions to check to see if you have properly installed the blades.  

025sergertute.jpg

You don't want your upper knife too tight or too loose, and it has to be at the correct angle to the lower blade and foot plate. Once you've made a few revolutions by hand and all is well, turn on your machine and test it out on some scrap, make adjustments if needed. 

I hope you found this tutorial to be helpful! Be sure to share it with all your sewing friends, and definitely to go "Like" the Ken's Sewing Center Facebook Page, and let them know Pattern Revolution sent you!  They offer sweet deals on a regular basis on everything from sewing machines to accessories. Sign up for members only specials HERE. You can get 10% off an order now using code: k1213, and you can also get free shipping on orders $39.99 and over. SWEET! 

The perfect Minnie Mouse Dress Sewing Tutorial

PicMonkey Collage.jpg


Hey, everybody!  I’m Kari, from That’s-Sew-Kari.  I have 2 little girls for whom I love to sew and create!  I am lucky to stay home with them and sew in my spare time (after bedtime…LOL).  I can’t believe it, but it’s been a whole year since I've gotten into sewing!

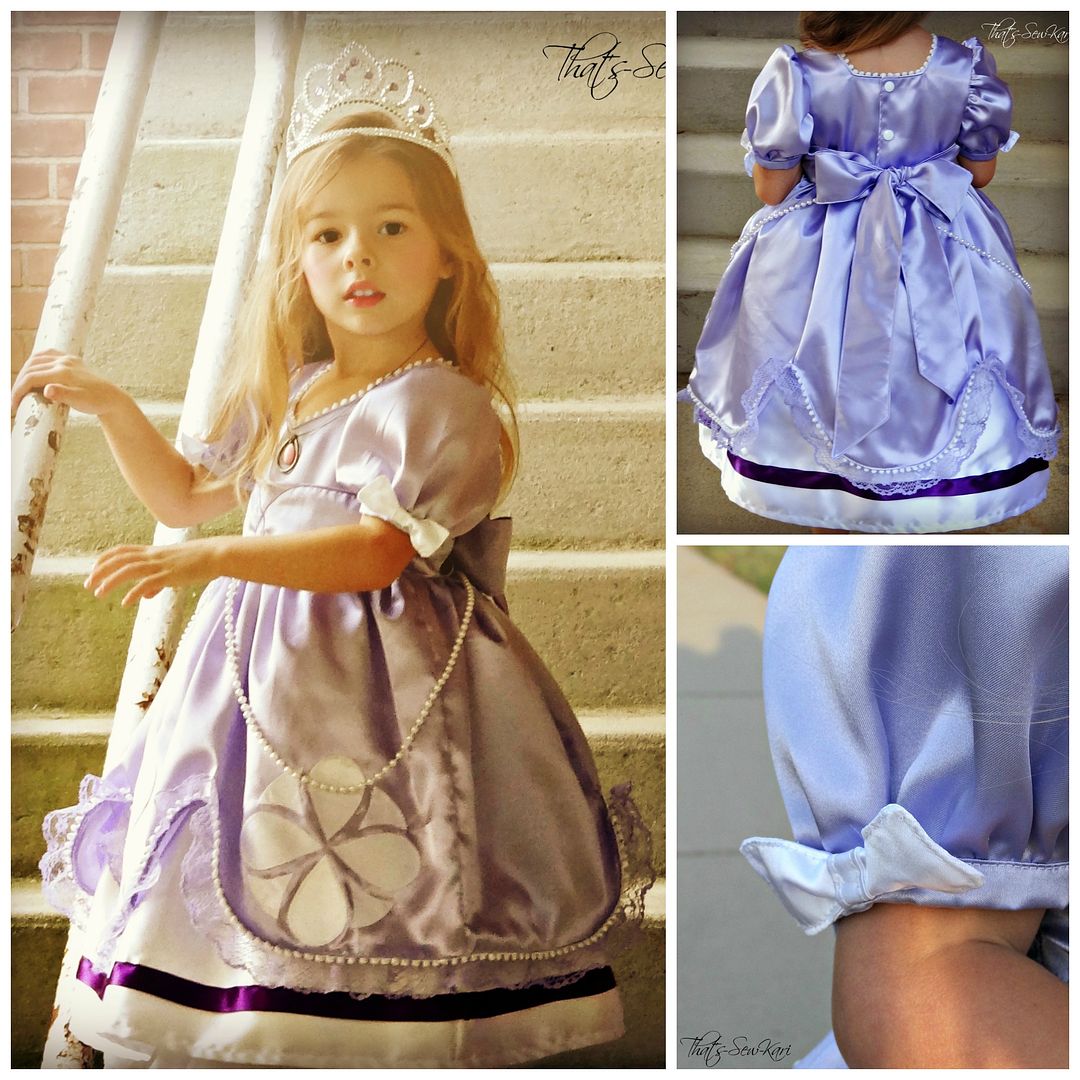
When I first saw this series idea posted for Pattern Revolution, I knew I needed to sign up.  I knew I'd be using the Candy Castle Princess Dress to create one-of-a-kind Halloween costumes for my girls.  I discovered Candy Castle Patterns at the beginning of the summer with my Bubblegum Dress review.  I was lucky enough to test the Candy Castle Princess Dress pattern and made Sofia the First during testing.  For Minnie Mouse, however, I wanted to deviate from the pattern a little bit so I could share it with all of you!


First of all, this pattern has lots of options so chances are that the pattern contains what you need!  There are 4 sleeve options, a slim or regular fit bodice, hemmed or ruffled underskirt and a paneled or non-paneled skirt.  I've made 3 dresses so far!

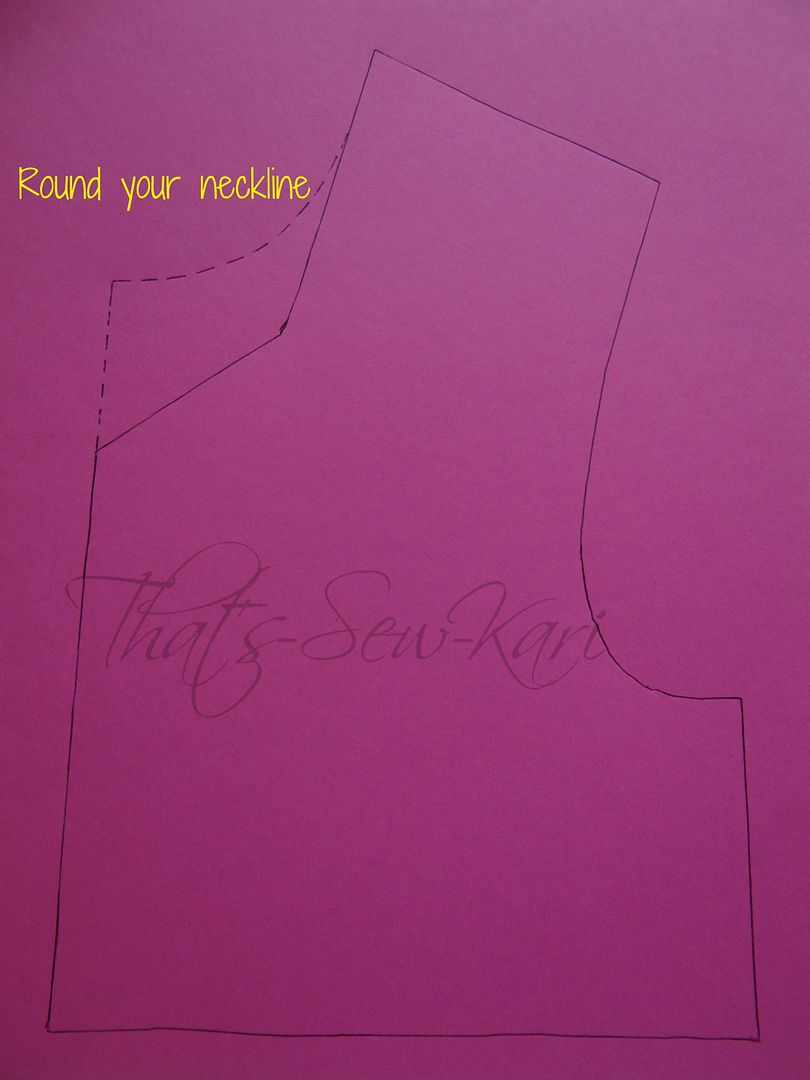
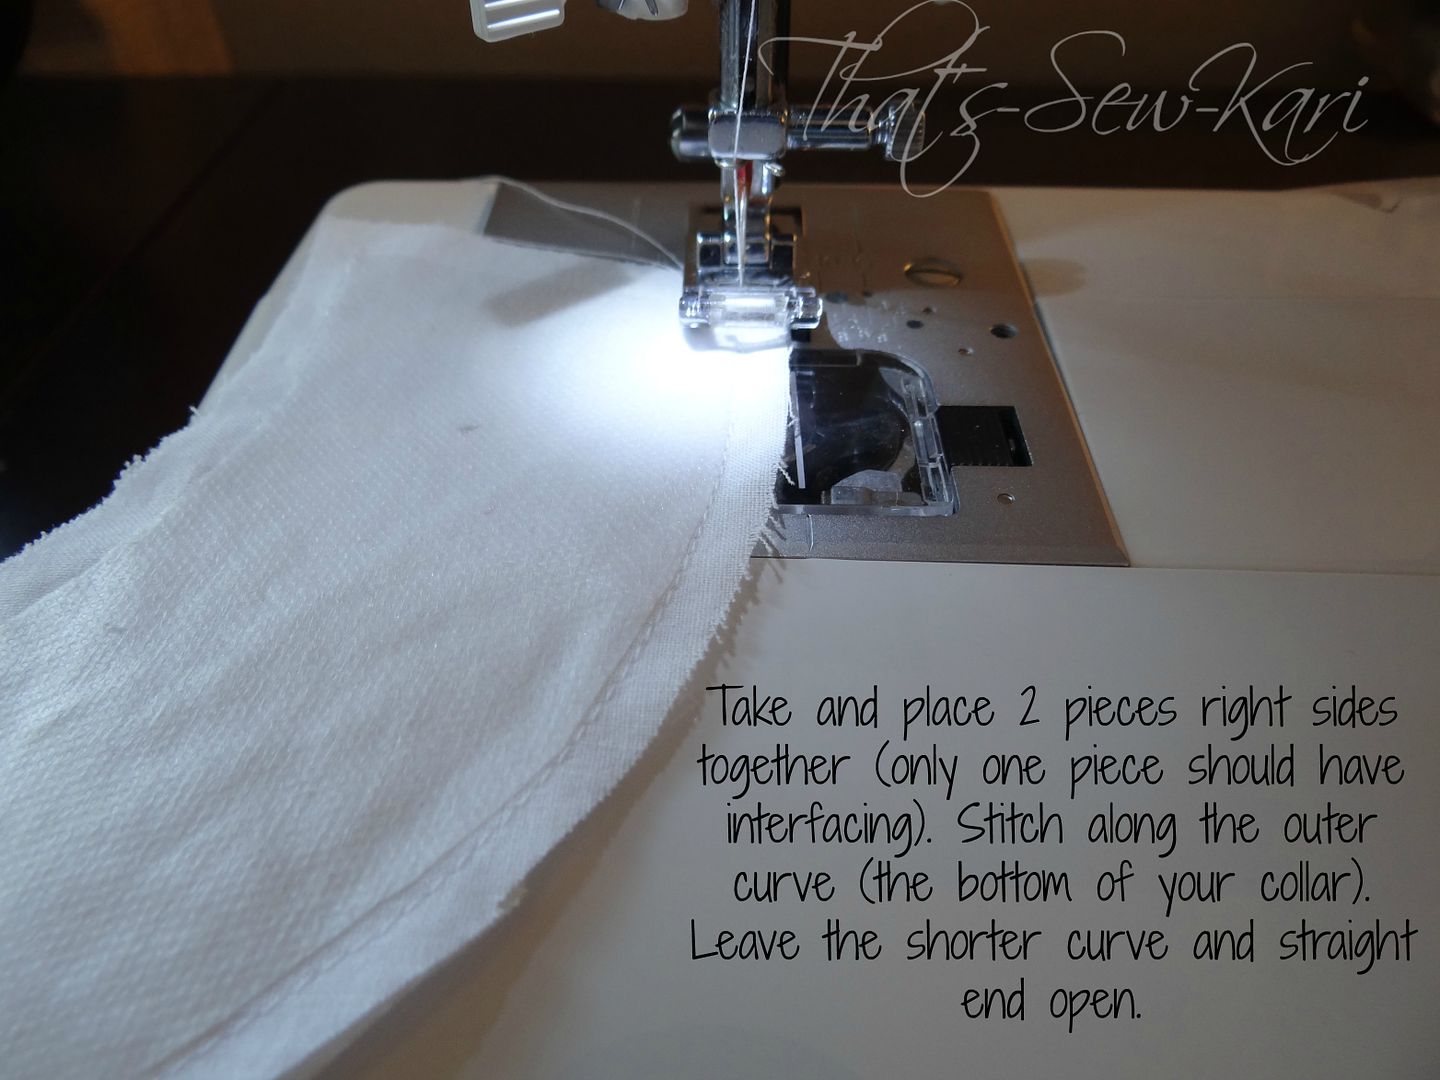
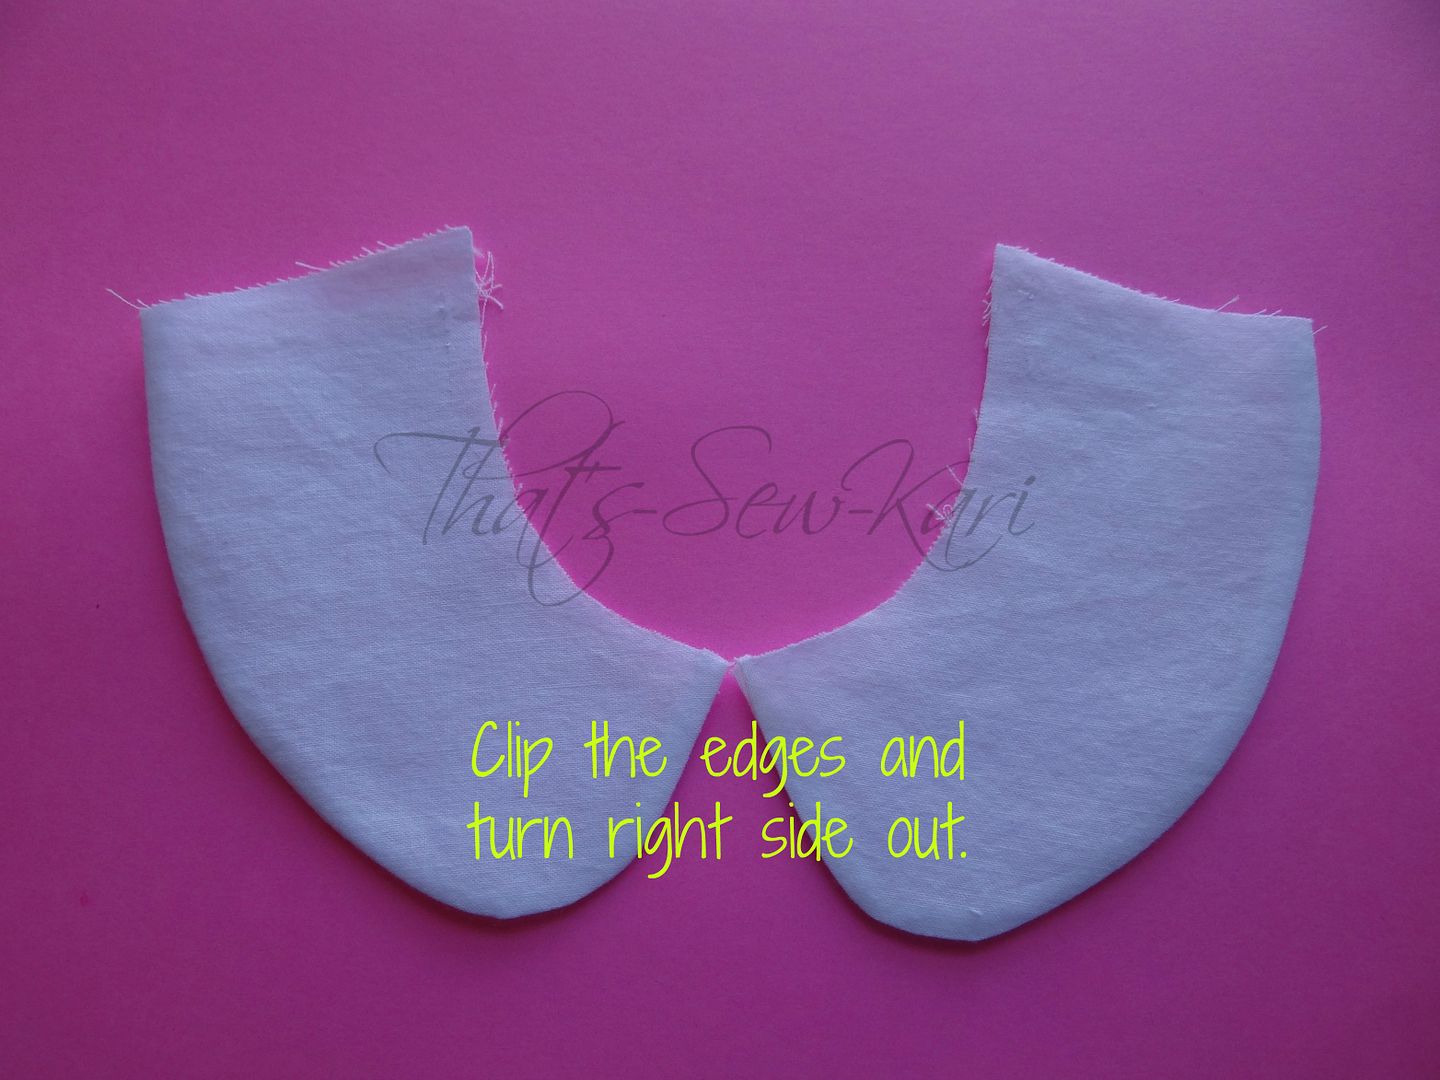
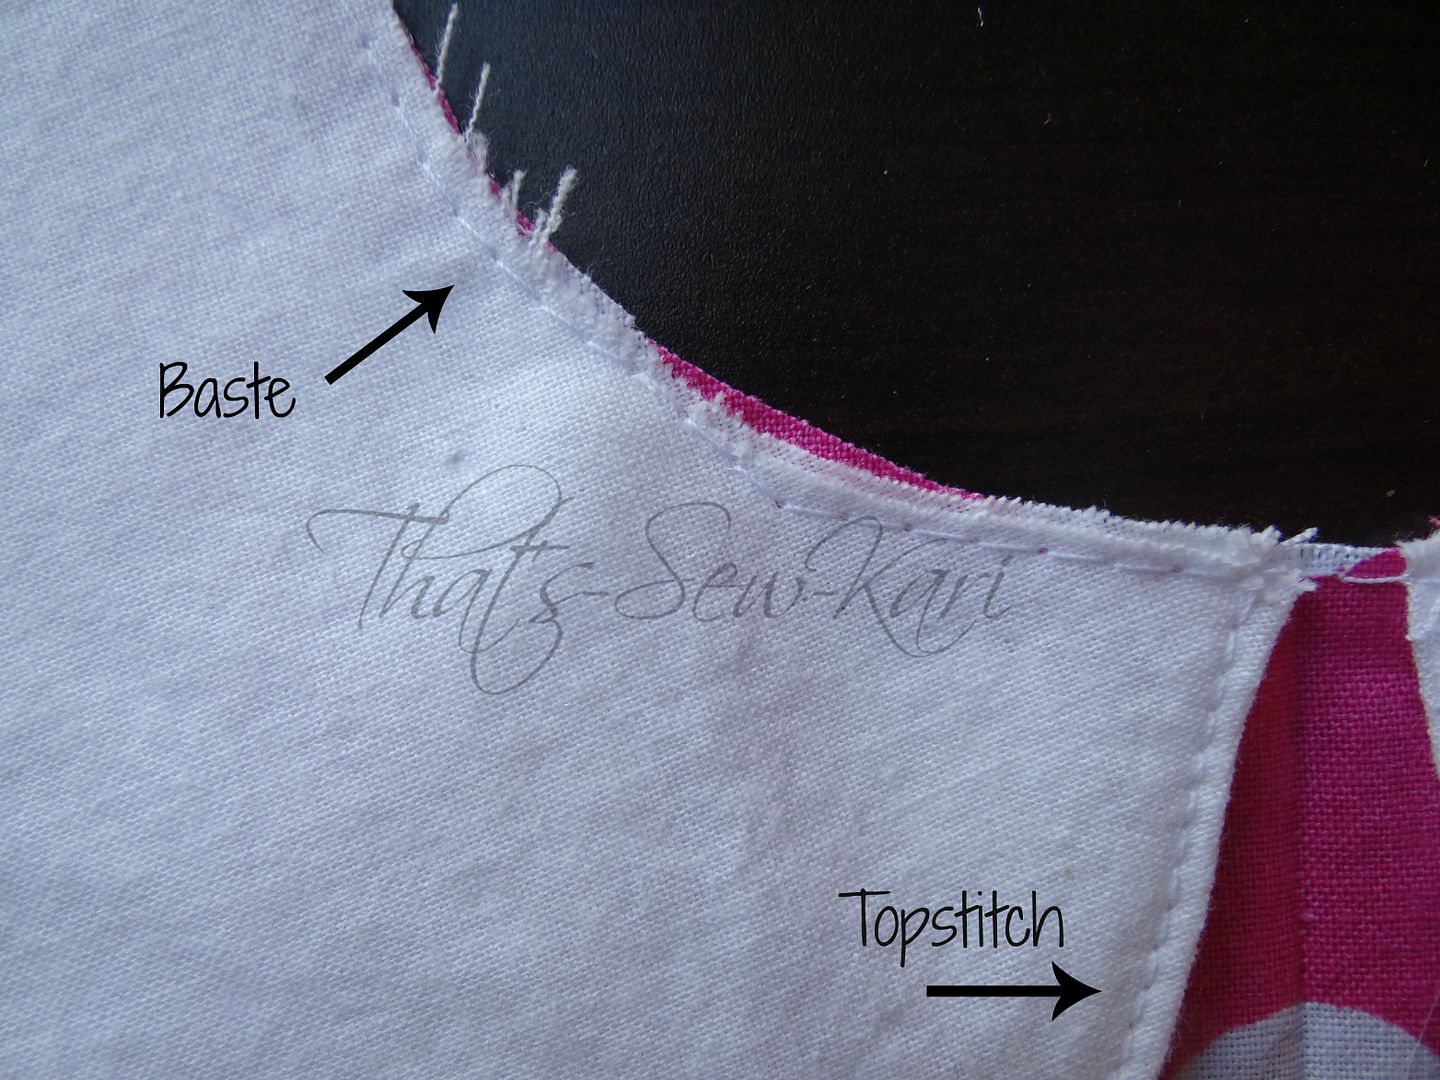
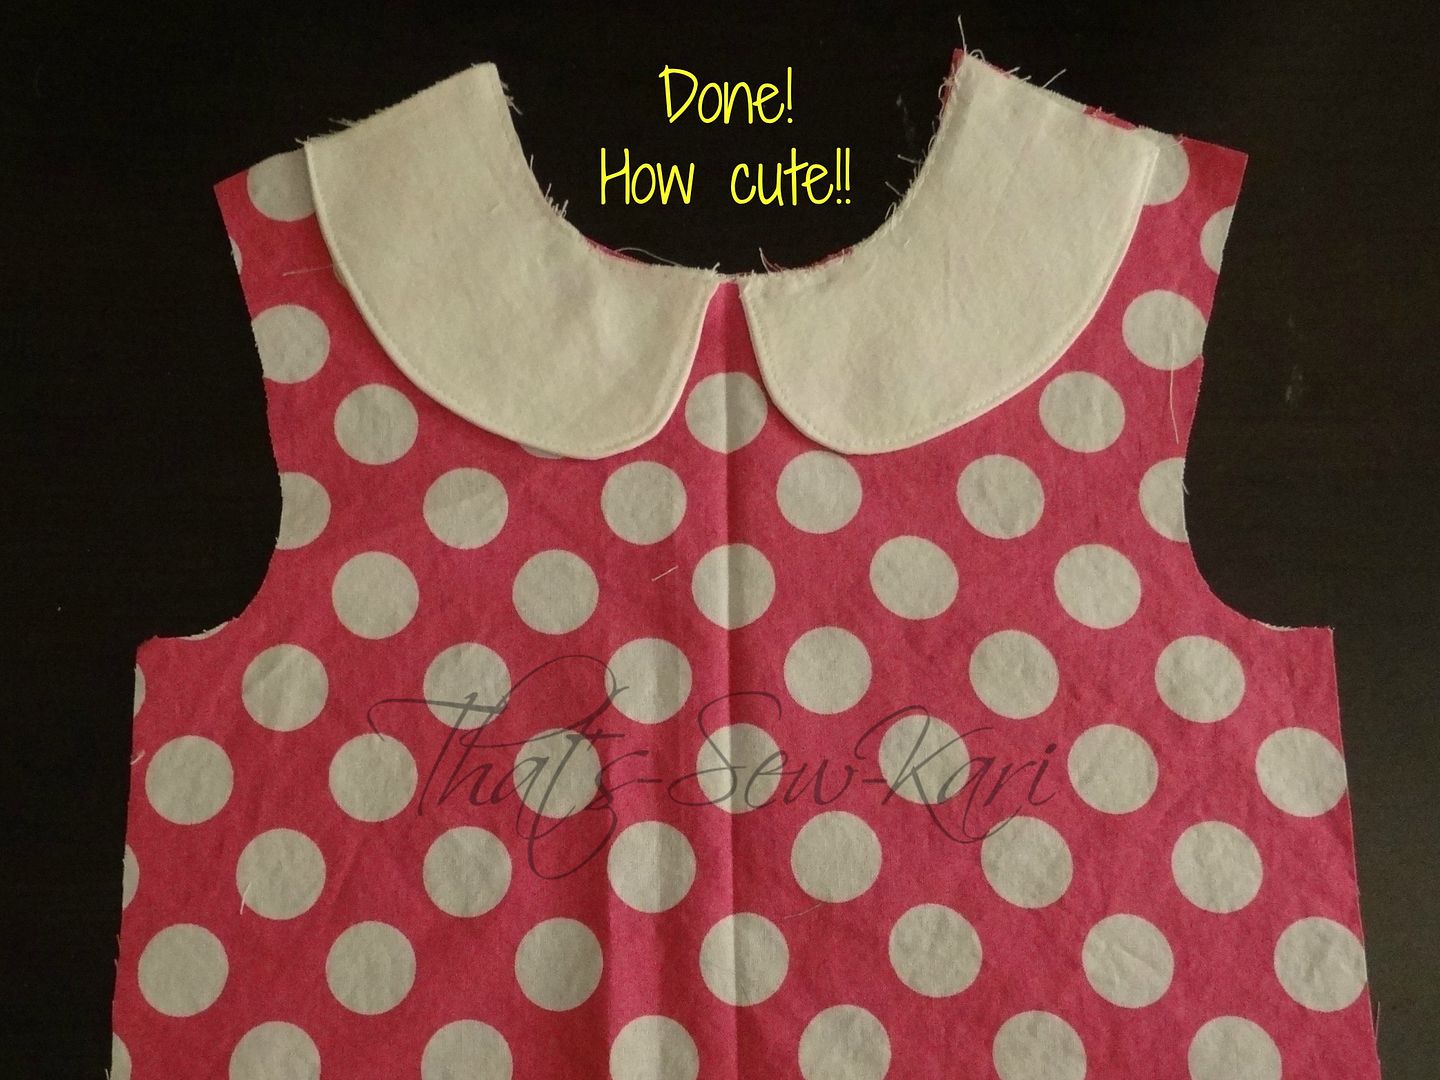
Minnie Mouse likes to wear a sweet peter pan collar on her dresses and it wasn't an option in the pattern so I set out to draft my own!  I wanted it to end at the shoulder seam so I would not have to alter the back.

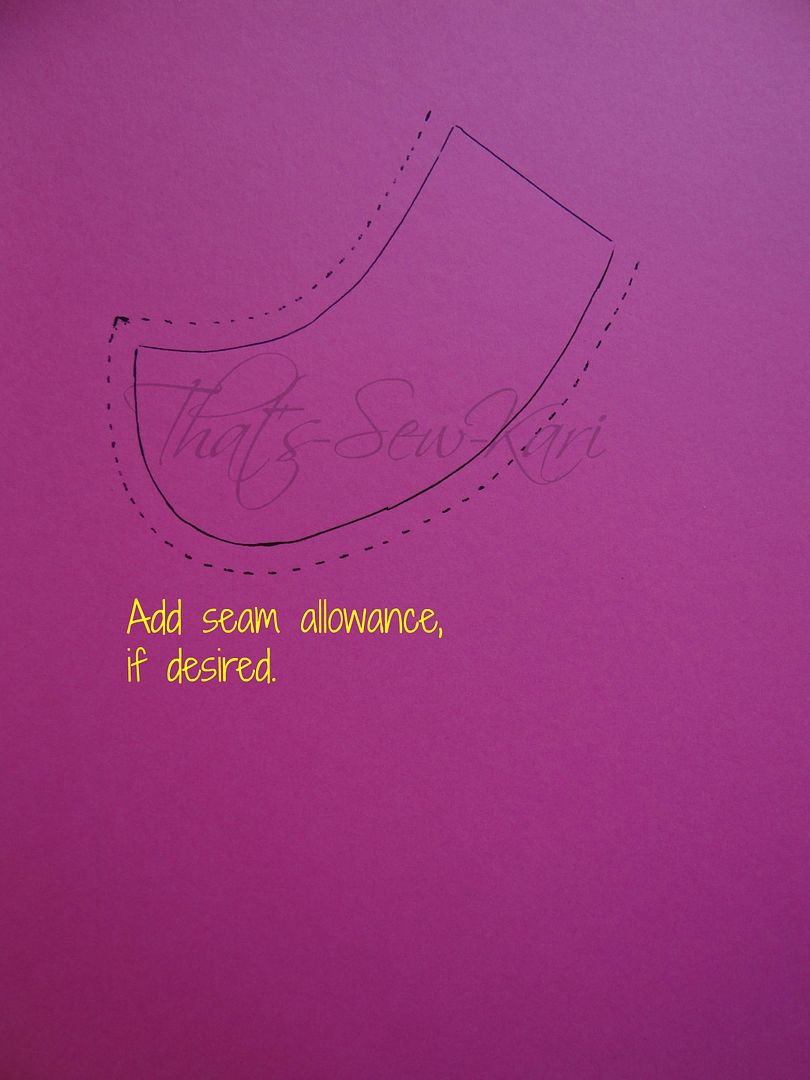
After I rounded my neckline, I drew the collar along the neckline and failed to take a picture... whoops!  Below, is my retraced collar piece.


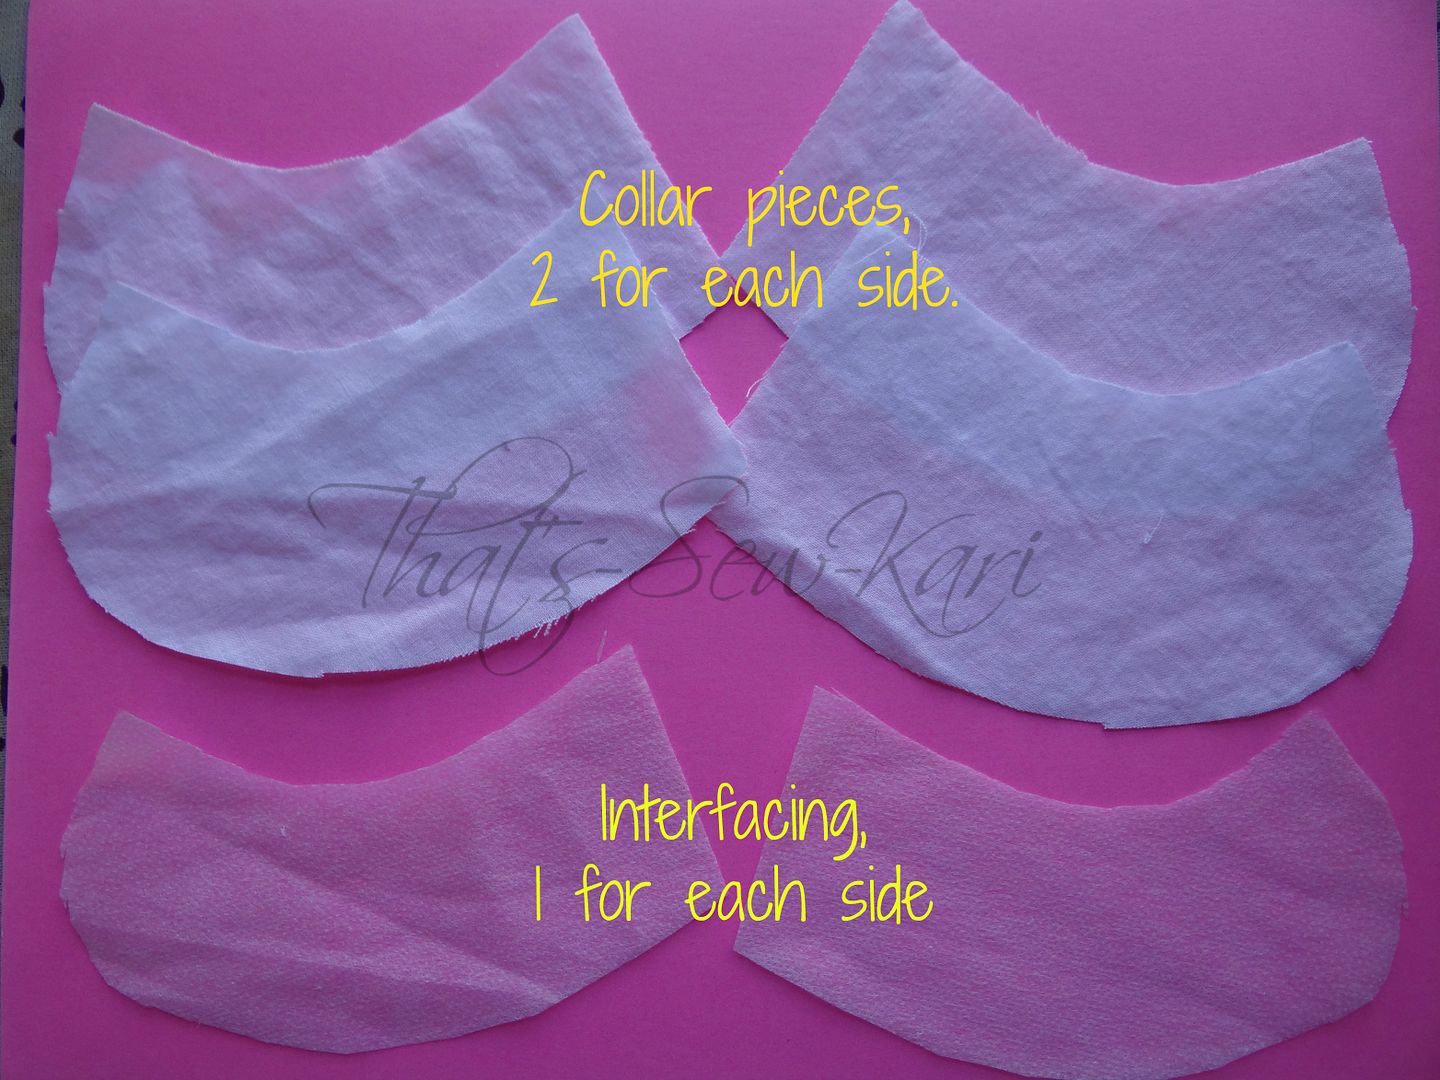
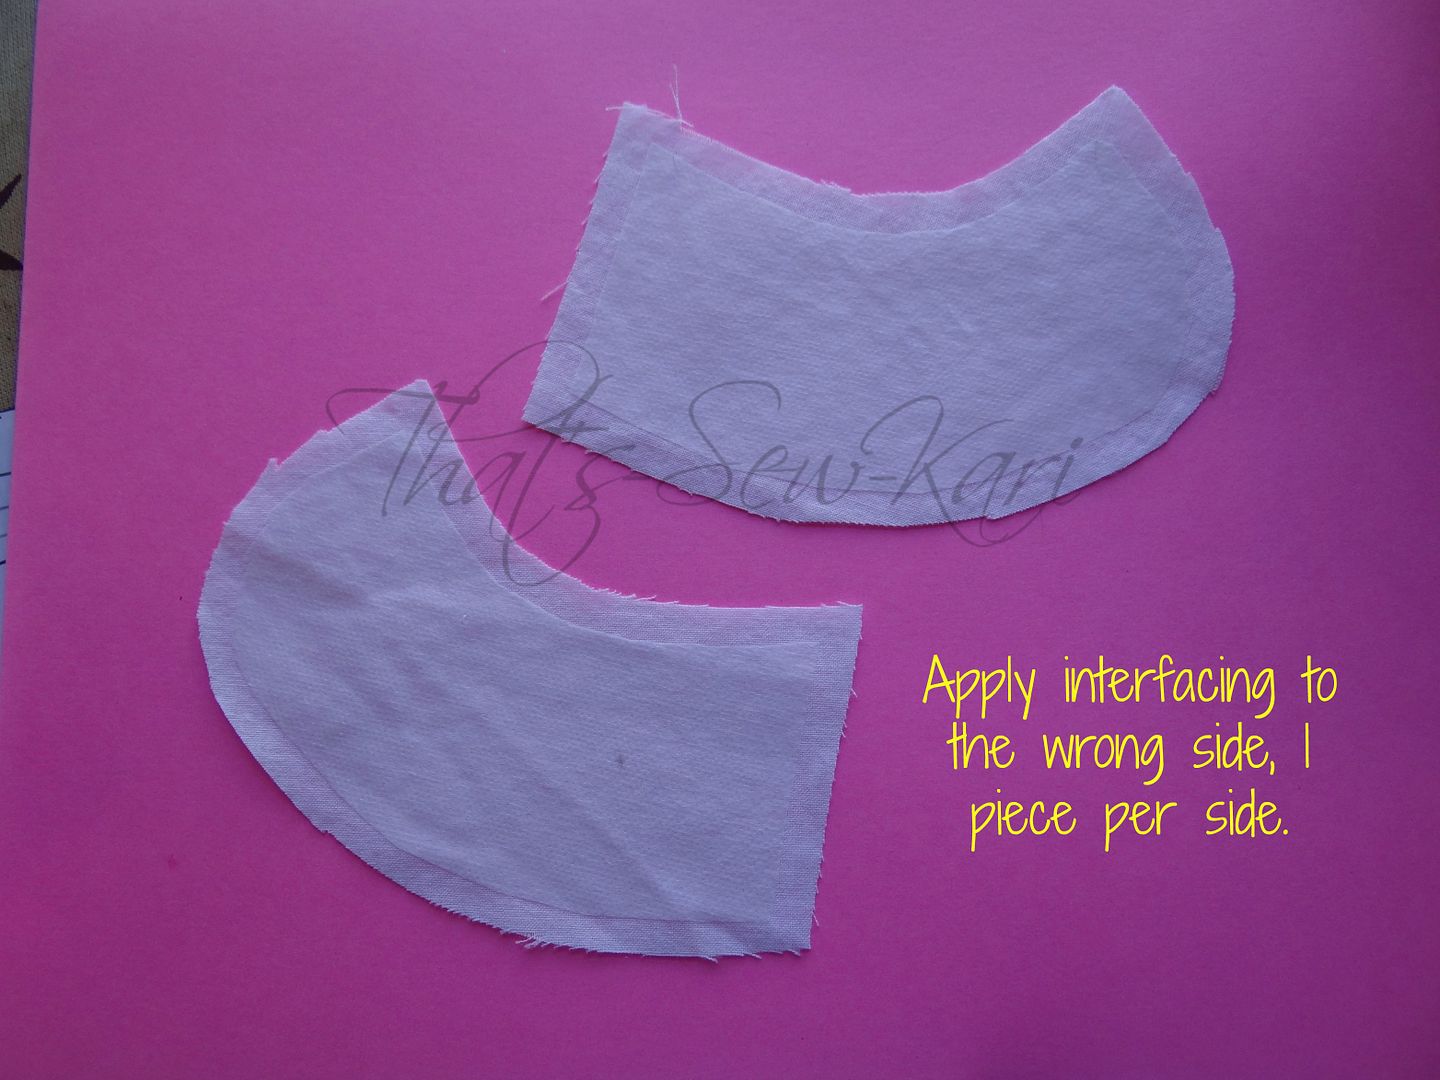
When you cut out your pieces, cut the interfacing without the added seam allowance to reduce bulk in the seams.


Now, sew according to pattern.

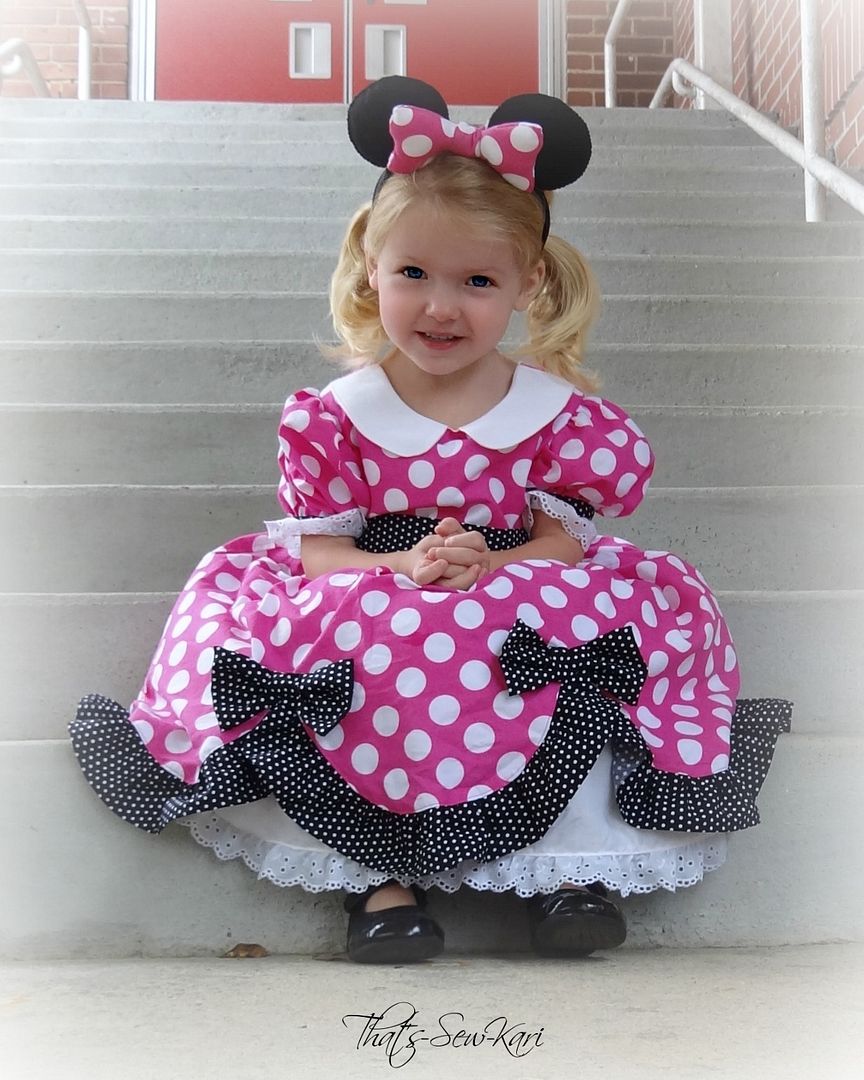
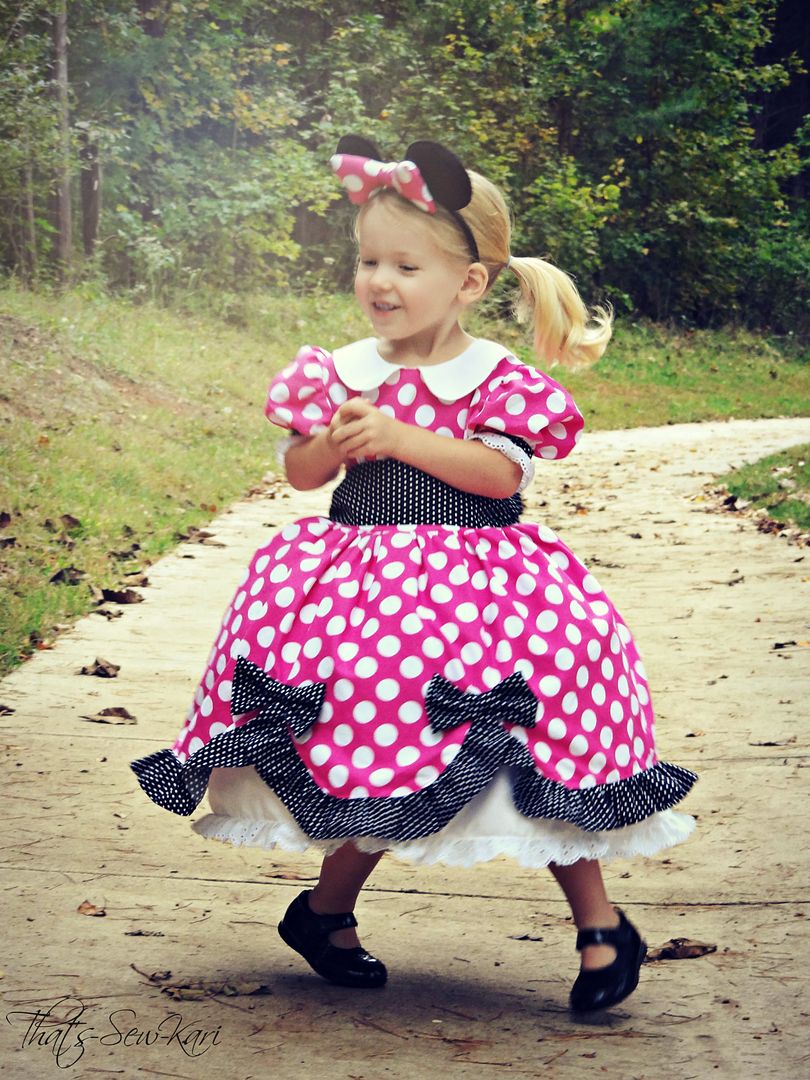
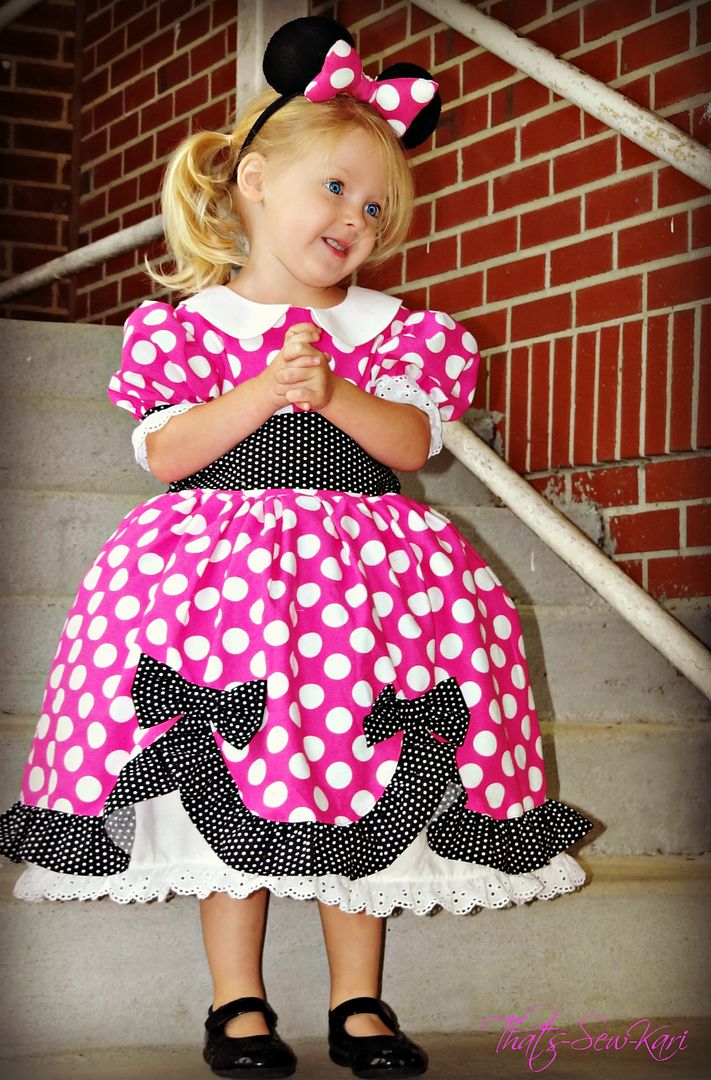
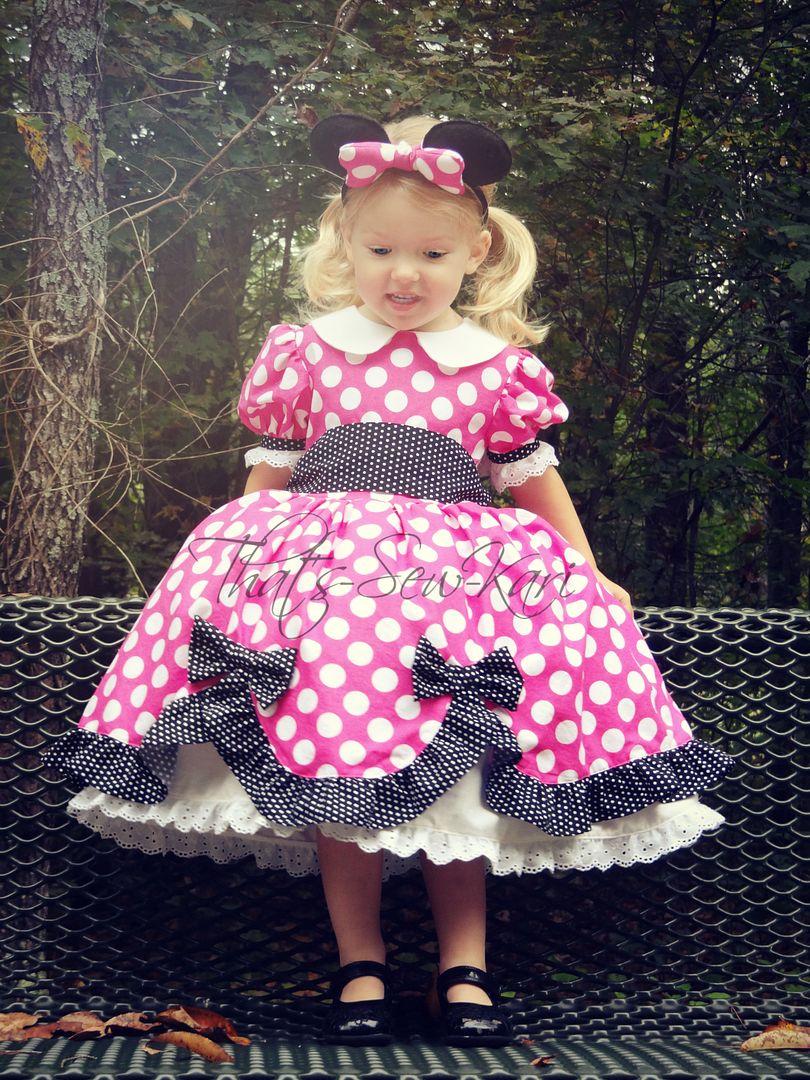
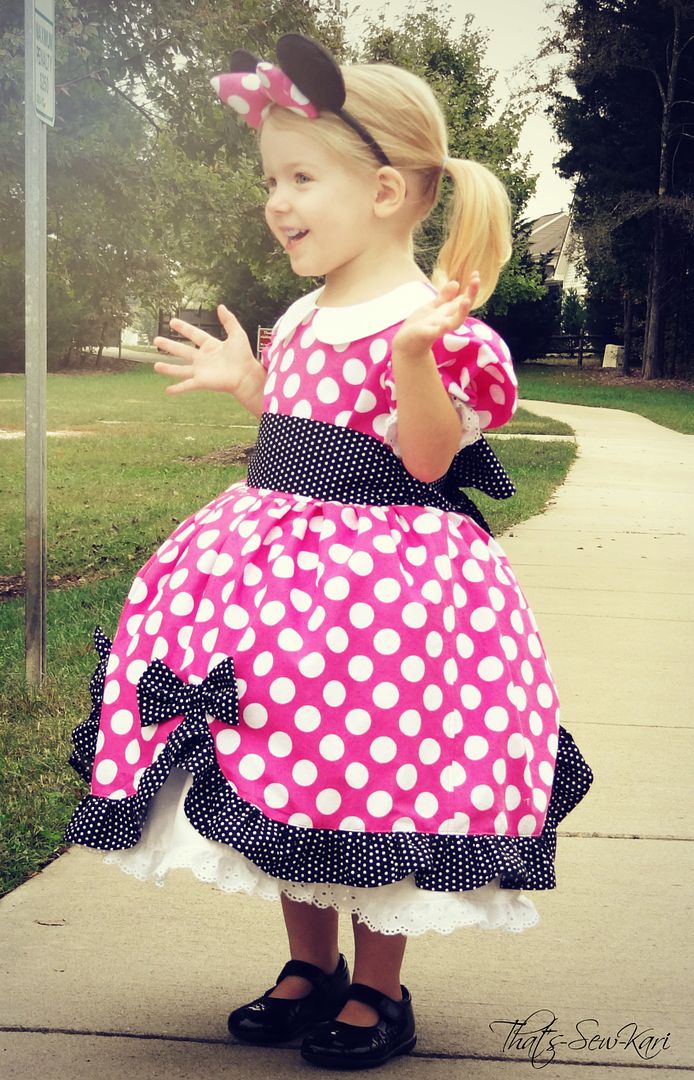
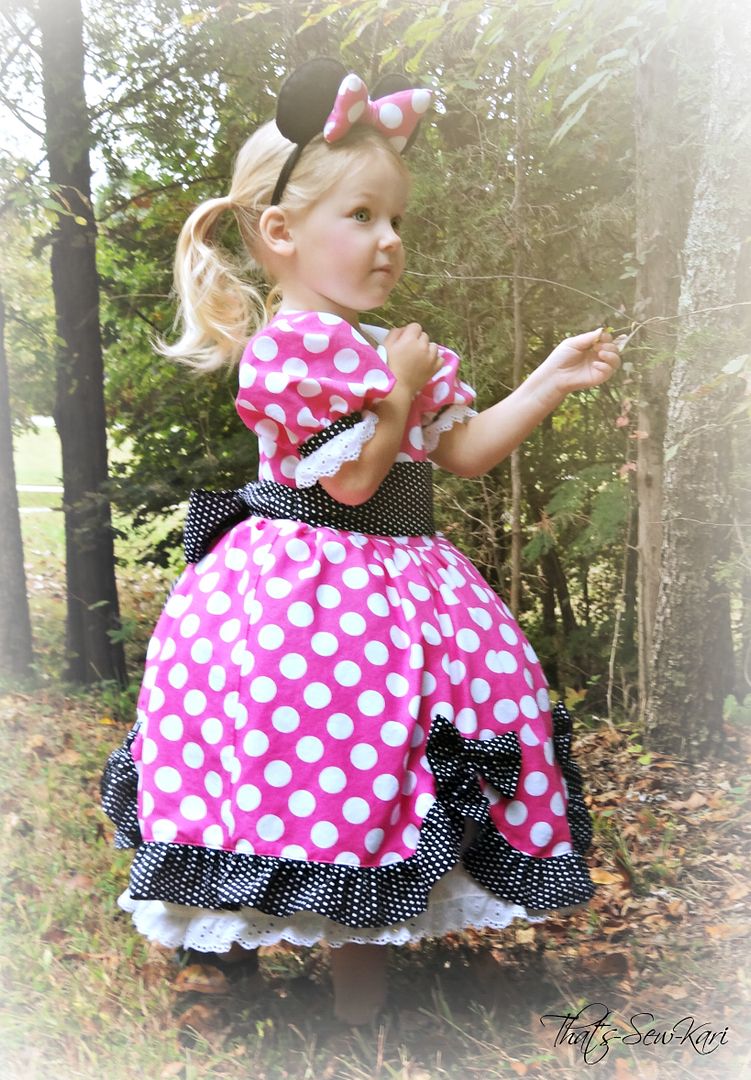
Other than the peter pan collar, Minnie Mouse dresses are easily recognizable simply by choosing the right fabric.  Minnie likes either red or pink, but white polka dots are a must.  My 2 year old was very adamant that she wear the "Pink" Minnie Mouse so I used a combination of pink/large white polka, black/small white polka, and white. (The red combination would be the same combo, but substitute the pink with red and add in some bright yellow!  It really pops!)   All of my fabrics and trim came from Hobby Lobby.

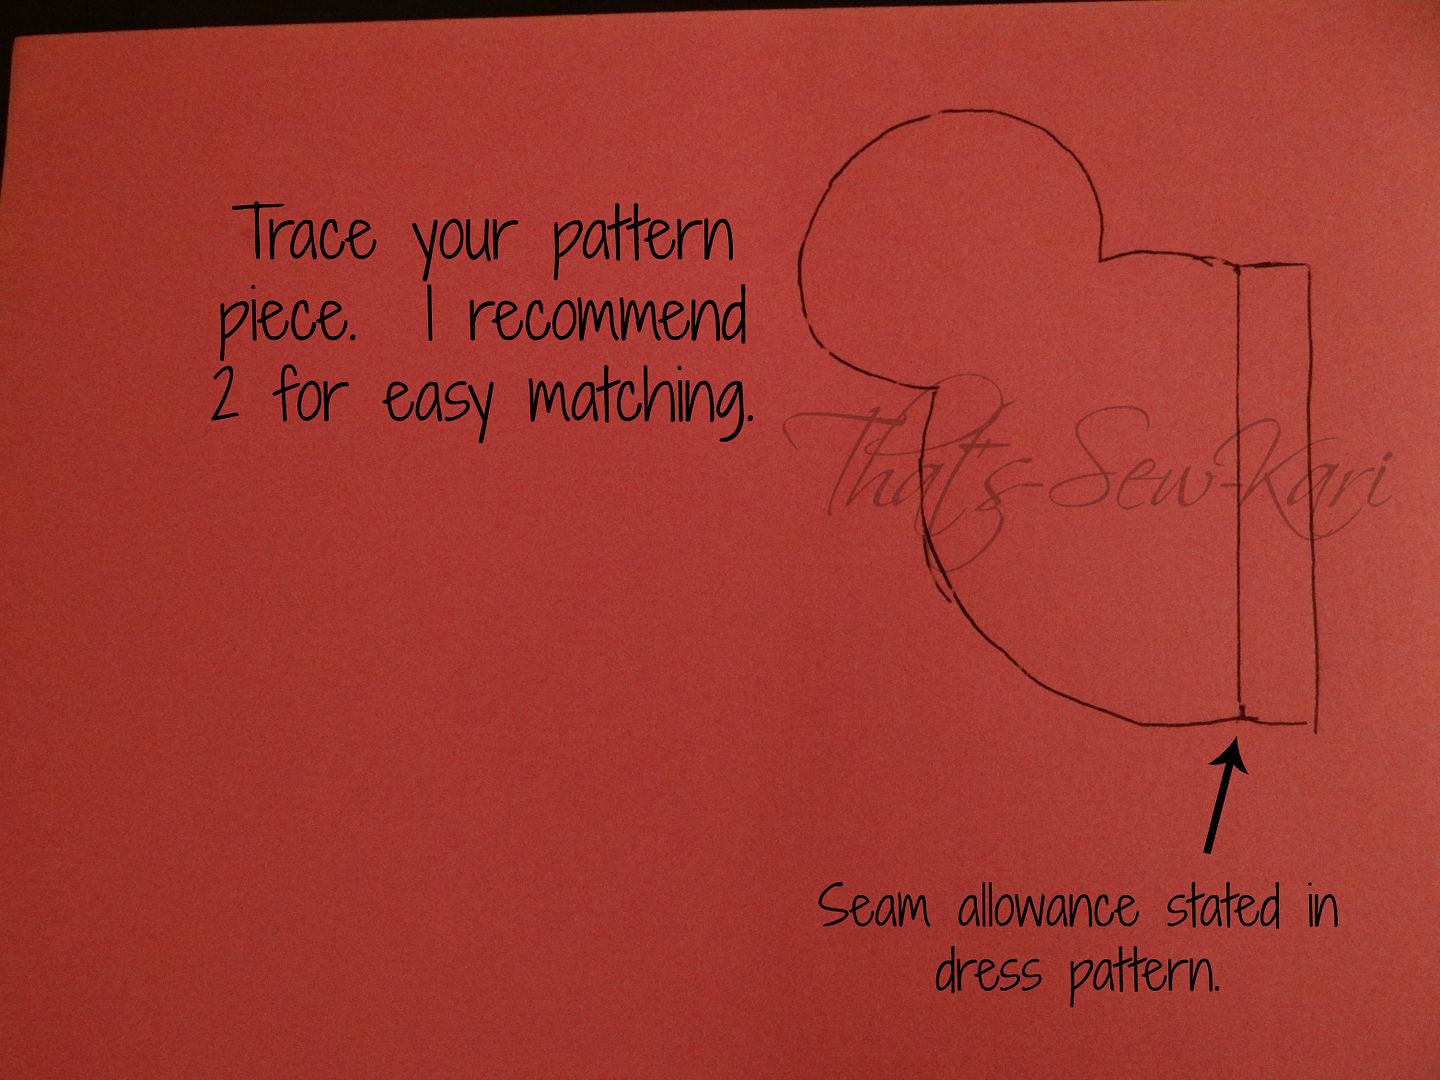
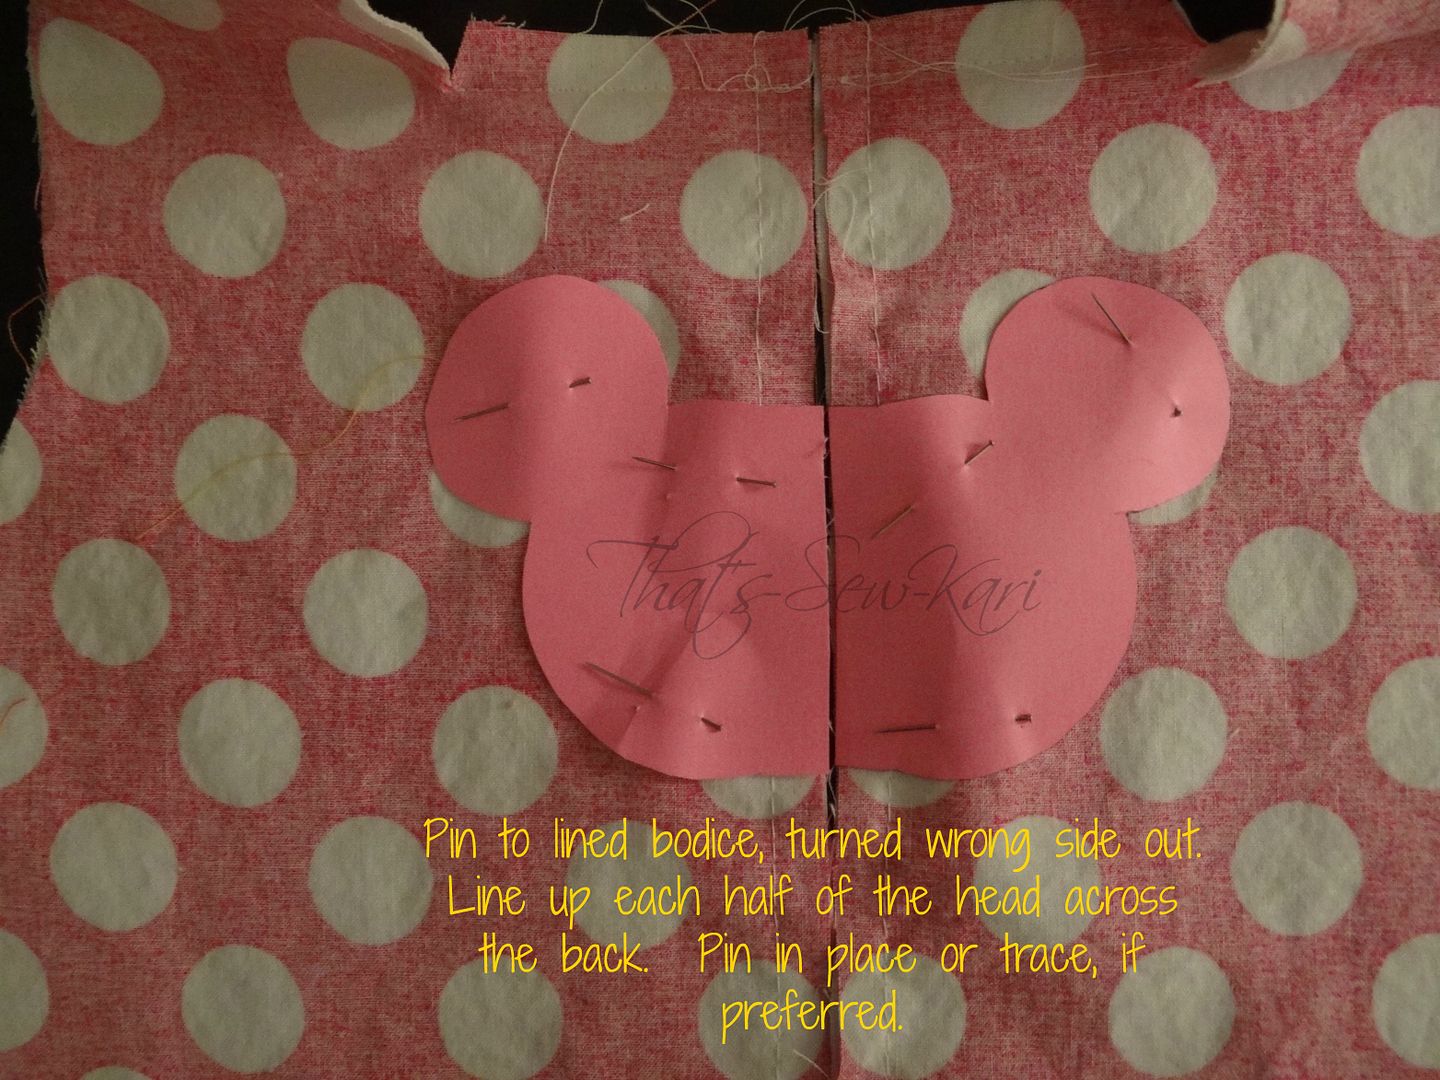
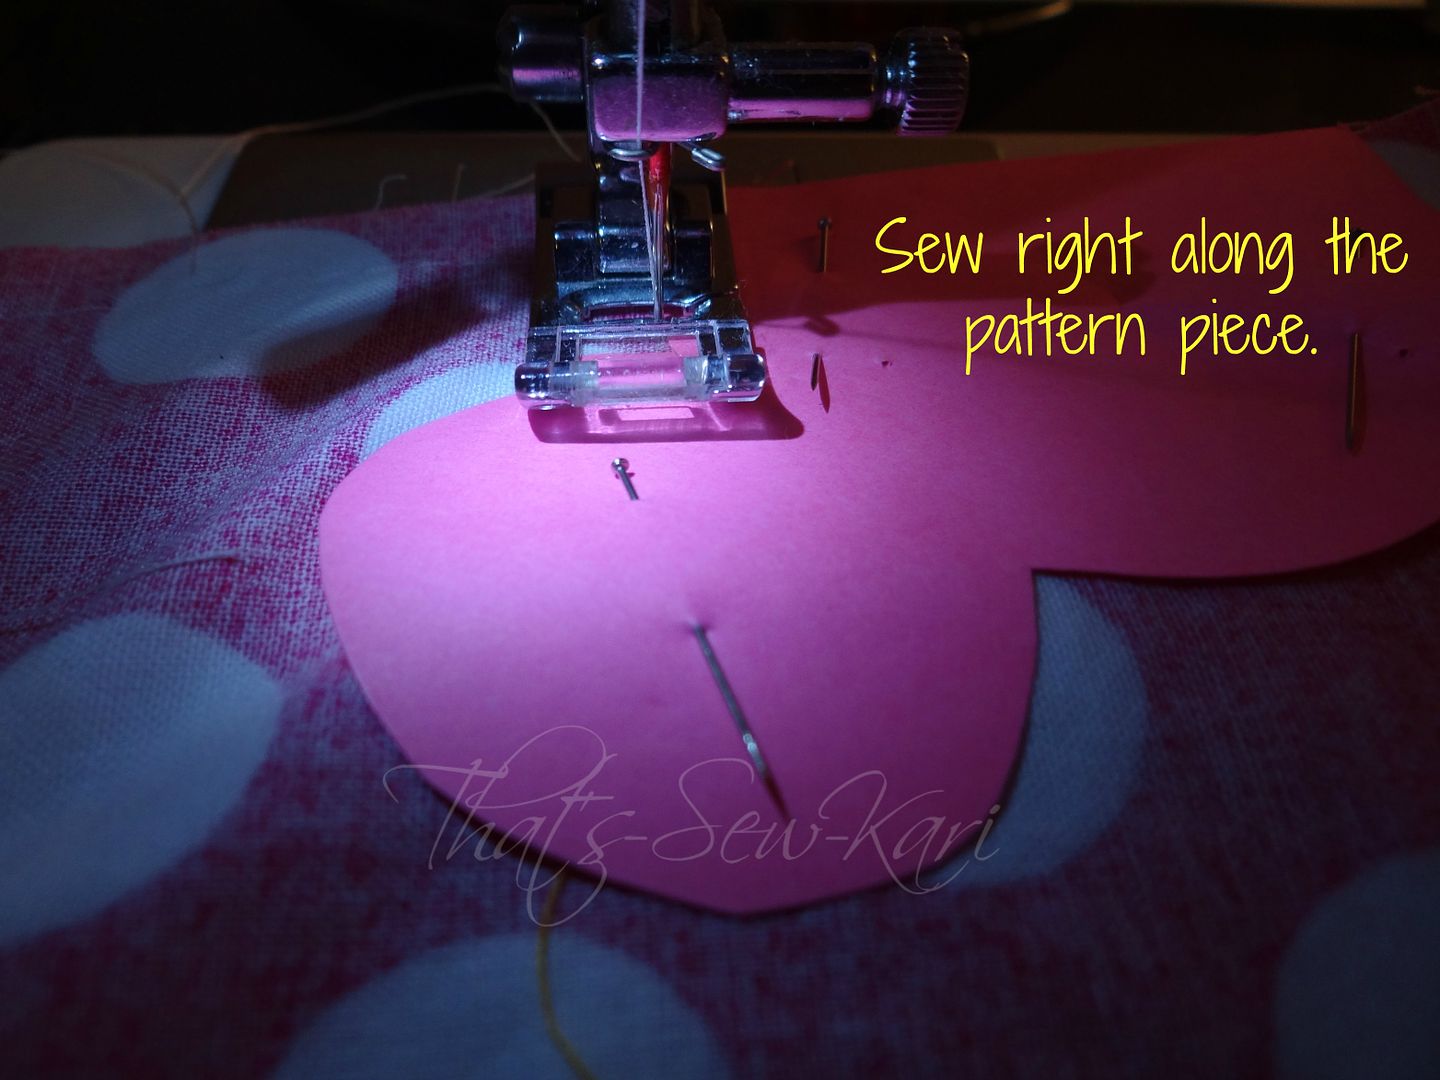
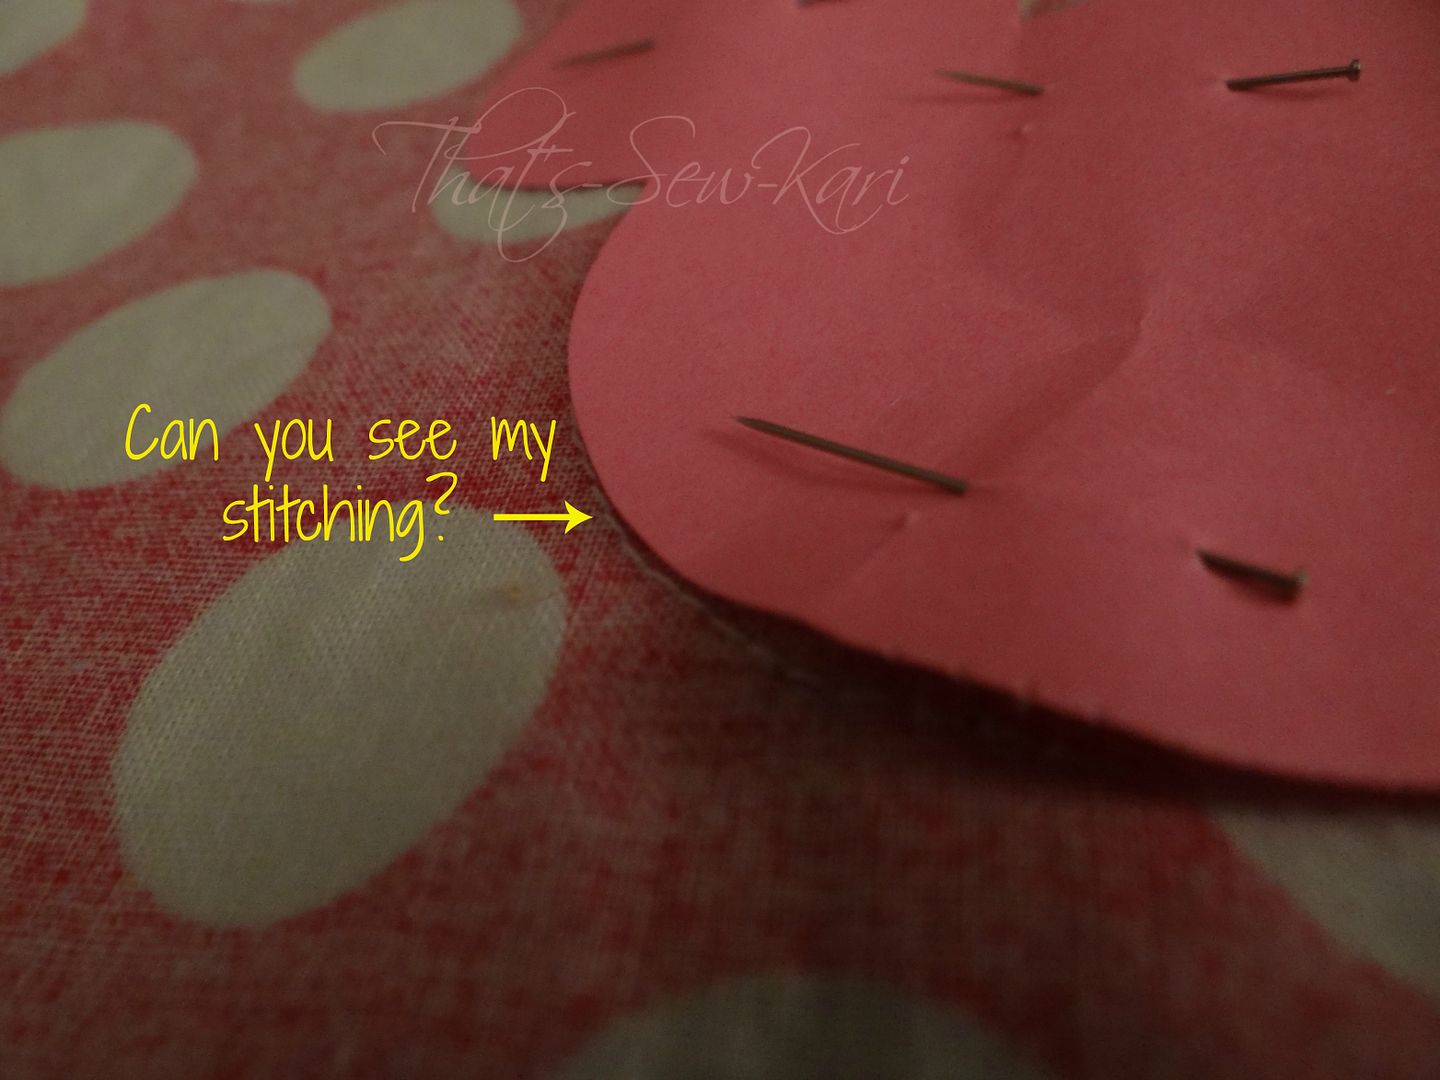
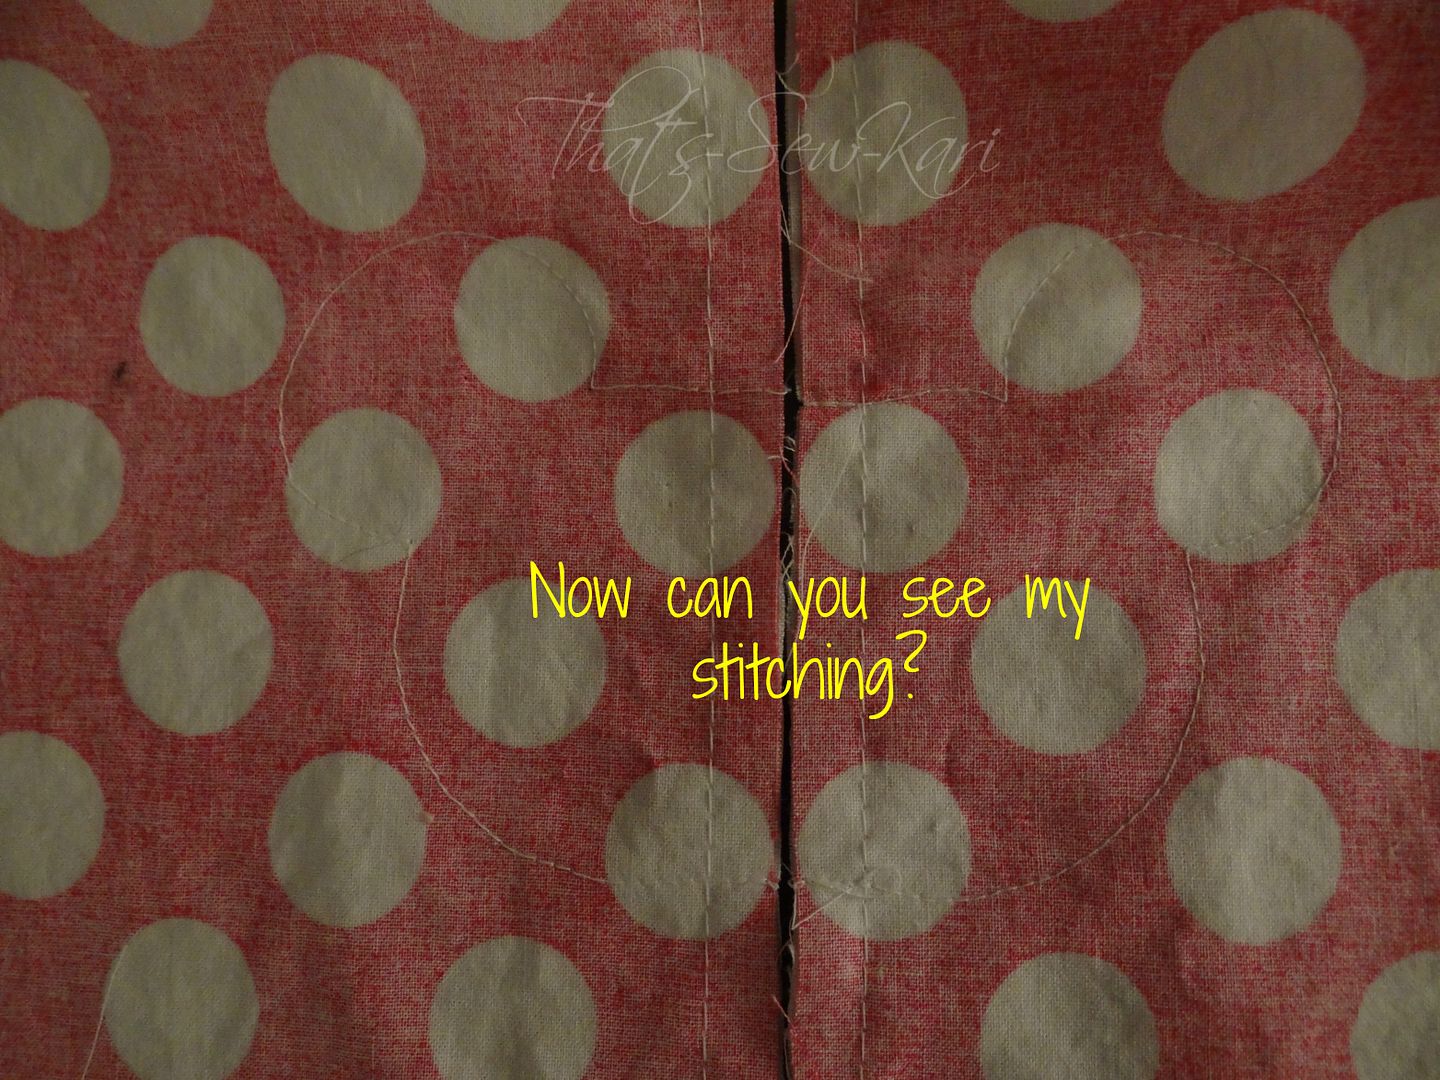
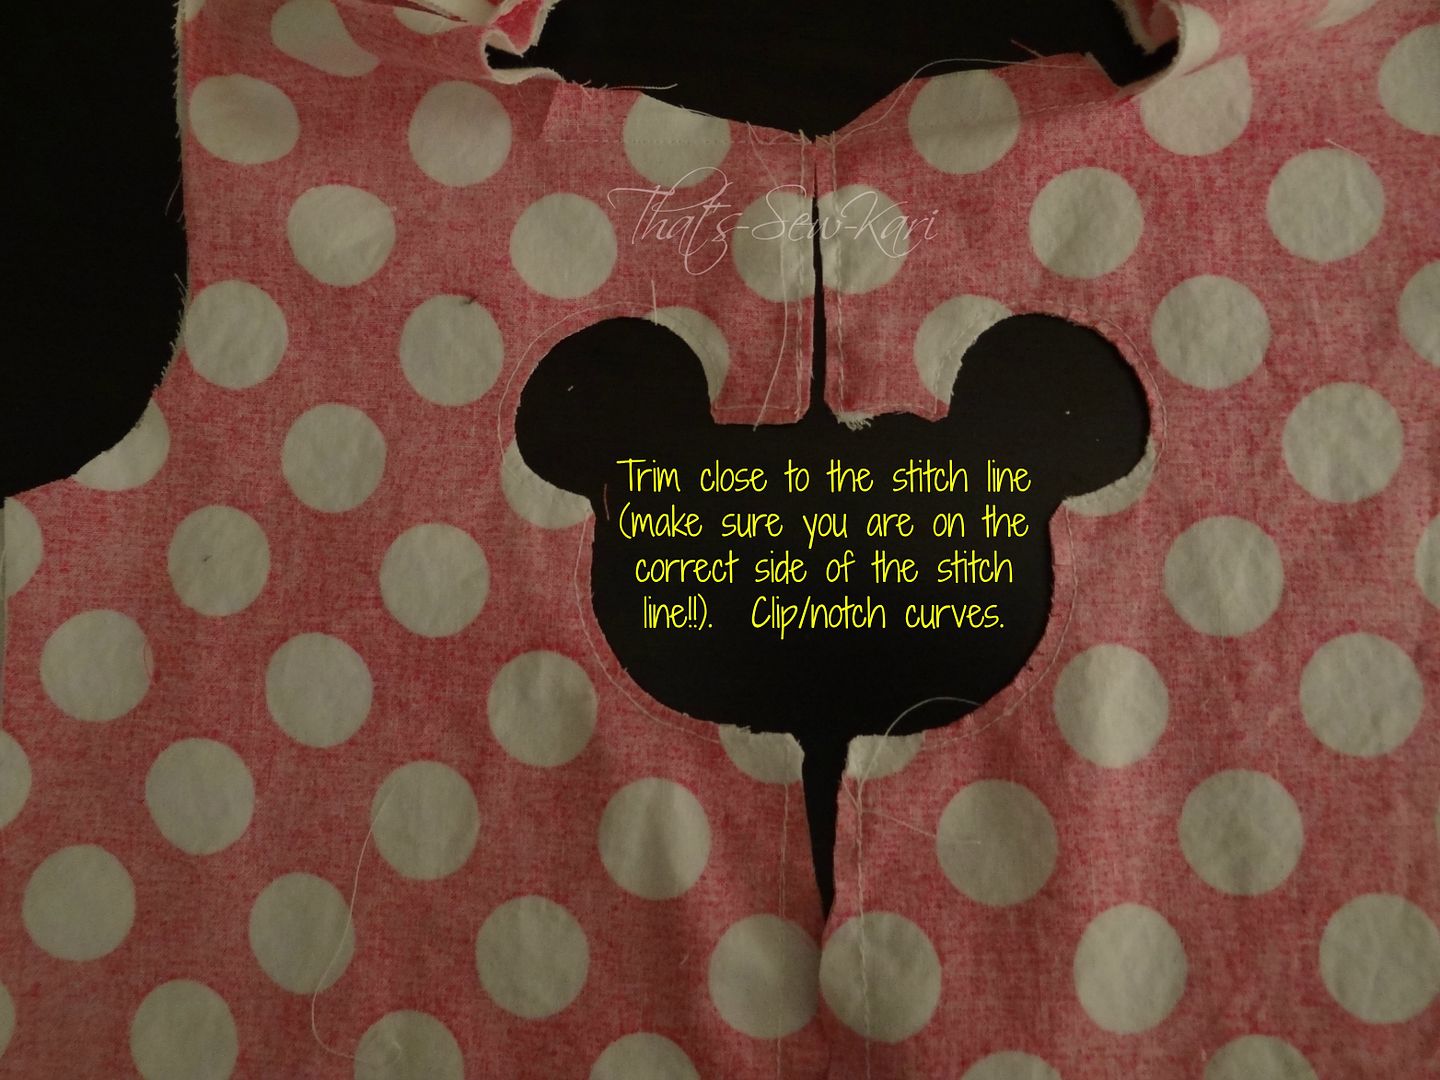
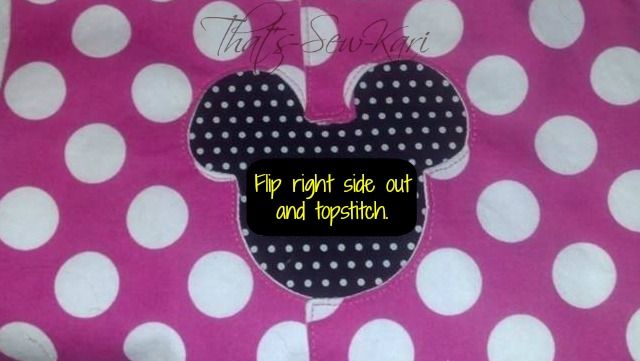
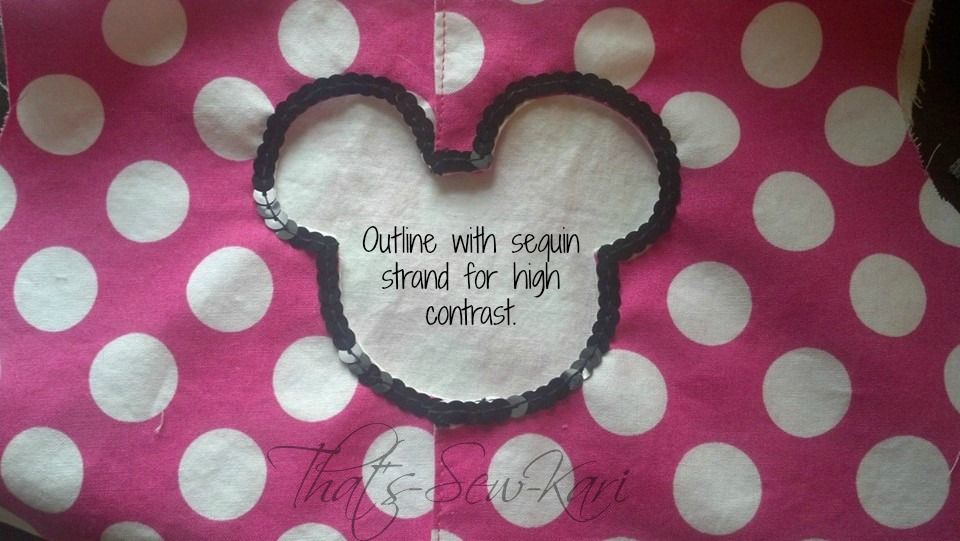
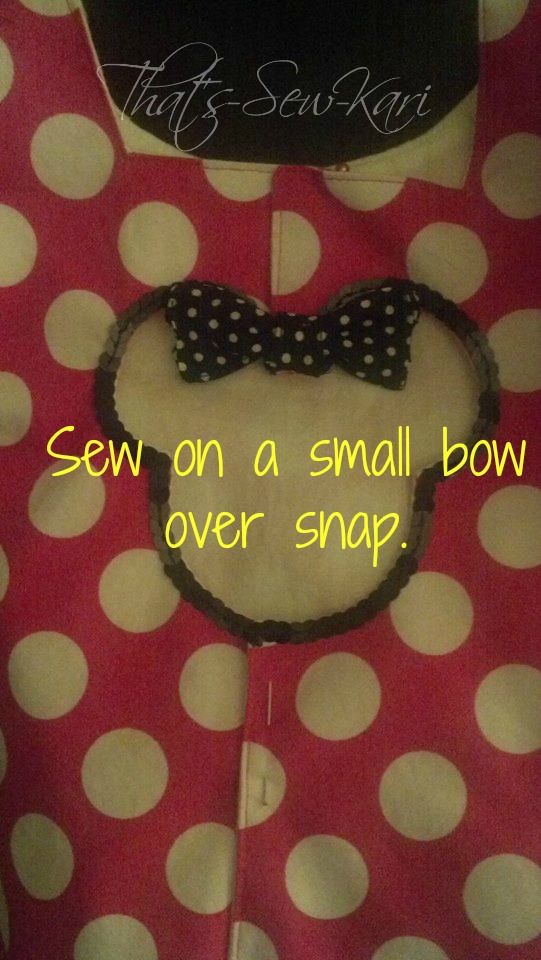
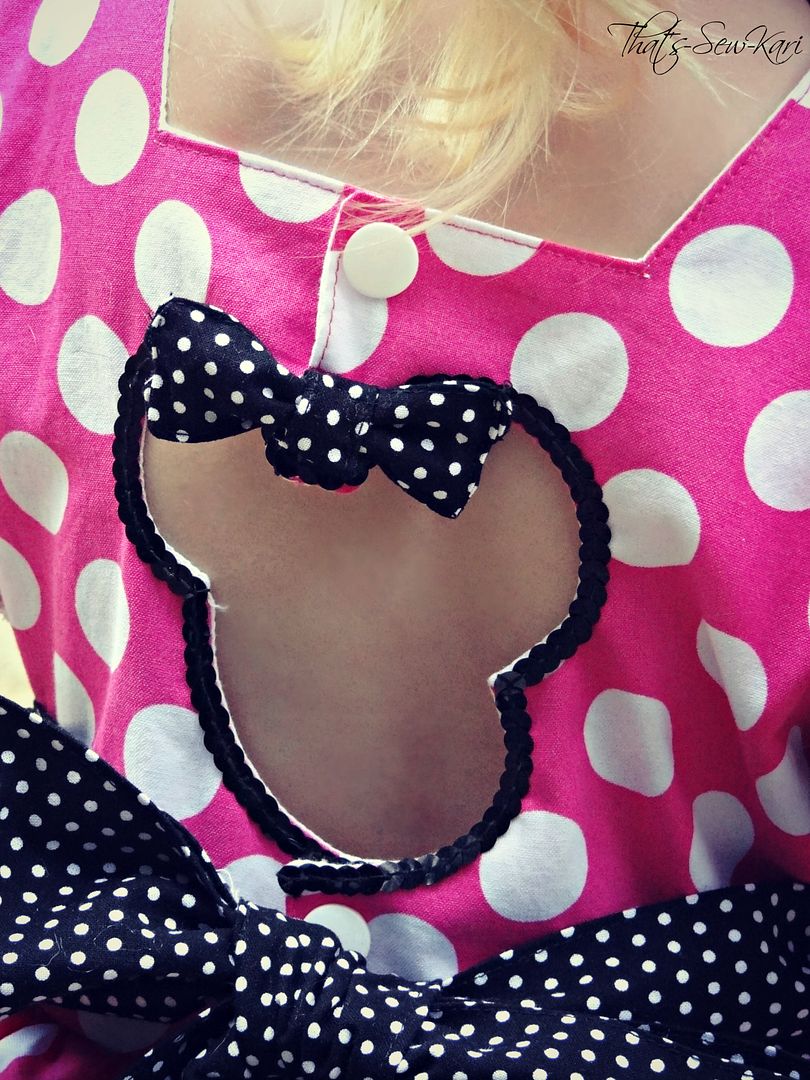
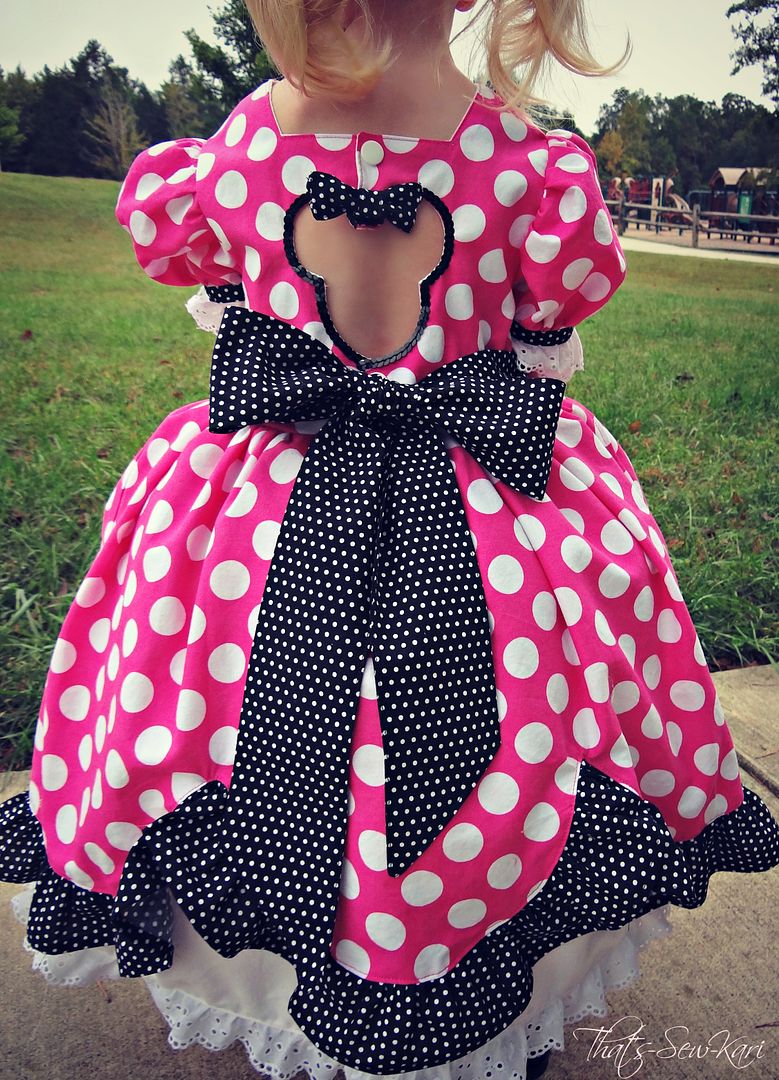
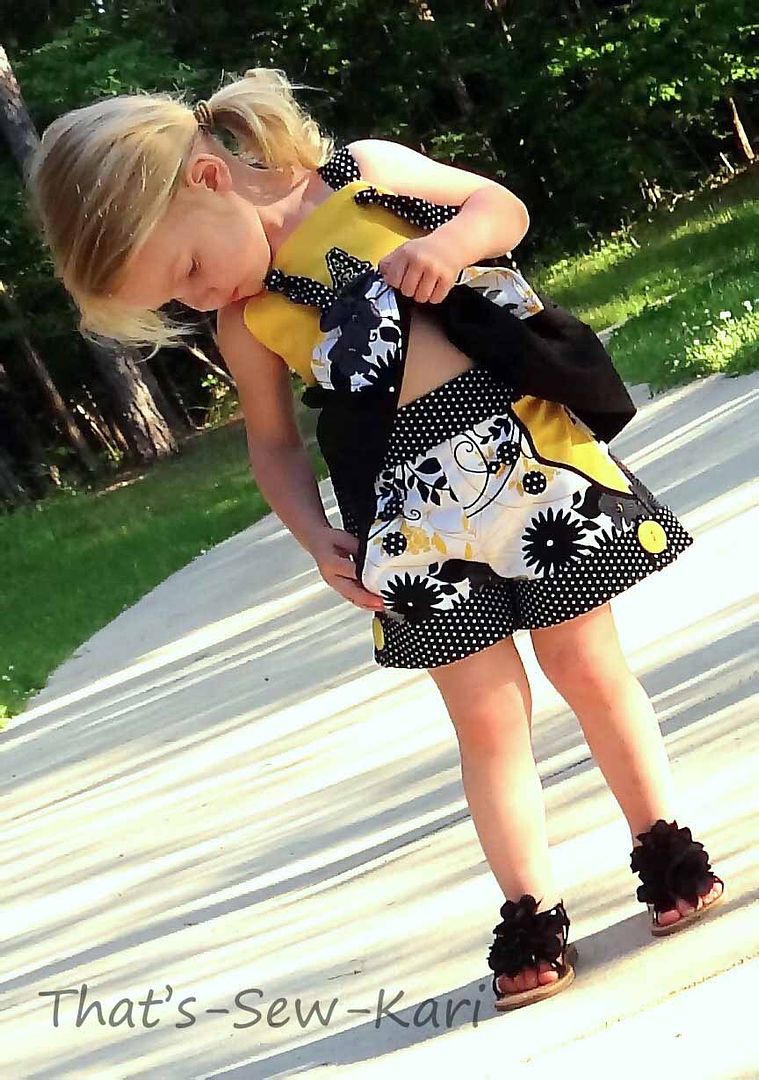
Fortunately for all of you, I couldn't just stop at a simple peter pan collar addition :)  I thought and thought and thought.... and then the light bulb went on!  I decided I wanted a Minnie Mouse head cutout in the back of my daughter's dress for a bit of unexpected awesomeness on the back of her dress.  So, I set out to make this crazy idea happen (because I don't give up easily!).  I practiced on a few muslin bodices first until I got it right.  Here's how I did it (and FREE template HERE!).  In order to fit the template along with the amount of snaps needed, I lengthened the bodice 1 inch from the original pattern.  The space between her ears is the overlap of the back bodice in the original pattern - fate, I tell you!!


You will want to make sure to put 2 snaps both above the cutout and below so that everything lays correctly.

I've made this dress 1 size larger so that I can ensure it fits when her birthday rolls around since it's highly likely she'll want a Minnie Mouse birthday again!  I'm ahead of the game!


To finish the Minnie's look, I chose an eyelet ruffle for my ruffled underskirt to mimic her eyelet-trimmed bloomers and carried the eyelet to the bottom of her sleeve cuffs. I used the large bow template in the pattern to create two bows to place on the front scallops.


My daughter is also wearing the Tulle Drop Waist Pettiskirt by Foo Foo Threads as well as a shorter 'no-sew' tutu from last year's Halloween costume for maximum poof! I made the Minnie Mouse ears and headband last year since my daughter was also Minnie Mouse then.  I used felt for the ears and stuffed them to make them stand up.  I also stuffed the bow and hot glued them all onto a black headband and then hand-stitched them onto the headband for extra stability.

My 2 year old has been asking for her Minnie Dress for WEEKS!!  Today, she got to go out for a photo shoot and she was in Minnie Mouse heaven.  This girl dreams of Minnie Mouse every night, or so she tells me.  I'm sure she would gladly wear this daily if I let her!


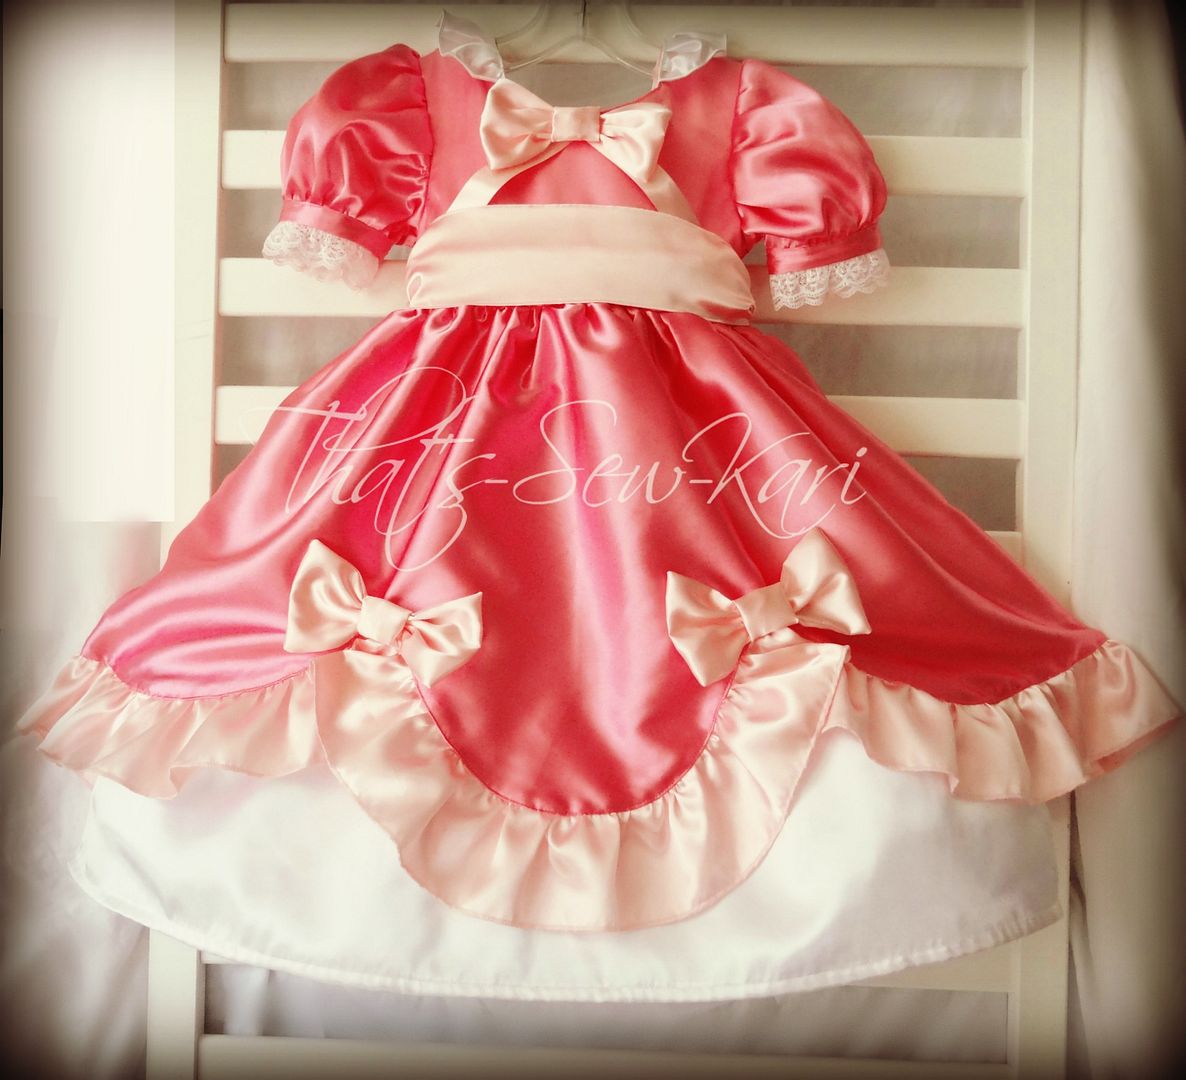
Oh, remember when I mentioned at the beginning how this was the third dress I've made using this pattern?  Here are Sofia the First and Cinderella!


Cinderella was created for a very special customer.  What a lucky little girl!!

Well, that wraps it up!!  Thanks  to Pattern Revolution for having me here today and also thanks to Candy Castle Patterns for a beautiful pattern!  Head over to her pattern shop and show her some love!


This dress was featured in The Collectionary. For more great Minnie Mouse inspired items visit them by clicking the image to the left.. 

Making your pants adjustable with button hole elastic

My Little Plumcake is a Pattern Revolution Blog Sponsor. This pattern was provided to me for free for use in this tutorial. Want to win a free copy for yourself? Enter the giveaway at the end of this post!

Whenever I (gasp!!!) buy store bought clothes for my kids, I always make sure to get pants with buttonhole elastic, especially for my oldest boy since the hand me downs go to little brother who is not shaped quite the same.  I've recently sewed a couple patterns that included buttonhole elastic in the waistband (Retro Glam Skirt and Otto Pants). I decided that I'll probably use it in most every pants pattern I sew from now on to make sure I can get the perfect fit throughout the life of the garment, no matter who is wearing it. As long as I'm doing it, I might as well show you how too, right?

First, there are a couple things to consider with the pants you are going to modify- do the pants have a flat front or is entire waistband elasticized? Do the pants have a separate waistband piece or is the top of the pants turned down to make a casing?

Today I'm working with the Jack and Jill Pattern from My Little Plumcake. They have a flat front and do not have a separate waistband, but if your pattern is different, I'll give you some tips at the end so you can still make the modifications. By the way, this pattern is designed to be fitted through the waist and butt and flare towards the bottom, but my kids both needed more booty room so I sized up. 

First, assemble the pant fronts and backs as directed in the pattern. Do not sew the inseam or side seams yet. Now it's time to mark your buttonholes.

008.JPG

The pattern directs you to turn the waistband under 1/2" and then another 1" to create your casing. You want your buttonholes to end up on the inside of the waistband centered on the casing, so you measure 5/8 down from the top of the pants, and measure 1" in from the side seam on each side. Mark your buttonholes.

009.JPG

Turn your pants piece over and transfer your marks on the back side, then apply 2 small pieces of iron on interfacing over each buttonhole mark.  

011.JPG
012.JPG

Turn your pants back over and make your buttonholes using your sewing machine.  

013.JPG

Don't forget to open your buttonholes with your seam ripper now! It's hard to do it once the casing has been sewn down!  Continue now with the pants construction according to the pattern directions. When your pants are together, make the casing as directed.

015.JPG

Instead of stopping, sew all the way around the casing.  

016.JPG

Add your buttons! 

017.JPG

Using a safety pin, feed the buttonhole elastic through the buttonhole, into the back side casing, and back out the other buttonhole.

023.JPG

Try the pants on your little one, adjust the elastic as needed, and secure with the buttons.  How easy was that???

031.JPG

So, a few things to keep in mind... All patterns are different. If you are using a different pattern that does not have a separate waistband, remember to check how much the casing is turned under (if at all). This measurement determines your buttonhole placement, and you're going to want to add 1/8" to that # and that is how far you measure down from the top of the pants to begin your buttonhole mark.

 If your pants have a separate waistband, you will need to center the buttonholes on the inside of the waistband piece using the same methods.

If your pants do not have a flat front and are elasticized all the way around, you only need one buttonhole. Insert the elastic, pull it through the casing so that the end of the elastic is right next to the button hole, place the button on the fabric directly on top of the end of the elastic and sew it down, securing both the button on the outside and the elastic on the inside. Pull the other end of the elastic the rest of the way through the casing and out the button hole and secure with button.

I hope you found this helpful, Happy Sewing! Now, Enter to win a copy of this pattern for yourself! 

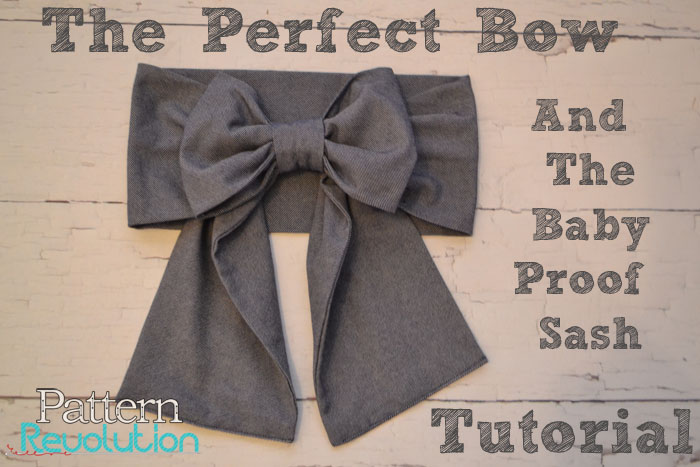
The Perfect Bow and the Baby Proof Sash Tutorial

Every morning it is a struggle to dress my feisty 2 year old. All her pretty sashes hang untouched in the closet, while the dresses they go with get worn over and over. I love the look of a pretty bow, but my baby wont hold still long enough to tie it nicely, and in the miraculous event that she does, she unties it and removes the sash a few minutes later. GRRRR!!! Tell me I'm not the only one with this problem???

And so I fiddled around in my sewing room and came up with just the right answer. 

058perfectbow.jpg

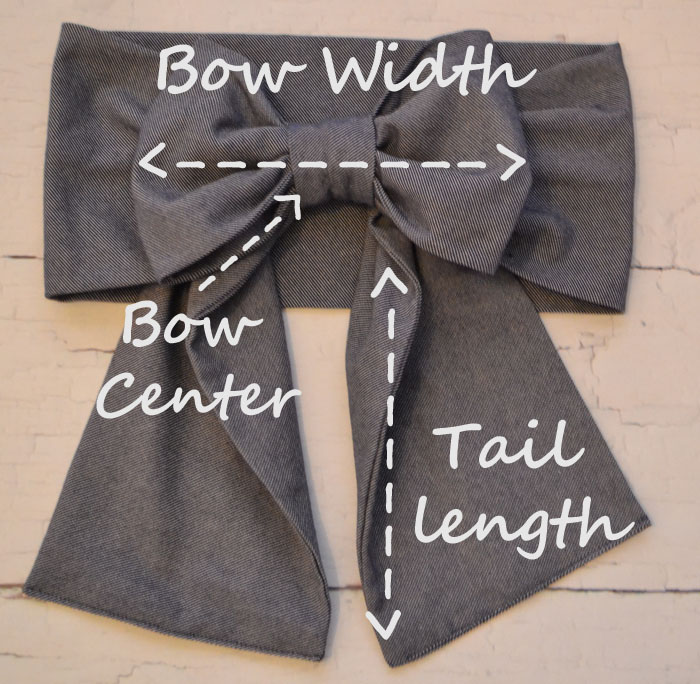
There are 3 pieces to the baby proof sash. The Bow, the Bow Center, and the Sash. 

Supplies: Sash and bow fabric, thread, sewing machine, scissors or rotary cutter, needle Kam Snaps and snap pliers. Kam snaps, by the way, are my FAVORITE things for garment closure for my crazy toddler. Fast and easy, but still secure.

Decisions, decisions....

First, you need to determine your sash length and width. Measure your child's waist while wearing the garment, add 2" for sash length.  Decide how wide you want the sash, double that and add 1/2". Cut your sash.

Then, you need to determine the bow width and tail length that you like.


058002perfectbow.jpg

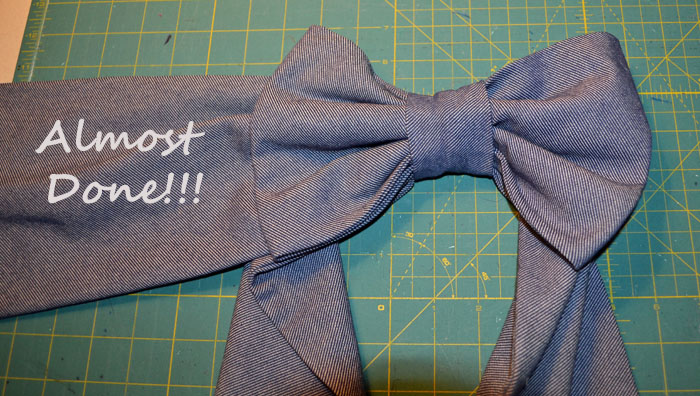
This is all a matter of preference, and you can experiment until you find the bow size you like. Some people like big floppy bows, others like neat and tidy little bows.  The bow portion of the sash is one long strip. The width of the strip should be the same as the width you chose for your sash. The length should be the bow width x 2 plus the tail length x 2. Cut your bow strip. My bow here was 14" wide (yep, that's a big ol' bow!) and 45" long. (Tail length 13" X 2 + bow width 9.5" x 2 = 45")

Your bow center is going to be 6" long, but you must decide how wide you want your bow center to be. Just eyeball it, you really can't go wrong. Then double that number and add 1/2". Cut your bow center 6" long by width x 2 plus 1/2" . 

Making it!

Cut your sash strip and your bow strip according to the above directions, then fold right sides together along the length. 

029perfectbow.jpg
030perfectbow.jpg
037perfectbow.jpg

Set sash aside for now. 

031perfectbow.jpg

Pin bow ends closed.  Then fold your bow strip in half lengthwise with the fold on the left, matching up the ends. 

032perfectbow.jpg

Lay edge of sash on the bow width line and stitch down using a straight stitch, making sure to backstitch at beginning and end. This closes the 1 sash end and attaches it to the bow.

033perfectbow.jpg
038perfectbow.jpg
039perfectbow.jpg

Time for a tiny bit of hand stitching. 

040perfectbow.jpg
041perfectbow.jpg
042perfectbow.jpg

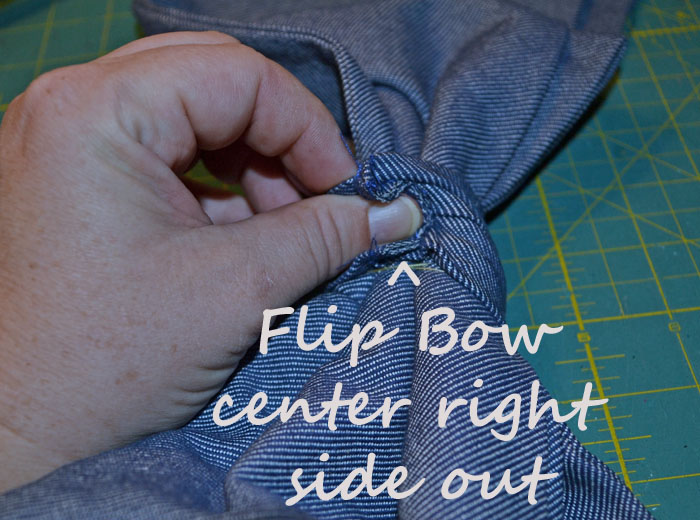
Time to make the bow center. 

036perfectbow.jpg
043perfectbow.jpg
044perfectbow.jpg
045perfectbow.jpg
046perfectbow.jpg
047perfectbow.jpg
048perfectbow.jpg
049perfectbow.jpg
050perfectbow.jpg
051perfectbow.jpg
052perfectbow.jpg
054perfectbow.jpg
056perfectbow.jpg
057perfectbow.jpg

That's it! You did it! Snap it on your baby girl. No tying, no nothing. Snap and go! 

058001.jpg

How to Make Your Own Piping

Dorothy Day Tripper Pattern by Paco Bean. Click the photo to read a review of this pattern written by Ali Cat & Co.

Dorothy Day Tripper Pattern by Paco Bean. Click the photo to read a review of this pattern written by Ali Cat & Co.

Piping is the perfect little detail to really make your designs pop, and Alicia of Paco Bean Patterns was nice enough to stop by to give us all a little lesson on how to make our own piping. Sure, you can buy it in the store, but how much cuter is it to be able to use whatever fabric your little heart desires?


Enter the  FUN giveaway at the bottom of the post to win a pack of Paco Bean patterns to pipe!


It seems a lot of people are intimidated at the idea of making their own piping or even using piping at all. After a lot of trial and error, I think I have a pretty easy method for both making piping as well as sewing it into a seam. This is a tutorial that will teach you how to create your own piping using the Paco Bean Dottie Vintage Bag as an example. This would also be nearly exact with the PB Dorothy Day Tripper as well. Try to ignore the wonkiness of the machine basting in the pics, something is up with my tension. Sigh.

 You will need: 5/32" cotton cording, fabric, zipper foot, pins, thread

1. Cut bias strips. Cutting strips on the bias of the grain allows it more flexibility and stretch around corners and curves. Fold your fabric diagonally, matching the side edge with the bottom edge and press like so. This will give you a 45 degree line to align your strips with.
photo-3
 
 Cut as many strips as your project requires (usually one strip is about a yard for me), parallel with the 45 degree crease you made. For my patterns, I use 1 ½" wide bias strips, which ends up giving close to a 1/2" seam allowance when sewn into the bag.

2. Connect bias strips. We need to connect our bias strips to form one big long strip. Place two strips right sides together at a 90 degree angle, aligning the "wide angle point" of each strip end with the other strip's edge.
Photo Jul 23, 9 30 35 PM

Stitch at a 45 degree angle from the top left overlapping point to the bottom right overlapping point.

Photo Jul 23, 9 33 22 PM

Then trim the excess, fold flat and press the seam. Repeat with additional strips.

Photo Jul 23, 9 33 50 PM Photo Jul 23, 9 34 08 PM

3. Prepare piping. Starting at one end of your bias strip, lay your cotton cording on the wrong side of your bias strip and fold overtop in half. Slide a pin through the folded strip, and through the cotton cording, securing both. Work your way along the bias tape, folding & pinning the cording inside, maybe every 8"-12" or so.
Photo Jul 23, 9 43 44 PM

4. Sew piping. Put your machine's zipper foot on and adjust your stitch length to the longest setting. Starting at one end of the piping, stitch along the cording to encase it in the bias tape.

Photo Jul 23, 9 47 50 PM

We don't want it super tight, we will be sewing a closer seam later to tighten it up. For this machine basting, I leave my needle in a "center" position, then later, I simply move my needle to the left to tighten up the piping while sewing at the same seam allowance. Keep your stitching as uniform as you possibly can, this will ultimately be the guide we use in the end. Now you have your very own handmade piping!

Photo Jul 23, 9 58 33 PM

SEW YOUR PIPING INTO A SEAM

We need to pin and machine baste the piping onto one of the pieces you will be sewing. In this case, I'm attaching the piping on the main panel of the Dottie bag before I sew it to the top/sides/bottom panel (placing it in between them in the seam). If you were making a pillow, for example, you'd pin and machine baste piping to all 4 edges of one of the square pillow panels before sewing it to the other square pillow panel.

5. Attach piping to panel. For the Dottie main panel, I pressed it in half to give me a center crease. Starting in the bottom center of the panel and leaving about 1" of piping hanging off the piece, match raw edges of piping to raw edges of main panel and pin. With these kinds of curves, you can never have too many pins! Match the raw edges as exactly as you can, especially around the tighter curves. If you have trouble getting the piping to turn easily around the curves, or need to do a 90 degree corner, you may clip the piping about 3/8" in from the raw edge. I find piping goes around curves much nicer without clipping so I only do it when necessary.
Photo Jul 23, 10 19 20 PM

When you get back where you started, at the bottom center, overlap the piping as shown, and let 1" of the end hang off the piece. The overlapping piping at start/end won't be seen much being on the bottom of a bag. There are other ways to finish the ends, but for the sake of learning, we are going with the easy overlap. If you'd like it to appear more seamless, click here to head over to Rock The Stitch to learn a different joining technique!
Photo Jul 23, 10 19 47 PM

At your longest stitch setting and with your zipper foot, start wherever you'd like and sew right along the same stitching you created when you made the piping to attach the piping to the main panel. When you reach the "overlap" at bottom center, stitch straight across the piping.

Photo Jul 23, 10 20 43 PM
Photo Jul 23, 10 25 58 PM

Turn your piece wrong side up and you can see the machine basting stitching you just made.

Photo Jul 23, 10 25 11 PM

6. Sew piping into seam. Now pin your pieces right sides together (for the Dottie, it's pinning the main panel to the bottom/top zippered piece) with the piping sandwiched in the middle. Match all raw seams together very well. Precision is key when piping is involved, well more so than if it was just a regular seam sans piping.
Photo Jul 23, 11 48 50 PM

With the wrong side of the panel that you basted the piping to facing up, switch back to your regular stitch length (2 for me and my Janome), and sew 1/8" INSIDE the line of stitching you can see. This is where I simply move my needle to the left 1/8" and sew at the same seam allowance as I had been when basting the piping to the main panel. This will get the piping nice and tight.

Photo Jul 23, 11 49 38 PM

Now turn your item right side out and look at your piping, and feel the entire way around. There may be spots that need to be tightened up a bit, just turn wrong side out and sew a little closer in that particular spot. You'll get the feel of it pretty quickly.

Photo Jul 23, 11 58 40 PM

Now sit back and admire your piping! You're all done! Unless you're making the Dottie, in which case, you get to do it all over again with the other side. :)


paco.jpg

Want to win your own Paco Bean Patterns to practice piping? Here's your chance! You can enter the Rafflecopter below by liking the Pattern Revolution and Paco Bean Pattern pages and to get 10 EXTRA ENTRIES add a link to the linky share of a youtube (or any public video link)  of you saying this fun Tongue Twister: "Patty Piper picked a pack of Paco Bean Patterns to practice piping." 

Hehehehe, if I can do it, you can too :) 
Have fun and good luck!!!

Thread Catcher Tutorial

032threadcatcher.jpg

For too long, my sewing room floor has looked like this. There's always a pile of scraps and threads on the floor next to my serger, and of course, the mess doesn't stay there...it gets tied up in my rolling chair wheels or tracked through the house by my little ones. I know, I know, how hard is it to pull a trash can next to me while I sew??? Not hard, and I do that sometimes, but I still miss the mark half the time and have a pile on the floor regardless.

Well, I've finally decided it's time to clean up my act. I've enlisted my husband to help, not because I can't do this all on my own, but because he spent his entire day swinging in the hammock in the backyard drinking his precious homebrew, and it's about time he does a little something today to earn his keep. Don't worry,  I just fed him a great pot roast dinner to help soak up some of that beer...can't be using power tools while tipsy, can we?

Serger Thread Catcher Tutorial

Serger Thread Catcher Tutorial

Here's what you'll need to complete this project: 

  • 1 piece of lauan plywood 1/8- 1/4 inch thick cut to size.
  • 2 scraps of material (one to cover the base and one to make the catch bag) 
  • E6000 glue or some other really great adhesive
  • Heat N bond
  • Sewing machine and thread

The first thing you need to do is measure the base of your serger. 

Mine measures 10" x 10".   I want my base to be 10" X 13". Yours should be the base of your serger X the base + 3". 


Measure your base and cut to fit.

Measure your base and cut to fit.

Next you need to mark the hole placement.

My hole is 1" in from the edge, 5" wide and 2" deep. It is 1" off center to the right. 

2.jpg

Trace your hole, round the corners. Use a drill to make a hole big enough to get a jigsaw in, then use the jigsaw to cut out your hole.

Tell your husband he can go back to the hammock.

011threadcatcher.jpg

Now it's time to get your fabric ready. I cut my fabric 3" wider than my base all the way around, so mine is 13" x 16". Cut yours 3" bigger than your base dimensions.

012threadcatcher.jpg

Now it's time to whip out one of my favorite products of all time-- Heat N Bond.  Cut your Heat N Bond to the same dimensions as your fabric. 

014threadcatcher.jpg

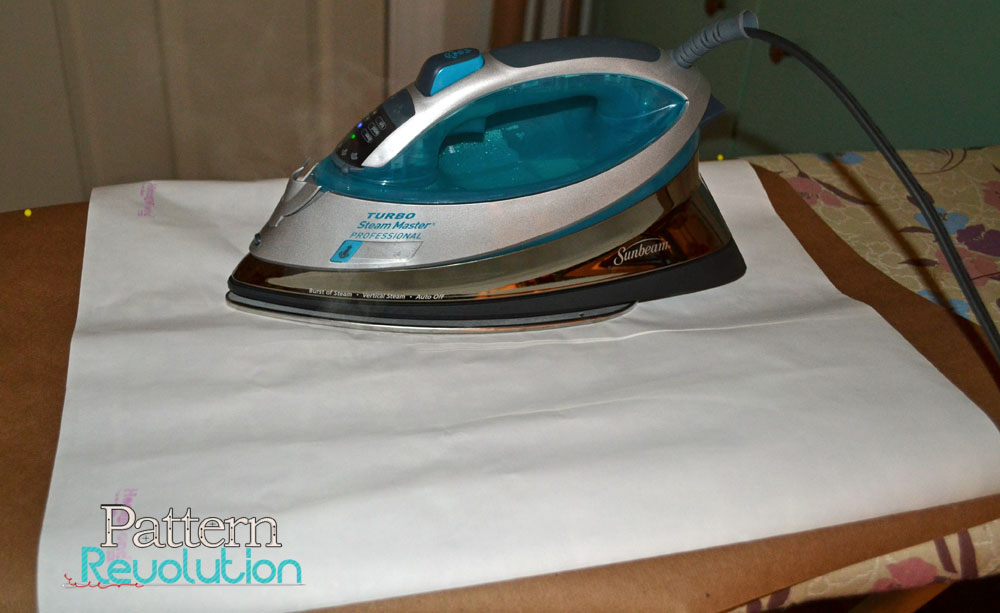
Iron the Heat N Bond to the wrong side of your fabric. I put craft paper down over my ironing board to protect it. 

015threadcatcher.jpg

Peel the paper backing off and place the fabric over your base.

016threadcatcher.jpg

Pull the long sides tight and tape in place temporarily.  

017threadcatcher.jpg

Iron the fabric to the top of the base to secure.

018threadcatcher.jpg

Trim a mitre into the 4 corners to reduce bulk. Then fold the bottom up. 

019threadcatcher.jpg

Iron to secure, then repeat with the top flap, be sure to miss the tape on the sides. Remove the tape and Iron the long sides in place. 

020threadcatcher.jpg

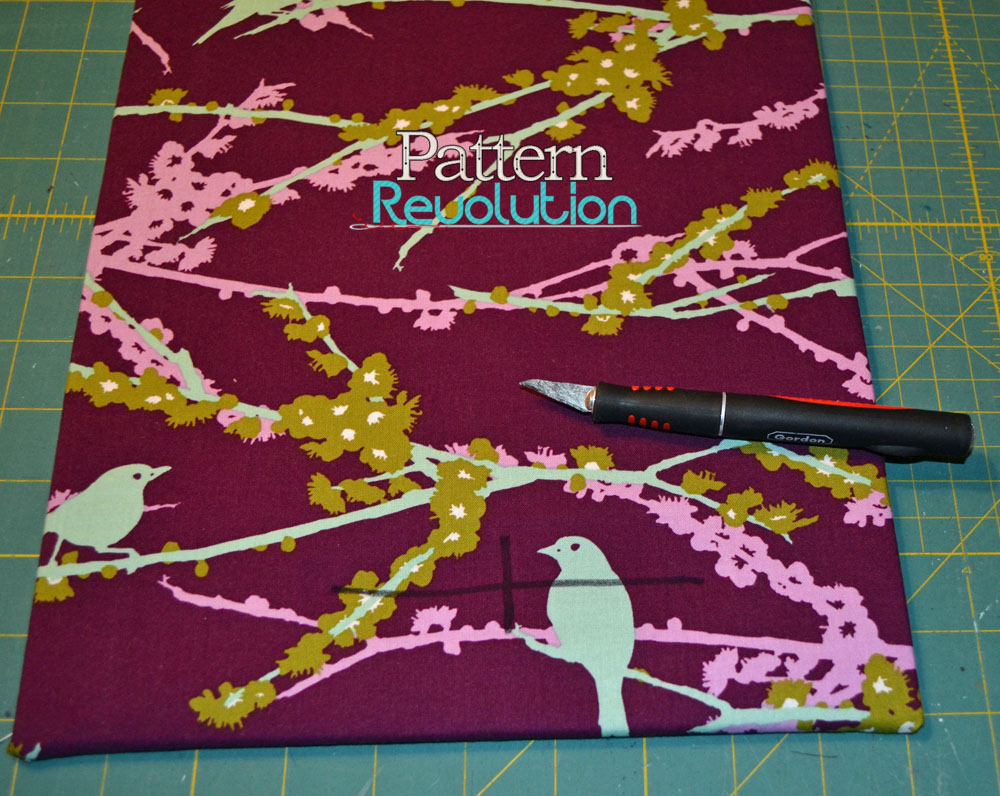
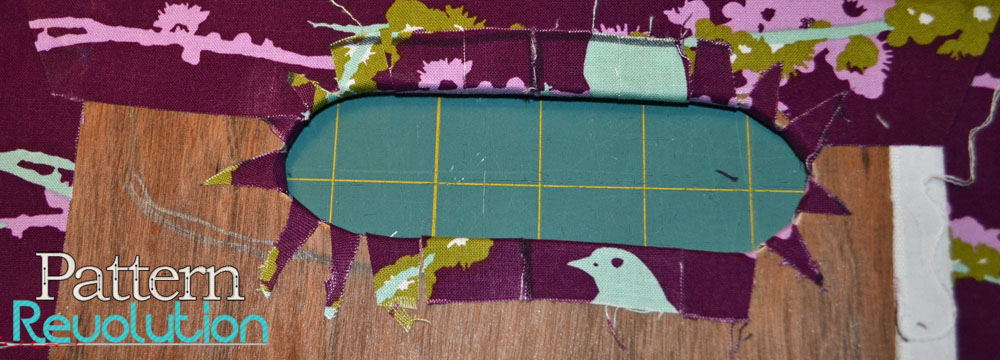
Mark the width and height of your hole and use an excto knife to cut through the fabric. 

023threadcatcher.jpg

Trim any fabric on the backside that is covering the hole. Make several small snips all the way around and pull the fabric towards the back. 

024threadcatcher.jpg

Pull each snippet tight toward the back and iron in place. 

025threadcatcher.jpg

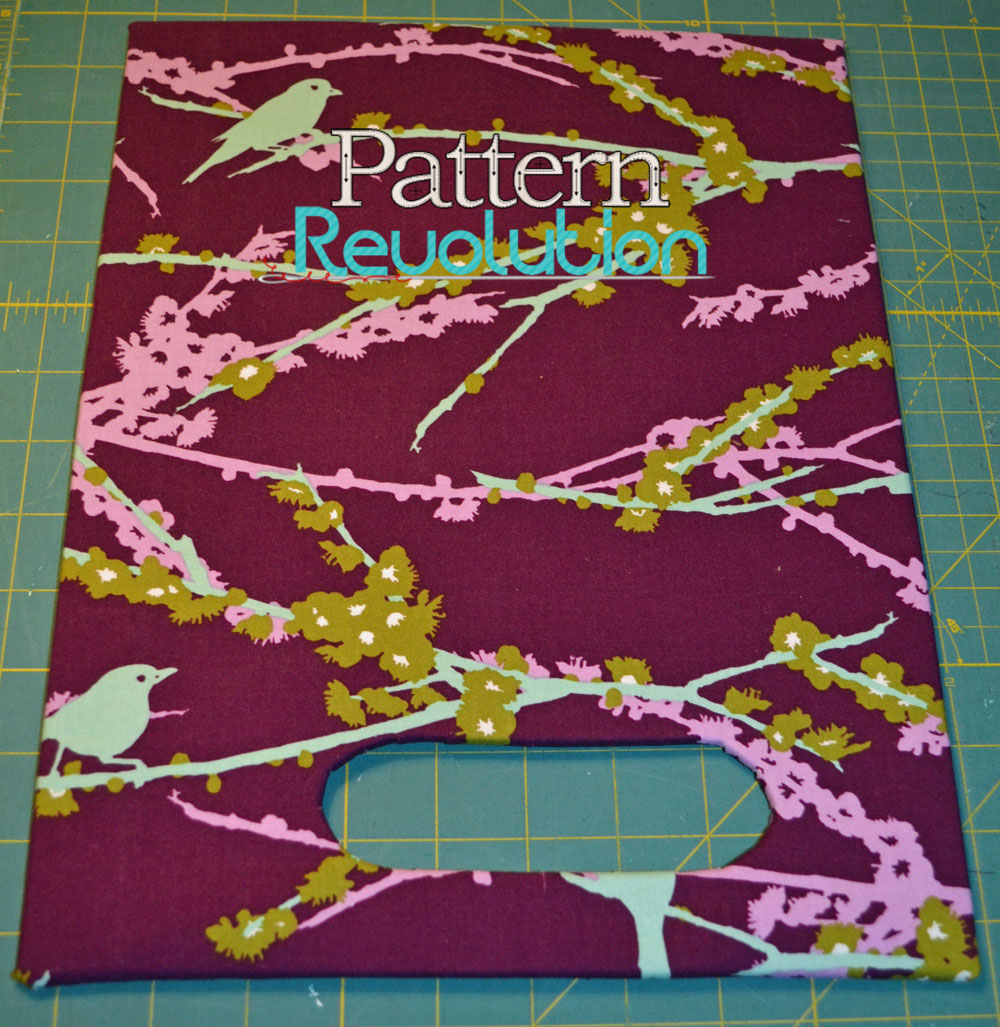
Now you should have something like this. Next, take your second fabric scrap. Cut it to 24" X 6". Fold the right sides together matching up the short sides.

026threadcatcher.jpg

The fold will be the bottom of your bag. Sew up the sides stopping 2" from the top, be sure to backstich at beginning and end. 

027threadcatcher.jpg

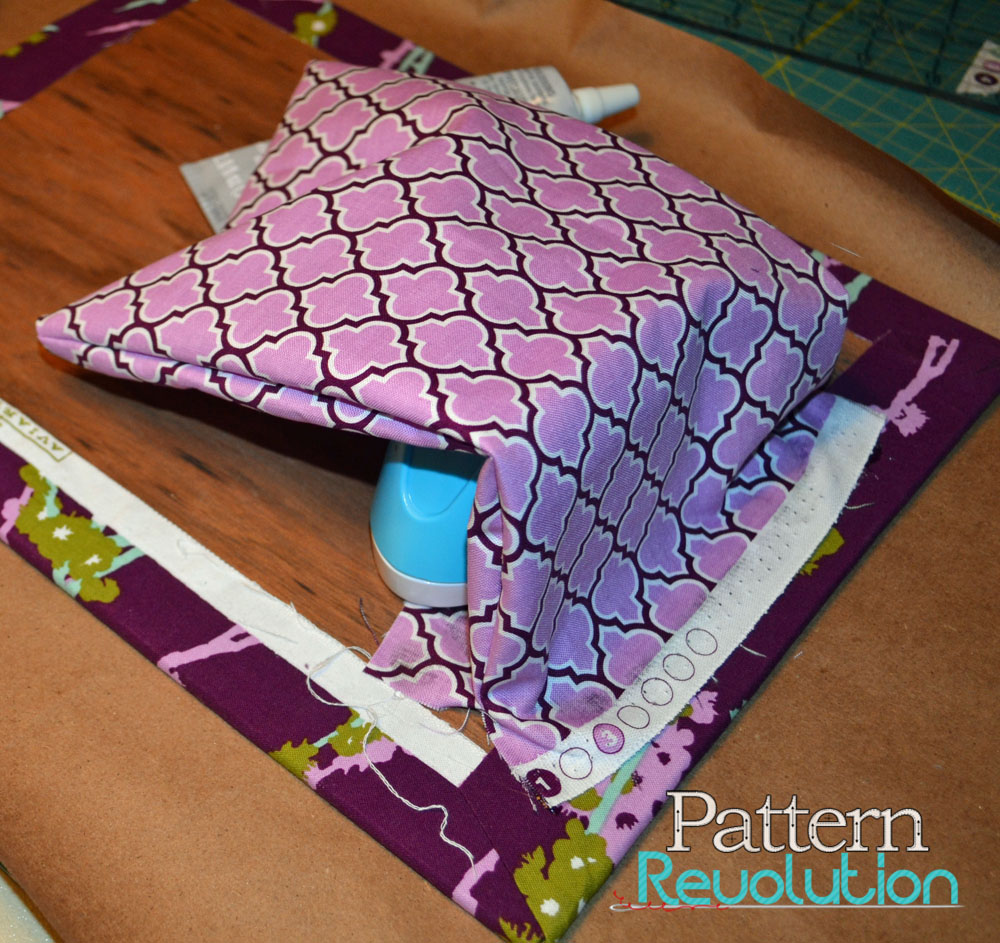
Get out you E6000, turn your bag right side out and open the bag at the side seams. 

030threadcatcher.jpg

Put your adhesive all the way around your hole. First place the top lip of the bag over the adhesive and smooth the fabric, then open and place the bottom lip over the bottom portion of the hole. 

031threadcatcher.jpg

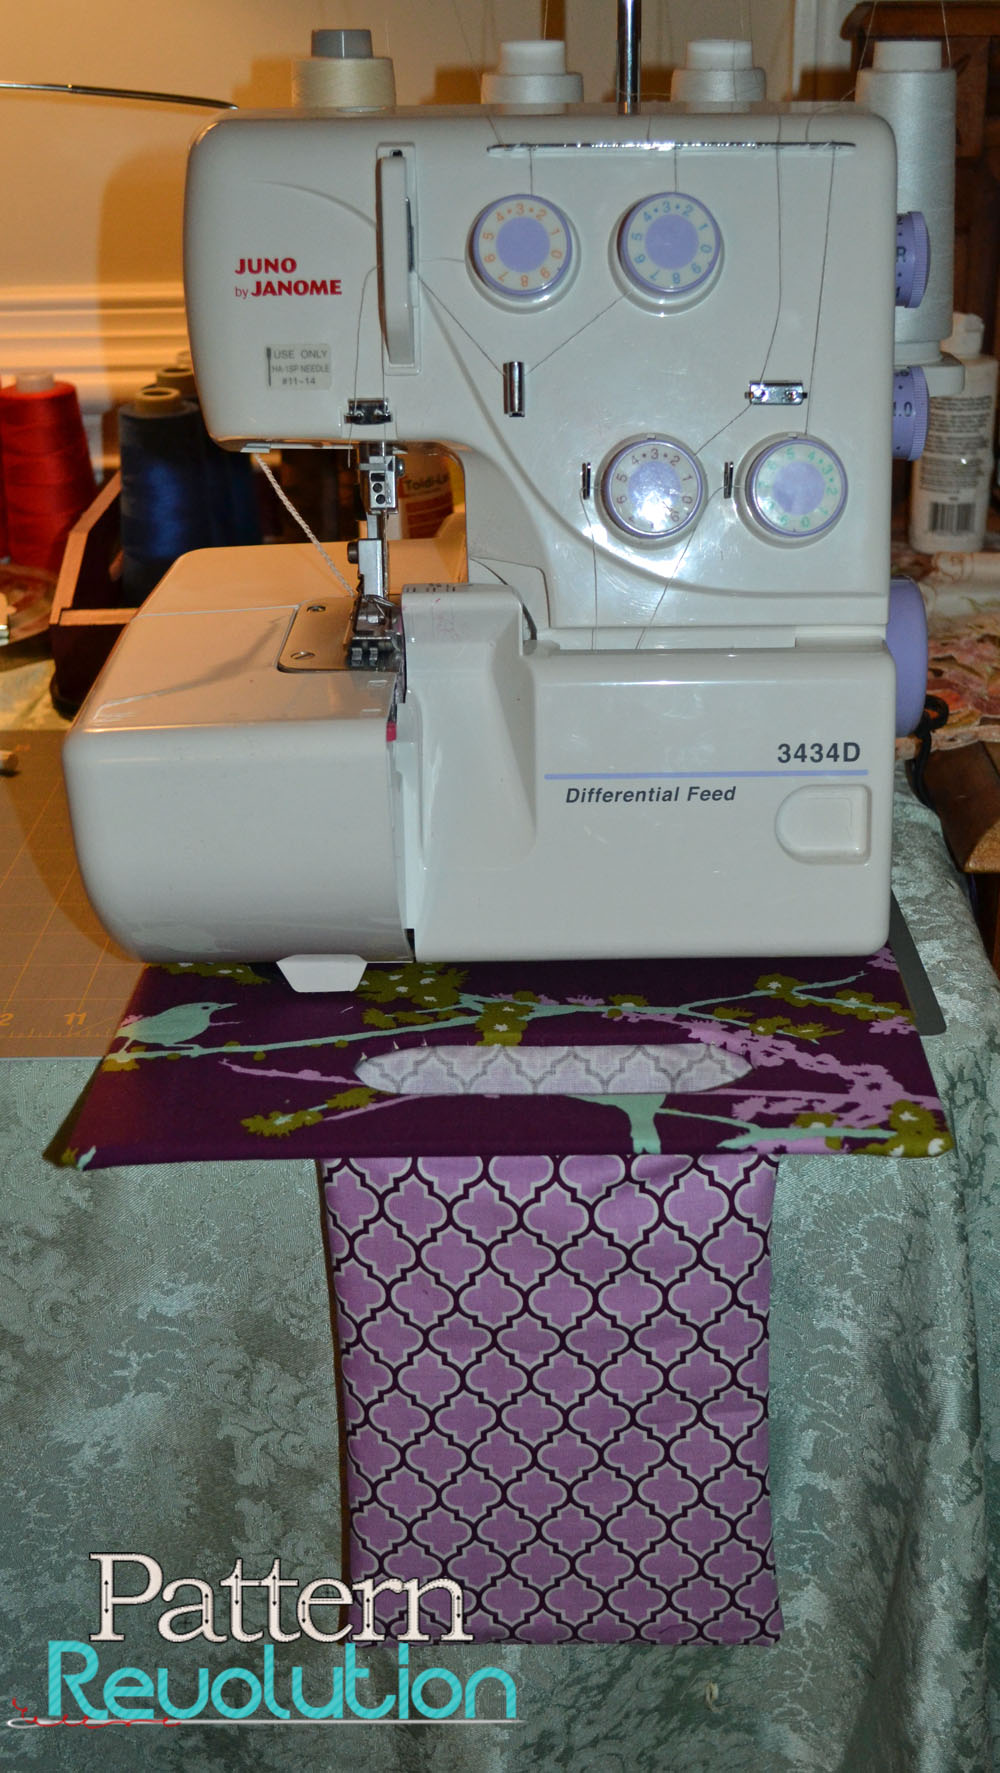
Leave it to dry. Go join your husband in the hammock, but only if it's sturdy enough for two. Come back in the morning and this is what you'll have: 

033threadcatcher.jpg

One totally awesome thread catcher!

Enjoy, and happy sewing! 

Robin

Lily Bird Studio's Kate Dress Adaptation: A Tutorial

Hey guys!  My name is Hayley and I blog over at Welcome to the Mouse House.   I was so flattered when these lovely ladies asked me to pop over and share a few tutorials for all of you. 

I was even more excited when they sent me a few Lilybird Studios patterns to try out because I had been eyeing these up for quite a long time.  Swoon!  Not only does she have amazingly cute patterns, Cecilia from Lilybird Studios is just so sweet and friendly.   I can't wait to try out more of her patterns.

For this post, I was asked to take the Kate Dress and turn it into a tunic top with pockets.  I can't even tell you how long I have wanted to try out this pattern and I wasn't disappointed.  

I was also given the pattern for the Adjustable Waist pants and I will share a tutorial another day for adding a cute little peekaboo cuff, so stay tuned for that!

Peek a boo!

This outfit is going to be perfect for when Ainsley returns to school in the fall.

Okay, let's get started on taking the Kate Dress and turning it into a tunic top with pockets.

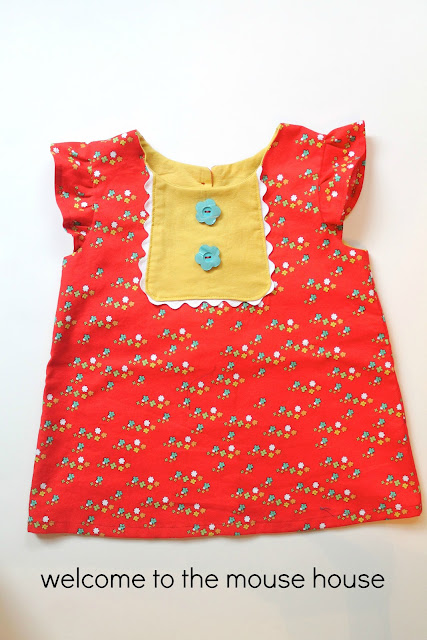
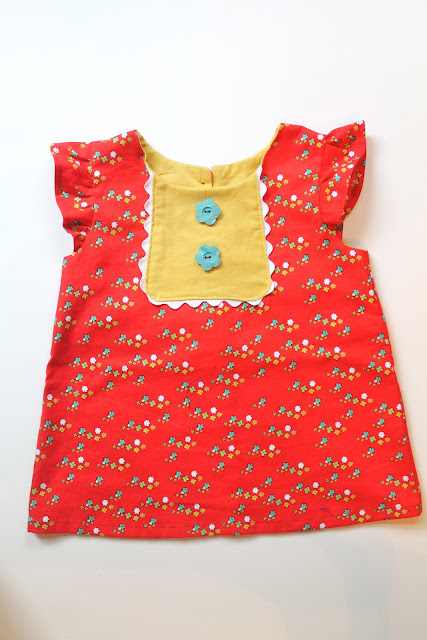
Start with this… super adorable top...

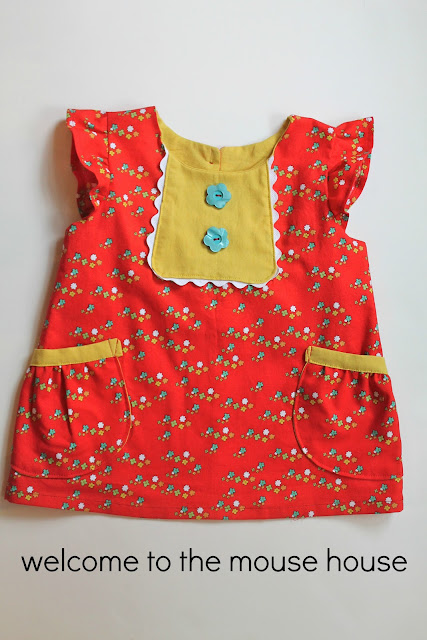
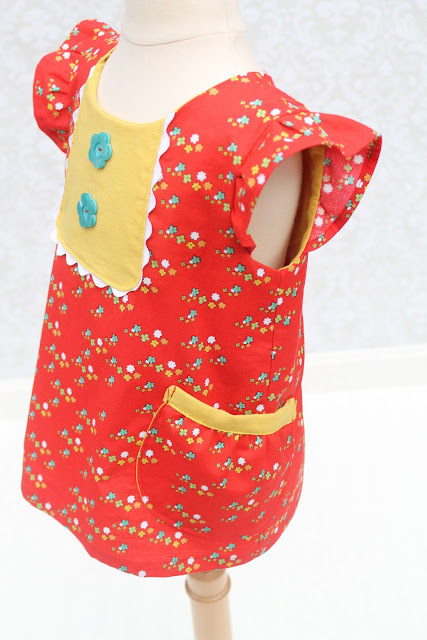
and end up with this… extra adorable top with pockets!

   Print out your pattern.   Grab a shirt from your child's closet and lay it on top of the pattern piece.  Pull the shirt 1/2 inch down from the top shoulder piece. 

(Lily Bird seam allowance is 1/4 inch) 

You are now going to make this a tunic length that hits the child around the hip area.  Cut the pattern piece 2-3 inches below the hem of the tshirt.  Double check the size by holding the pattern piece up to your child.  You will want the finished product to land at your child's hips and you will need 1 inch for hemming. 

Sew up the pattern according to the directions.  Make sure you pay attention to the 1/4 inch seam allowance ( a lot of pdf patterns tend to be 1/2 inch, so you always want to check this!)

You will end up with a super cute top!

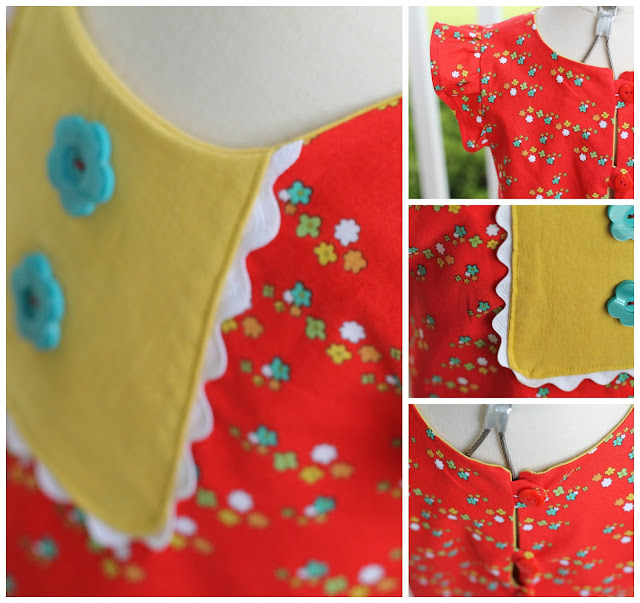
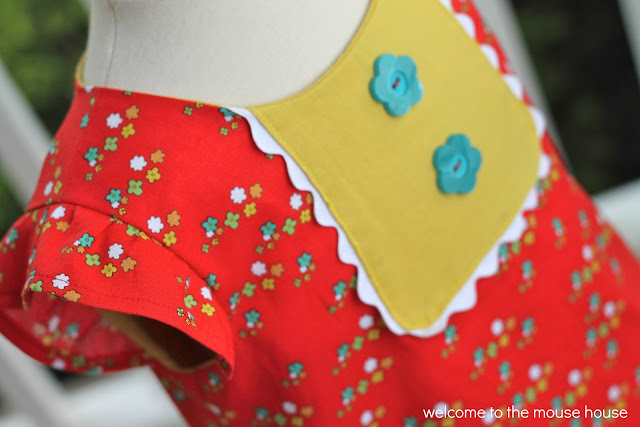
Now, I should note that I did add ric rac instead of piping and I only did 2 buttons instead of the 6 that she calls for.  These are all easy switch ups that anyone can do and they create a unique product!

Let's move on to the pockets!

These are super easy… I promise.

Print out the pattern pieces I have provided HERE.

If you are doing a size 12 months, I suggest you slightly reduce the % when printing so that they aren't giant :)  
Cut your fabric according to the pattern.

Grab a lining and a main pocket piece.

Sew them together, right sides together.  Follow the red line below.

Turn right side out and press.

Using a gathering stitch, gather the top of the pocket.

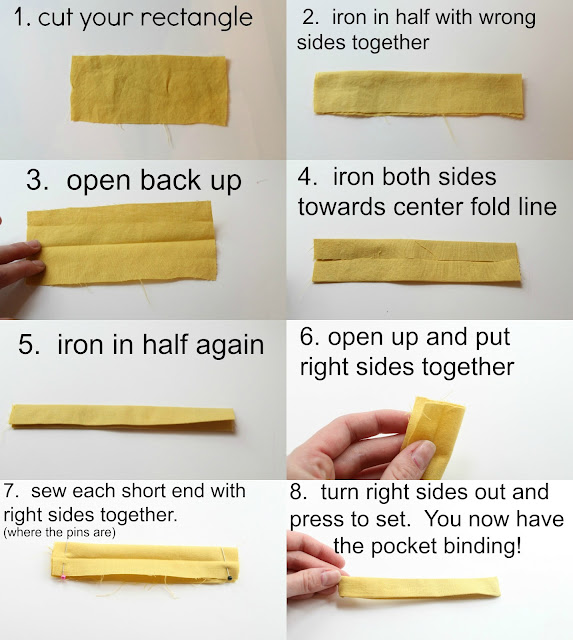
Make your pocket binding pieces 

Slide the pocket into the binding and adjust the gathering until it fits perfectly. Sew the binding as close to the edge as possible.

Sew the pockets onto each side of the tunic.  Try to angle the pockets back a bit, so that it is comfortable for the child to use.

Only sew the sides and curved edge… not the top! You want your child to be able to use it and not be all angry that you sewed your pocket shut.   My daughter would probably flip her lid if I put a pocket on her outfit and then she couldn't access it :)

Also, it is a bit hard to tell because I am just so awesome at matching up side seams ;), but I actually put the pocket about 1/3 of the way past the side seam…. Can you tell?  It puts the pocket a bit more to the side, rather than the front.  

That's it!  You now have a cute shirt with pockets

Ainsley loves loves loves it!

Win your own copy of Kate's Dress, enter the Rafflecopter below!

Free Brownie-Goose Summer Sailors Pocket Tutorial


It's an awesome day 

for 
Brownie Goose Fans!

Today Brownie Goose released the extended sizes of her uber popular and incredibly hot- this- season Summer Sailors! You can purchase the pattern HERE that ranges from 6-12mo- through size 12 girls. Or, if you already have the pattern, you can purchase the extended size upgrade only HERE for just a buck!!!


And if that isn't enough good news for one day....
Brownie Goose fan and
*****SUPERSTAR*****
Kari Steiger has written  a free tutorial forBrownie Goose and Pattern Revolutions fans
explaining how to turn those precious faux pockets into real working pockets!
Check it out below!


WHO LOVES BROWNIE-GOOSE’S SUMMER SAILORS?
  We do!!

WHO WANTS FUNCTIONING POCKETS?
 We do!!


Checking on her pine cone in her pocket 

Hi everyone, I’m Kari.  I love the Brownie-Goose Summer Sailor shorts.  In fact, it was my very first paid PDF pattern I sewed!  I quickly made a pair according to instructions.   Although I love the original pattern, my girls love to fill their pockets with treasures.  So I added pockets to my 2nd pair!  Adding pockets is actually very easy.  It’s just a matter of deconstructing the front pattern piece.  I learned about constructing pockets last year when I made my daughter a pair of Paperbag Pants by Shwin&Shwin.

After I finished my pair of Summer Sailors with real pockets, I posted a picture late (read: way past bedtime) at night on the PDF pattern group.  Within 15 minutes, I had several inquiries as to how I did it.  I quickly made a rudimentary tutorial, using just one picture and posted it.  This basic tutorial gets referenced almost every time BG summer sailors are mentioned.   The original tutorial was a bit lacking.  So without further ado,

Drum roll please………

Here is a STEP BY STEP guide showing you how to add functioning pockets to those beloved shorts (and any other pants really!):

STEP 1:   Print your pattern, tape pages together per instructions.   Trace or cut out the size you need.   (In my example, I’ll be making a 2T.)

STEP 2:  Set the BACK piece aside.  We’ll be working with both the FRONT and the FAUX POCKET pieces.  Take the FAUX POCKET piece and set it on top of the FRONT pattern piece, lining it up in the outer corner.  Trace the around the FAUX POCKET.  Cut away the traced area of the FAUX POCKET.  This is now your “new” FRONT piece.
  
"new" FRONT
                                                                                                                                                                                                                             
STEP 3:  Now we need to construct the pocket pieces.  On a new piece of paper, trace the FAUX POCKET.   Next, determine how wide and deep you would prefer your pockets.  In this example, I will be adding 2” from both the top and the bottom of the curve of the pocket.  It’s up to you to decide how big your pockets need to be.  Just be mindful that they need to fit within the “new” FRONT piece.  We don’t want any pockets peeking out! Mark your distance on your paper.  Draw intersecting lines to complete the rest of the “rectangle”.  Cut the new shape out.  (You may also round the bottom inner corner of the pocket if you wish.)


STEP 4:  Trace your shape from step 3 on a new piece of paper, making sure to mark the top to make sure the outer corner matches your original pattern. (The outer side will slope slightly as the original pattern).This will now be referred to as POCKET.  Cut out.  On the original “rectangular” piece, cut away the FAUX POCKET tracing.  This piece will now be your POCKET LINING.
          
This is your POCKET.

This is your POCKET LINING.
                                                                                                                                             
STEP 5: To review, you have 3 pieces – POCKET, POCKET LINING, and “new” FRONT.   Pin pattern pieces to chosen fabrics and cut out.  Remember, to cut a MIRROR image for the other side of the shorts.  Grab your bias tape as well.


Here is one side of the front, cut out.  Note the pins in the POCKET and POCKET LINING.  This is to remember the top of the POCKET and the right/correct side of the LINING.  Also, if your shorts are mainly white as mine are, choose a POCKET LINING that won’t show through.


STEP 6: Now the fun begins!  Take your “new” FRONT piece and your POCKET LINING piece and match the curve up wrong sides together (WST).  Take your bias tape and sandwich it around the curve.  The bias tape will hide the raw edges so there’s no need to finish those edges first.   Pin bias tape in place and sew.  Helpful hint: Sew your 4 sailor buttons on the front now.  I didn't and it made it really difficult to sew them on later.
        

STEP 7:  Grab your POCKET piece and match up the outer edges with your “new” FRONT.  Flip over.  The inner edges of the POCKET and POCKET LINING should match up perfectly.  If not, trim to match.   The POCKET and POCKET LINING should be right sides together (RST).  Pin the inner edges and sew with ¼” seam allowance.   Finish edges in the manner you desire (serge or zigzag to prevent fraying).


STEP 8: Baste the POCKET and POCKET LINING to the “new” FRONT on the top and outer edge to prevent shifting.
                                                
Baste 
Close up of top basting
Close up of bottom basting
STEP 9: Repeat steps to construct the other front side of the shorts.  Now, you have real pockets!  Don’t you just love them?!   Please note:  I learned the hard way by not having the buttons on yet.  Don’t make my mistake!      


STEP 10:  Continue the pattern as normal.  Be careful when sewing around the crotch.  Make sure your pocket doesn't get caught under the needle! (I speak from experience…) 

STEP 11:  When you finish, make sure you take a picture!  They truly are works of art.  Can you stand the cuteness?!

In the great words of Amy Norris…. “YAHOOOOOOS!”

Clutching the pine cone in her pocket
     
 I've paired Miss A’s Summer Sailors with the Jill Frock.

She loves the outfit as much as I do!  She told me “Thank you, thank you, thank you for my new outfit, Mommy! I’m so proud of you!”

Love this free tutorial? Share it with your friends on Facebook and pin it on Pinterest so all the world can share in the awesomeness that is Brownie Goose Summer Sailors (with real pockets!).