How to change your own serger blades
/There I was, happily serging along, trying to get one more outfit done before leaving for vacation, when all of a sudden I heard that dreaded sound, "crunch!" Ugh, I ran over a pin, AGAIN. It doesn't happen often, but when it does, it isn't pretty...you probably know exactly what I mean. This time it was especially ugly, because instead of using my awesome ultra thing quilters pins, I had a few cheapies mixed in there, and they don't snap right in half like the good ones do, in fact, my machine came to a grinding halt and my handwheel was jammed. BAD. After a few cuss words and a sprained thumb, I was able to work it free and remove the carcass that was jamming my machine, but it just wasn't cutting the same anymore. GREAT! I nicked my blade.
At first I wasn't quite sure what to do. I called my local dealer, $100 for service and new blades. Ugh, there goes my vacation money! After taking a closer look at my machine, I decided to use Google to find a part number because I can remove 3 screws on my own and I knew the parts had to be available somewhere. I stumbled upon Ken's Sewing Center and after asking around in some of my online sewing groups, I found that they had a great reputation, so I decided to give them a try. Their website was easy to navigate and I easily found just what I needed to fix my problem. Within a week, I got my parts in the mail and set to work. I took less than 10 min to change my blades, saved me a lot of money doing it myself, and my machine is as good as new!
Want to learn how?
The first thing you need to know is when to change your blades. Each manufacturer has their own recommendations for each model, but to be perfectly honest, I was LONG overdue according to my User Manual and my machine was working just fine. So, how do you know when it's really time? Well, the same way you know when a pencil needs sharpening, or your scissors are dull, it's just not the same! If you can't cut through multiple layers with ease, if your machine keeps jamming, or your scrap keeps getting caught up in your threads, it's time to change blades.
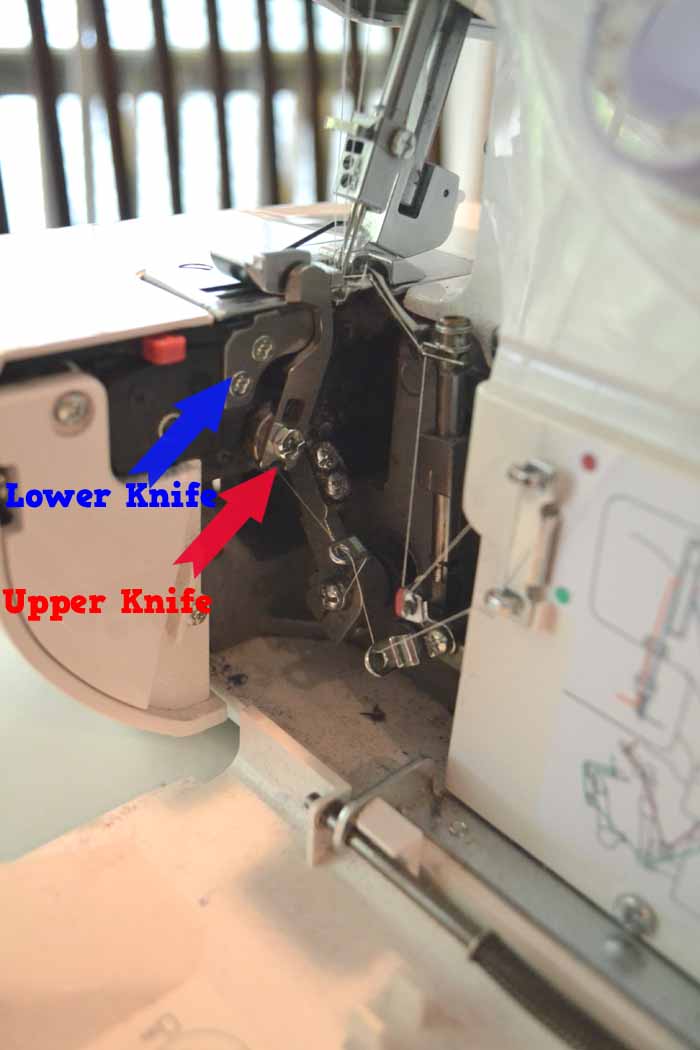
Next you need to get friendly with your machine. I have a Janome 3434D. Take a look at your blades, they may look different than mine.
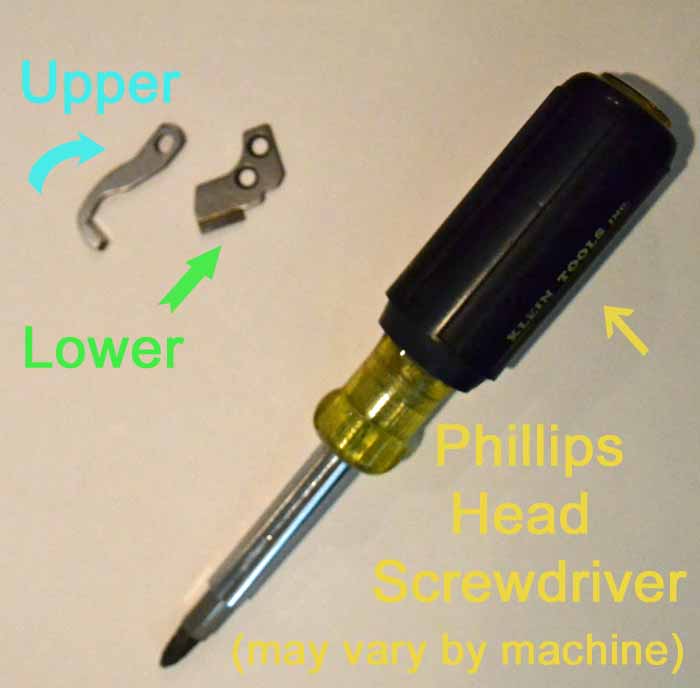
Next, get your tools and spare parts ready.
Make sure your machine is off and unplugged. Disengage your upper knife and find the screws for the lower knife.
Yes, it really is that easy! I swear, it took less time to change the blades than it takes to thread the darn thing! Before you turn it on and start serging, turn the handwheel slowly several revolutions to check to see if you have properly installed the blades.
You don't want your upper knife too tight or too loose, and it has to be at the correct angle to the lower blade and foot plate. Once you've made a few revolutions by hand and all is well, turn on your machine and test it out on some scrap, make adjustments if needed.
I hope you found this tutorial to be helpful! Be sure to share it with all your sewing friends, and definitely to go "Like" the Ken's Sewing Center Facebook Page, and let them know Pattern Revolution sent you! They offer sweet deals on a regular basis on everything from sewing machines to accessories. Sign up for members only specials HERE. You can get 10% off an order now using code: k1213, and you can also get free shipping on orders $39.99 and over. SWEET!


