Hello, for those of you who don’t know me, I am Stacey, owner and designer of Hailey Bugs Closet. I have been around for a few years and initially started out by selling finished clothing and then eventually creating my own PDF patterns to sell. I love every aspect of sewing and the design process that goes into it, BUT even when it is all said and done, and I have a perfectly polished pattern or a gorgeous outfit I am ready to list beautiful pictures can make or break that sale. I must say, when I look back at my first photos when I started out on Etsy I cringe, I have NO CLUE how in the world I sold a thing. I would like to share a bit of what I have learned over the past 3 years about boutique photography, I do take some of my own pictures but I also send out product as well. There are benefits to both of these ways in regards to your shop and I will explain why as well as give some tips and techniques on how you can improve the pictures of your products.

When your customers are browsing through websites and Etsy photos are the first thing they see, they represent you and your product. You may make gorgeous items, and they are sewn together beautifully, however, if your photos don’t show that same quality their eyes will be drawn elsewhere. This is why it is extremely important to make sure your photos shine and represent the product you are selling. If you do not have the time to sit down and play with your camera, and no you don’t need to have a fancy shmancy DSLR camera, although if you do have one it would be a great time to pull it out and learn how to take it off Auto.

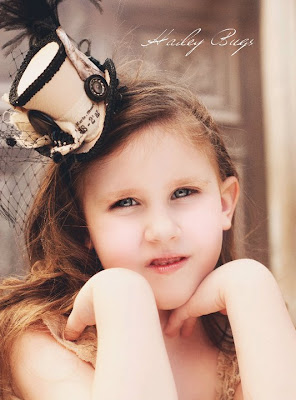
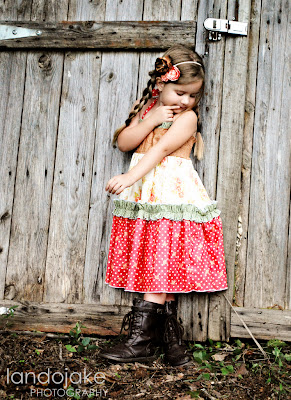
Thankfully, if you don’t have time to photograph your products or the thought terrifies you there are other options. You can get in touch with some photographers, and there are many out there, you can see their work on lots of Facebook pages and ask them if they are trading pictures for product. Most of them do if they have time. You will need to make sure you are both on the same page as to what is expected. How many pictures you will be receiving. I ask for a minimum of 3, I prefer 5 and there are some incredible ones who send me 10 and I get to pick and choose what I add to my listings. Not only do you get incredible pictures, there is another bonus to using a boutique photographer with a large following, ADVERTISING! Most of them will post the pics of the sessions with your outfits and accessories. Just ask if this is their policy. They will also share your name and tag your shop driving new fans right to your pages. I do recommend doing a little research to make sure they are on the up and up, so far I have been pretty lucky with this. I have some faves that I have gone to several times. Jennifer with Forty Toes Photography takes gorgeous pictures and her fan following is HUGE! She will work for you and is a doll to work with. However, she is incredibly busy so if you want to use her get in touch with her and see what her schedule is. I also love Land O’ Jake’s work. The pictures you receive will be top quality, her model is a real cutie and she has an eye for using props that do not distract from the items she is photographing. Her colors pop and she tries to coordinate other boutiques to add accessories to complete the look!
 |
Forty Toes
|
 |
| Land O Jake |
If you don’t want to send out your product for whatever reason there are some things you can do yourself to make sure that your products pop and look their best. For starters practice with your camera. Read up on the manual or if you don’t have one look it up online. It is essential to take it off Auto and start using a Manual mode or an Apeture mode. Even point and shoot cameras have these features. Products look best when taken in natural light, set up a small staging area near a well lit window or look online and create a soft box. Heck, go outside and photograph your subject, especially if you are using children. It helps them to relax and gives you more natural looking pictures. The best times of the day to photograph is early in the morning, about an hour after sunrise and in the evening about an before sunset. This is called the “golden hour” as your light gives a warm golden glow. Don't have your subject(s) look directly into the sun, have their backs to the sun and use indirect light. You don't want squinting eyes in the pictures. Additionally make sure that your clothing or accessory is visible and you can clearly see the product that is on display. Talk to the kids, interact with them and get natural smiles. These always look best, or catch them playing, just make sure you are getting the product in the shot. Additionally keep them out of dappled light, you know how you get shade under a tree but there is some sun sneaking in and you have dark and light areas on your subject, you don't want that. Take LOTS of pictures, you will toss most of them out. But the ones you do use you now need to edit. You can buy software, Photoshop Elements is relatively inexpensive and has a learning curve. But, you can purchase photography actions to help make your pics pop. There are several free services as well. Like Gimp and PicMonkey. Play around with the contrast and see if you can make the colors pop a little, maybe you need to brighten it up a bit or darken it a little. These websites will help you. Add a logo, even if it is simply your business name typed over the photo, it helps to protect your investment. Here are a couple of my pics, one taken before cropping and editing and then after.....see what a difference a few minutes worth of work to the pictures make?


These were taken inside and using a piece of scrapbook paper as a background. Get creative with what you use when you photograph as well.
These were taken outside, before sunset with the sun in the background behind the trees. Giving great light, with some editing and cropping the product really pops. 
Thank you so much for giving me the opportunity to blog about boutique photography and share a little bit of what I do with my pictures. I personally use a Nikon D80 and I love it. I do use PhotoShop Elements 9 but that can be purchased for less than $100, and they have 11 out now too. Although at this time I don't see any reason for me to upgrade. You can download a free sample from the Adobe website and see how it works for you. You get a 30 day trial at no cost! Plus there are a lot of free photoshop actions you can download and try out as well. I take about 60% of my own photographs, however, I do ship out product as well, I like the advertising, and the fact I don’t have to invest anymore hours into that product. Plus having a variety of models is great! I hope I was able to help out a bit in regards to what looks best for product photography and how you can achieve amazing results.
Thanks Again
Stacey Mann
Hailey Bugs Closet


