Tutorial: Layering Love - Adding an Overlay to a Circle Skirt

Tutorial: Layering Love - Adding an Overlay to a Circle Skirt

So, as we established yesterday, Valentines day may not be my favorite holiday; but, that doesn't mean I don't want my baby girl to have something special for the day ;o)  It does mean though, that I want that item to be able to worn for more than JUST V-day.  And while I want it to be adorable, I also want it to be a fairly easy sew.

Read More

Tutorial: Turn the Ruby Jeans Closet Gwedolyn into a FROZEN Cape

Tutorial: Turn the Ruby Jeans Closet Gwedolyn into a FROZEN Cape

Raise your hand if you have seen the movie FROZEN - raise it again if you have seen the movie more than once - keep it up if you burst into the refrain of 'Let It Go' at completely inappropriate moments.... Yep, my hand is still up!  This movie has captured my heart and the hearts of many other little girls around the world.  Mama's everywhere are scrambling to make their daughters one of the 'looks' of Anna or Elsa, and Designers have been working their tails off to bring patterns inspired by the movie to the market.

Read More

Tutorial: Upcycled Leg Warmers for Valentines Day

Tutorial: Upcycled Leg Warmers for Valentines Day

Hold onto your socks!!!  Today we have the ever talented Kara sharing a great tutorial for easy upcycled leg warmers.  Add a little heart or embellishment and your holiday sewing for Valentine's Day is all set.  You may never look at all of those sweaters hanging in your closet the same way again!

Read More

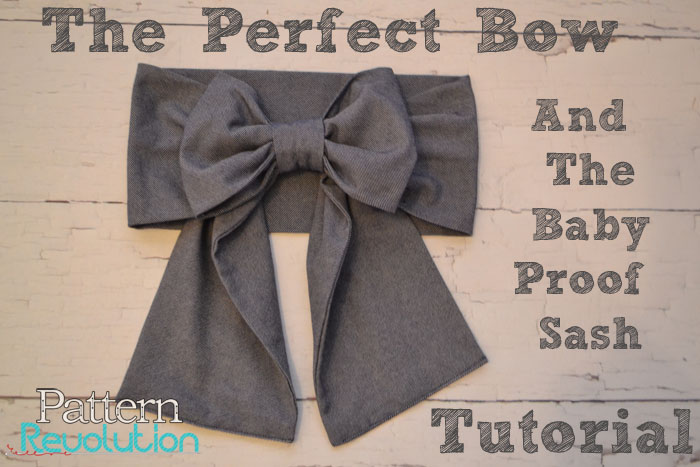
The Perfect Bow and the Baby Proof Sash Tutorial

Every morning it is a struggle to dress my feisty 2 year old. All her pretty sashes hang untouched in the closet, while the dresses they go with get worn over and over. I love the look of a pretty bow, but my baby wont hold still long enough to tie it nicely, and in the miraculous event that she does, she unties it and removes the sash a few minutes later. GRRRR!!! Tell me I'm not the only one with this problem???

And so I fiddled around in my sewing room and came up with just the right answer. 

058perfectbow.jpg

There are 3 pieces to the baby proof sash. The Bow, the Bow Center, and the Sash. 

Supplies: Sash and bow fabric, thread, sewing machine, scissors or rotary cutter, needle Kam Snaps and snap pliers. Kam snaps, by the way, are my FAVORITE things for garment closure for my crazy toddler. Fast and easy, but still secure.

Decisions, decisions....

First, you need to determine your sash length and width. Measure your child's waist while wearing the garment, add 2" for sash length.  Decide how wide you want the sash, double that and add 1/2". Cut your sash.

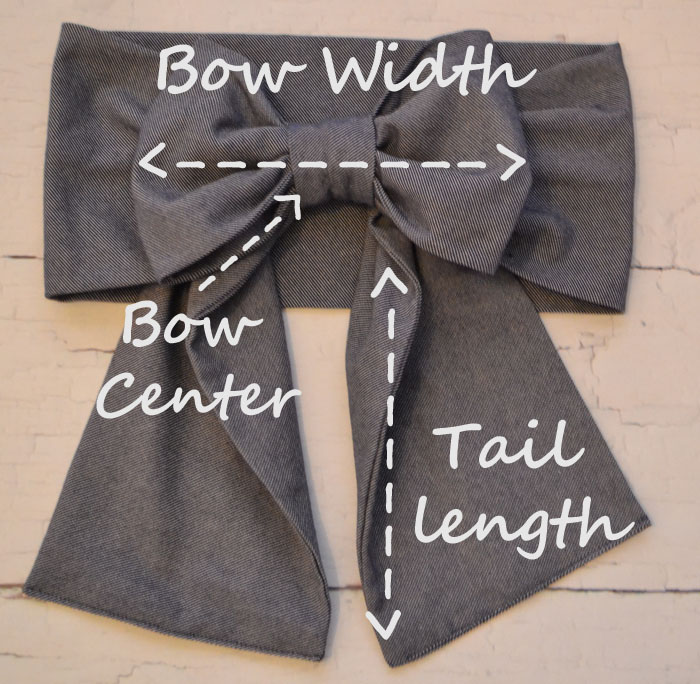
Then, you need to determine the bow width and tail length that you like.


058002perfectbow.jpg

This is all a matter of preference, and you can experiment until you find the bow size you like. Some people like big floppy bows, others like neat and tidy little bows.  The bow portion of the sash is one long strip. The width of the strip should be the same as the width you chose for your sash. The length should be the bow width x 2 plus the tail length x 2. Cut your bow strip. My bow here was 14" wide (yep, that's a big ol' bow!) and 45" long. (Tail length 13" X 2 + bow width 9.5" x 2 = 45")

Your bow center is going to be 6" long, but you must decide how wide you want your bow center to be. Just eyeball it, you really can't go wrong. Then double that number and add 1/2". Cut your bow center 6" long by width x 2 plus 1/2" . 

Making it!

Cut your sash strip and your bow strip according to the above directions, then fold right sides together along the length. 

029perfectbow.jpg
030perfectbow.jpg
037perfectbow.jpg

Set sash aside for now. 

031perfectbow.jpg

Pin bow ends closed.  Then fold your bow strip in half lengthwise with the fold on the left, matching up the ends. 

032perfectbow.jpg

Lay edge of sash on the bow width line and stitch down using a straight stitch, making sure to backstitch at beginning and end. This closes the 1 sash end and attaches it to the bow.

033perfectbow.jpg
038perfectbow.jpg
039perfectbow.jpg

Time for a tiny bit of hand stitching. 

040perfectbow.jpg
041perfectbow.jpg
042perfectbow.jpg

Time to make the bow center. 

036perfectbow.jpg
043perfectbow.jpg
044perfectbow.jpg
045perfectbow.jpg
046perfectbow.jpg
047perfectbow.jpg
048perfectbow.jpg
049perfectbow.jpg
050perfectbow.jpg
051perfectbow.jpg
052perfectbow.jpg
054perfectbow.jpg
056perfectbow.jpg
057perfectbow.jpg

That's it! You did it! Snap it on your baby girl. No tying, no nothing. Snap and go! 

058001.jpg

Lily Bird Studio's Kate Dress Adaptation: A Tutorial

Hey guys!  My name is Hayley and I blog over at Welcome to the Mouse House.   I was so flattered when these lovely ladies asked me to pop over and share a few tutorials for all of you. 

I was even more excited when they sent me a few Lilybird Studios patterns to try out because I had been eyeing these up for quite a long time.  Swoon!  Not only does she have amazingly cute patterns, Cecilia from Lilybird Studios is just so sweet and friendly.   I can't wait to try out more of her patterns.
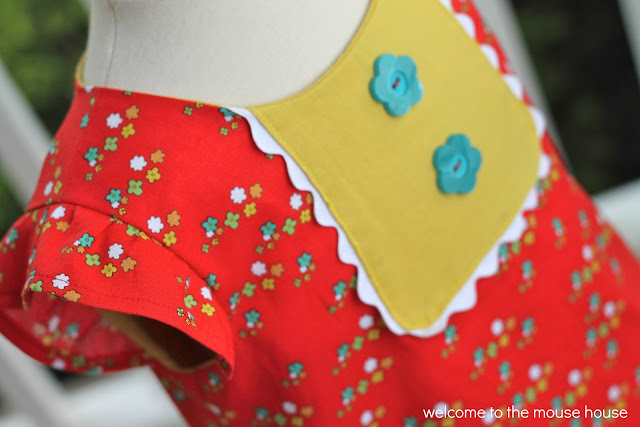
For this post, I was asked to take the Kate Dress and turn it into a tunic top with pockets.  I can't even tell you how long I have wanted to try out this pattern and I wasn't disappointed.  

I was also given the pattern for the Adjustable Waist pants and I will share a tutorial another day for adding a cute little peekaboo cuff, so stay tuned for that!

Peek a boo!

This outfit is going to be perfect for when Ainsley returns to school in the fall.

Okay, let's get started on taking the Kate Dress and turning it into a tunic top with pockets.

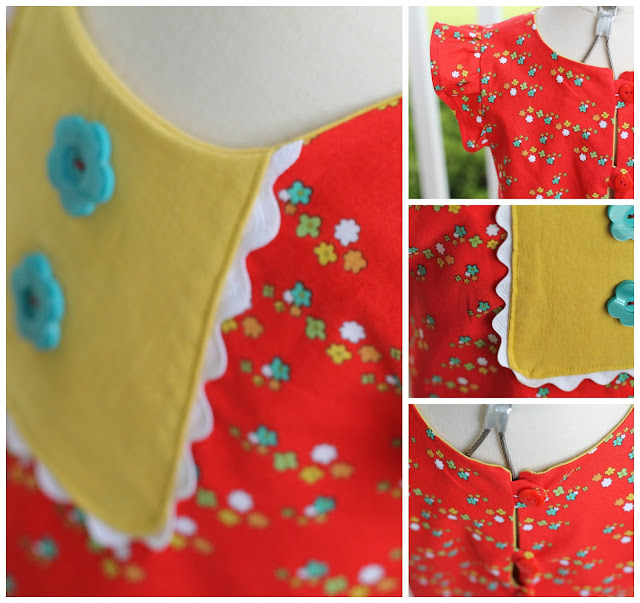
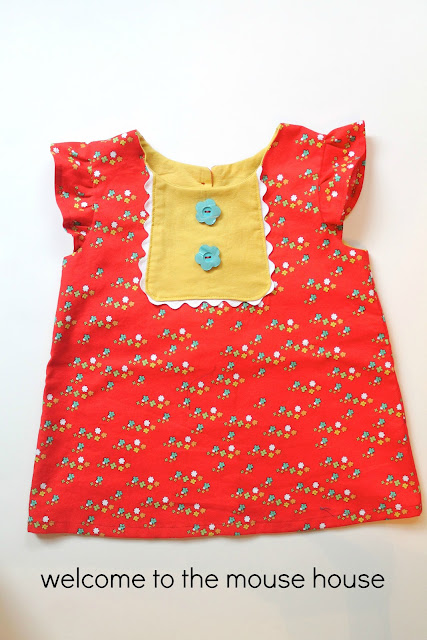
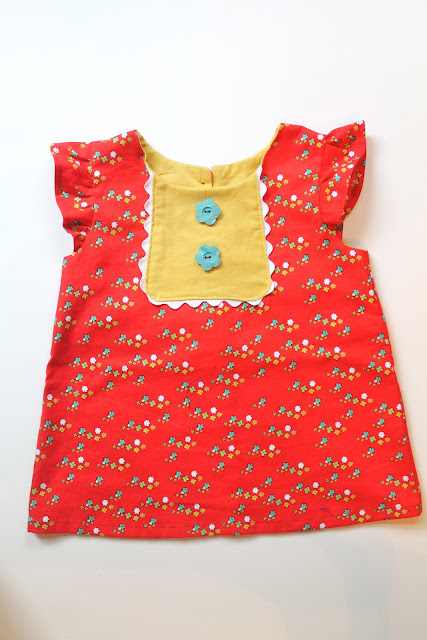
Start with this… super adorable top...

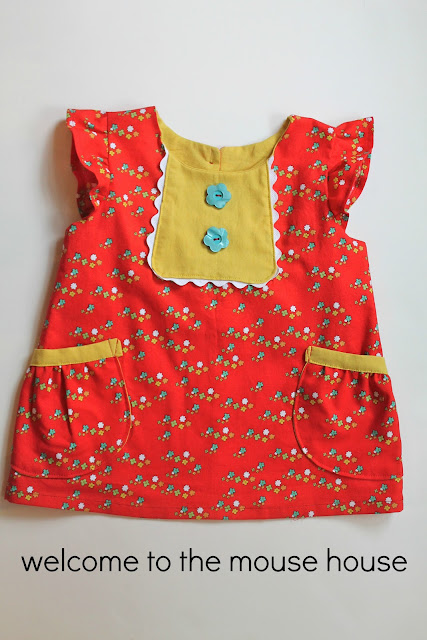
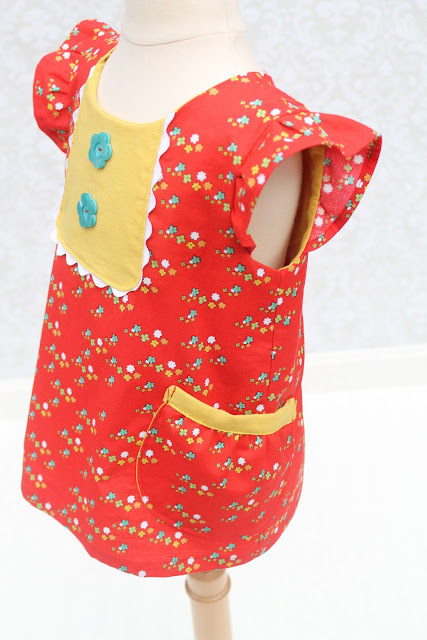
and end up with this… extra adorable top with pockets!

   Print out your pattern.   Grab a shirt from your child's closet and lay it on top of the pattern piece.  Pull the shirt 1/2 inch down from the top shoulder piece. 

(Lily Bird seam allowance is 1/4 inch) 

You are now going to make this a tunic length that hits the child around the hip area.  Cut the pattern piece 2-3 inches below the hem of the tshirt.  Double check the size by holding the pattern piece up to your child.  You will want the finished product to land at your child's hips and you will need 1 inch for hemming. 

Sew up the pattern according to the directions.  Make sure you pay attention to the 1/4 inch seam allowance ( a lot of pdf patterns tend to be 1/2 inch, so you always want to check this!)

You will end up with a super cute top!

Now, I should note that I did add ric rac instead of piping and I only did 2 buttons instead of the 6 that she calls for.  These are all easy switch ups that anyone can do and they create a unique product!

Let's move on to the pockets!

These are super easy… I promise.

Print out the pattern pieces I have provided HERE.

If you are doing a size 12 months, I suggest you slightly reduce the % when printing so that they aren't giant :)  

Cut your fabric according to the pattern.

Grab a lining and a main pocket piece.

Sew them together, right sides together.  Follow the red line below.

Turn right side out and press.

Using a gathering stitch, gather the top of the pocket.

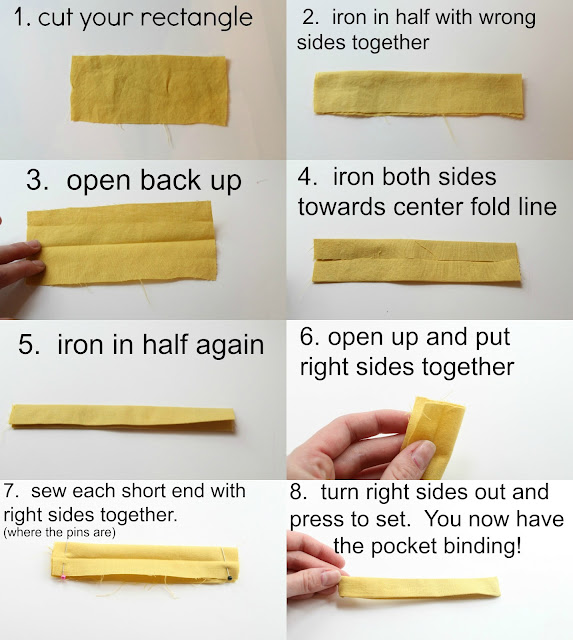
Make your pocket binding pieces 

Slide the pocket into the binding and adjust the gathering until it fits perfectly. Sew the binding as close to the edge as possible.

Sew the pockets onto each side of the tunic.  Try to angle the pockets back a bit, so that it is comfortable for the child to use.

Only sew the sides and curved edge… not the top! You want your child to be able to use it and not be all angry that you sewed your pocket shut.   My daughter would probably flip her lid if I put a pocket on her outfit and then she couldn't access it :)

Also, it is a bit hard to tell because I am just so awesome at matching up side seams ;), but I actually put the pocket about 1/3 of the way past the side seam…. Can you tell?  It puts the pocket a bit more to the side, rather than the front.  

That's it!  You now have a cute shirt with pockets

Ainsley loves loves loves it!

Win your own copy of Kate's Dress, enter the Rafflecopter below!

Tutorial: Adding Extreme Ruffles to Your Leggings

Plain leggings are perfectly fine, but sometimes you just want ruffles and LOTS of them ... like EXTREME ruffles. 

00-ExtremeRuffles.jpg

If you don't have a leggings sewing pattern yet, you will LOVE the Ruffle Leggings pattern from Jocole  which covers sizes newborn through 14 and includes the dolly size.  The Ladies Basic Leggings covers sizes XS through XXXL.  They both include full length, capri length and short length and can be made with or without euro ruffles along the hem.

Back to the extreme ruffles ... this is a different variation and you are going to LOVE it.  These are super cute leggings that your sweetie won't ever want to take off. 

ExtremeRuffles-01.jpg
1)  First you'll need to measure the bottom of your leggings.  Mine were 4 inches

1)  First you'll need to measure the bottom of your leggings.  Mine were 4 inches

2)  Cut strips 4 times whatever your measurement was in step 1.  Example:  my measurement was 4 inches ... so my strips were 16" long.  I cut 2 that were 5 inches wide, 2 that were 4 inches wide and 2 that were 3 inches wide. ​

2)  Cut strips 4 times whatever your measurement was in step 1.  Example:  my measurement was 4 inches ... so my strips were 16" long.  I cut 2 that were 5 inches wide, 2 that were 4 inches wide and 2 that were 3 inches wide. ​

​3)  Sew each strip into a loop.  I used contrasting thread only so you would see it better in the pictures.

​3)  Sew each strip into a loop.  I used contrasting thread only so you would see it better in the pictures.

​4)  Layer each loop on top of the others.  I started with the widest and ended with the narrowest.  I also made the seam allowance on the widest strip sandwiched between the middle strip.  This is so when the ruffles a…

​4)  Layer each loop on top of the others.  I started with the widest and ended with the narrowest.  I also made the seam allowance on the widest strip sandwiched between the middle strip.  This is so when the ruffles are sewn onto the leggings the seam allowance won't be on the outside.

​5)  Stitch a line of basting stitches through all the layers, down the middle of the loops.

​5)  Stitch a line of basting stitches through all the layers, down the middle of the loops.

​6) Mark the loops into quarters, and your clear elastic.  I like the leave about 2" on both ends of the clear elastic, then you'll need to mark half of whatever your length from step 1 was (example mine was 4" ... so my marks were 0", 2", 4", 6" an…

​6) Mark the loops into quarters, and your clear elastic.

I like the leave about 2" on both ends of the clear elastic, then you'll need to mark half of whatever your length from step 1 was (example mine was 4" ... so my marks were 0", 2", 4", 6" and 8")  I just use a regular ballpoint pen and draw directly on the clear elastic.

I tried including it in the picture but it was SOOOO hard to see.

​7) Gather ruffles with clear elastic and a zigzag stitch.  For full instructions please click here.

​7) Gather ruffles with clear elastic and a zigzag stitch.  For full instructions please click here.

​8)  Using a zigzag stitch stitch the ruffles on the RIGHT side of the leggings hem (i did i about 1/2" above the edge).  

​8)  Using a zigzag stitch stitch the ruffles on the RIGHT side of the leggings hem (i did i about 1/2" above the edge).  

IMG_0885-cropped.jpg