
NYNU: Getting Stuck on Notions
/Taking our notions to the next level with outside of the box thinking and some Heat Transfer Vinyl. Rachel may not have been vinyl-ing long, but she sure known how to make things awesome for her kids!
--------------------------

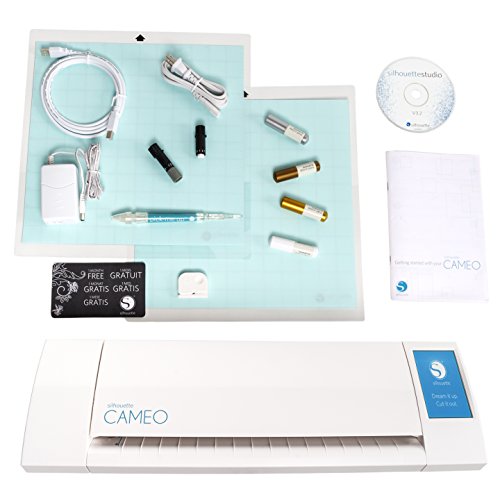
Confession time: I’ve had my Silhouette Cameo for nearly two years, and until recently I’d only used it to cut freezer paper stencils. I know, such a limited use of that machine! I love stenciling, but I found myself limited to designs that didn’t have too many tiny bits or small/thin fonts. It was time for me to gather my nerve and jump into heat transfer vinyl!
What took me so long??! It’s so much fun - if you’re anything like me, you can’t let a plain tee sit in your kiddo’s drawer for very long. It’s just BEGGING for embellishment. And heat transfer vinyl (HTV) is the perfect answer for kids of all ages. I’ve embellished onesies for my niece and as newborn gifts, and vinyl-ized tees are great for grown-ups too. Hello, they’re everywhere - just ask Pinterest if you don’t believe me!


Here are a few tips and tricks I’ve picked up along the way that were helpful as I dove right in, and lots of photos with examples of some projects I’ve done recently. There are TONS (and tons and tons) of blog posts and pins about using HTV, and my favorite resource so far has been Silhouette School . She’s got great intro posts for new users, tons of troubleshooting suggestions, and lots of helpful tips too.
I know lots of folks swear by using a heat press to adhere their vinyl, but I’ve been using my iron (dry and on super high heat) so far with good results. (As in, my kids’ clothes have been through several wash/dry cycles and none of the vinyl has peeled up at all.) I bought one of these Teflon sheets to place in between the fabric and my iron, which helps protect the fabric while allowing the vinyl to adhere under appropriately high heat settings. I even applied vinyl to Supplex nylon for my daughter’s dancewear without a problem!


I currently use a Rowenta Focus iron, which gets nice and hot - when I’d tried using HTV once before, I was still using my decade-old Black and Decker iron and I couldn’t get the vinyl to stay on well since I couldn’t get my iron nice and hot. Make sure to apply a good bit of pressure as you press down, too. That also helps the vinyl adhere. If you’re set on getting a heat press, make sure to check your local Craigslist, since there are often presses posted for sale there. If you’re cutting words from your vinyl, make sure to flip/reverse the image in your vinyl cutter before you cut it - it’ll be the mirror image when you put it onto your item and you want to make sure it’s not backwards!

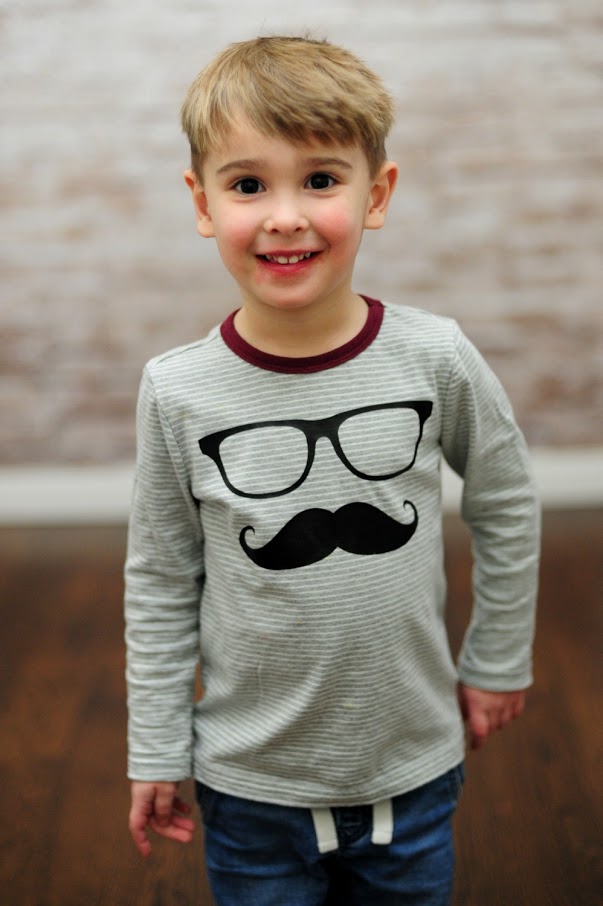
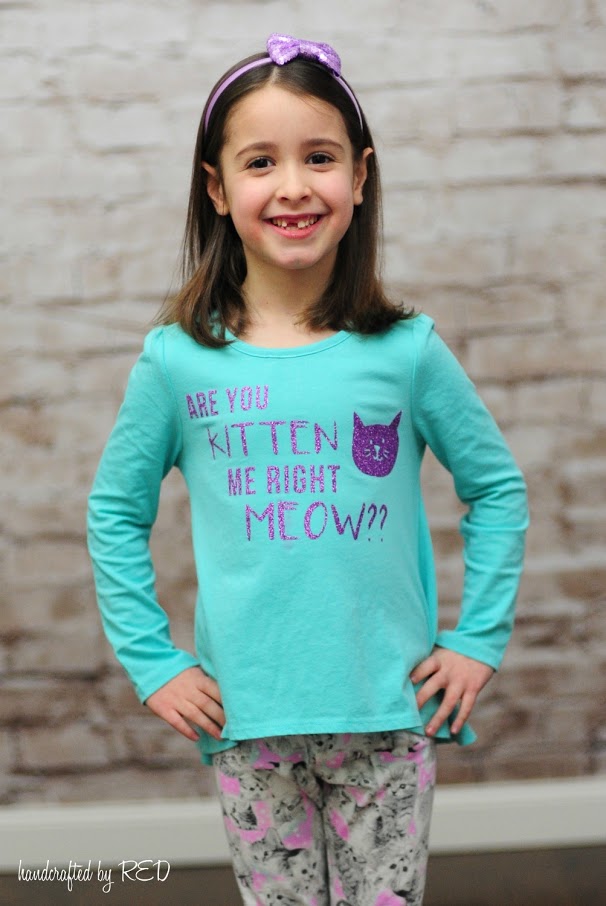
The solid vinyl is easiest to use and also to weed, which means taking out all of the little bits around and inside your design that won’t be included in the transfer (I have the weeding tool from Silhouette but you can also use an Exacto knife). I recommend starting with a more basic design that doesn’t have lots of teeny pieces - the big glitter bow was one of the first things I cut from vinyl for Miss P and I love the look on her tunic (it’s a Lil LDT from Love Notions Patterns). The glasses and mustache on my little guy’s tee was a nice and easy design, too. Both of those designs came from the Silhouette Design Store. I’ve purchased lots of designs there (they’re inexpensive - around $1 each - and they have lots of great sales weekly), and I’ve designed some of my own. You can use the fonts on your computer (download lots of fun freebies at www.dafont.com) to design text for your vinyl, and you can use the “Trace” feature in your cutting software to make a cut file from silhouettes or other images that you find online.


You can also buy designs from independent designers. One of my favorites (and a fun sewing friend, too) is Katy McKinley of Handmade Escapade - her designs are awesome and reasonably priced, especially considering she includes multiple formats. And they cut beautifully, too - from purchase to cutting to weeding and ironing, this “I will change the world” tee took me less than a half hour. I used a ready-made tee from Children’s Place and my guy’s spring wardrobe is well on its way! The ivory onesie for my niece is from Old Navy. (Check stores like Children’s Place, Old Navy, and Target for great clearance finds; I love to stock up on blank tees to use for things like this.) I can’t wait to do one of these in red, white, and blue for election season!

As a gift to PR readers, Katy has generously offered us a coupon code to use this weekend for any of the graphic designs in her shop. Use code PRFANS25 through Monday, February 1, 2016 for 25% off - good on the cut files in Katy’s shop at Handmade Escapade and make sure to stop by the PR group on Facebook to show us what you’ve made with the designs!
Until next time,
Rachel


